How to Draw a Lion
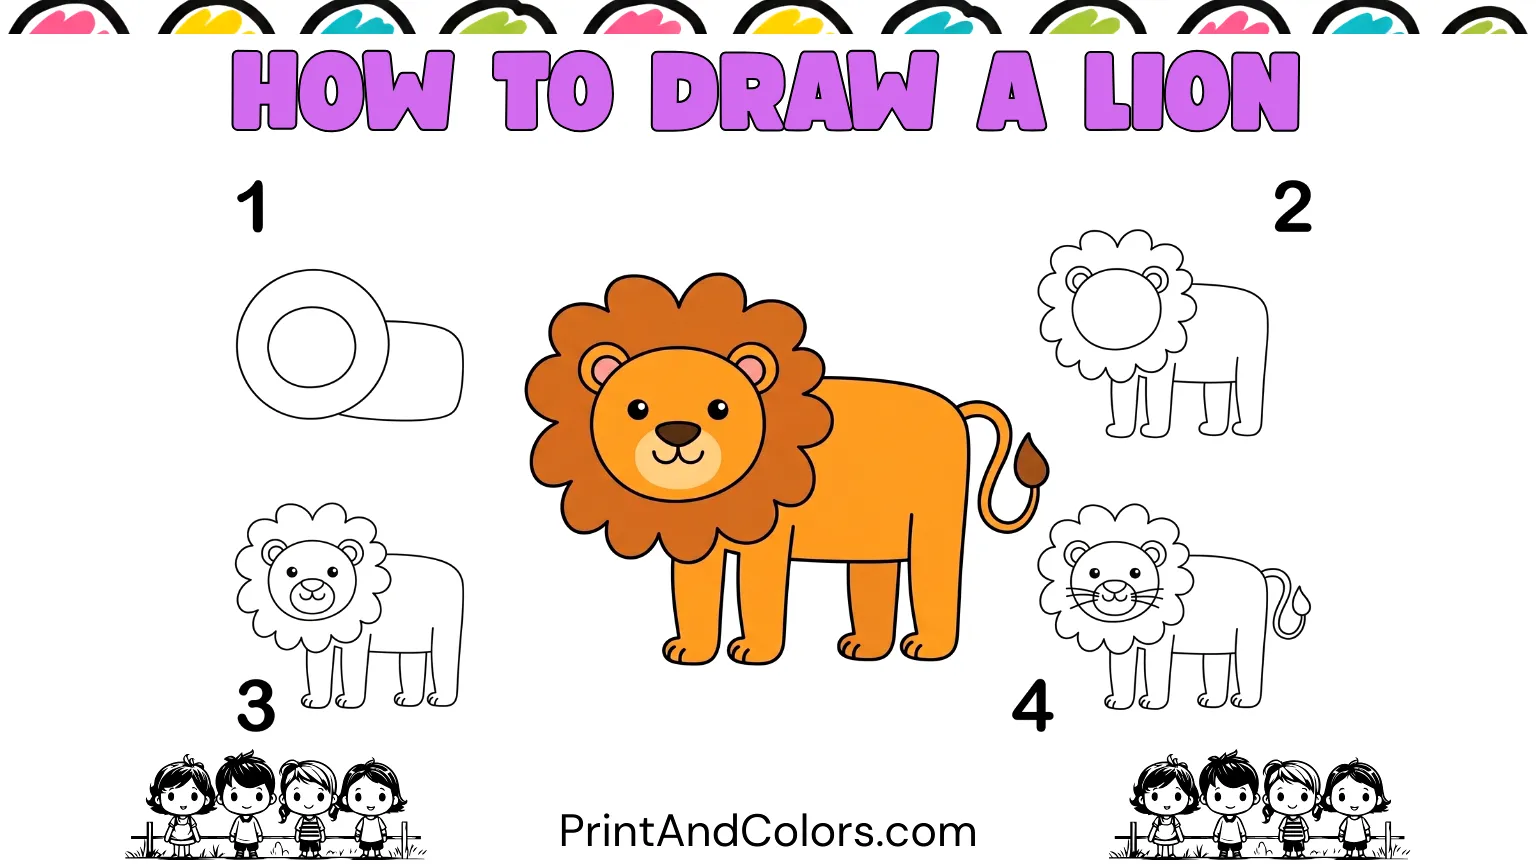
Do you want to learn how to draw a lion without getting bogged down by complex shapes or intricate, hyper-realistic details? This simple lion-drawing tutorial breaks the process down into small, easy steps so that children, beginners, parents, teachers, and anyone interested in drawing can easily follow along.
Drawing a lion might seem challenging due to its large mane, powerful body, four legs, and expressive face. However, you don’t have to draw everything at once. We will build the drawing gradually, starting with simple shapes and then adding the mane, body, legs, tail, ears, face, whiskers, and color.
Finally, you will have a complete, friendly drawing of a lion ready to be colored, and you can also print this full tutorial as a ‘Lion Drawing PDF Book’ for offline practice.
Your next masterpiece awaits—try these stunning pages!
What You Need to Draw a Lion
You don’t need a large collection of art supplies. Gather:
- Pencil
- Drawing paper or sketchbook
- Eraser
- Colored pencils, crayons, or markers
- Black pen or fine-tip marker (optional)
- The printable lion drawing PDF (optional)
Start with light pencil strokes. The early lines are construction guides, so keeping them light makes it much easier to correct proportions or erase them later.
Step 1: Block In the Head and Big Mane
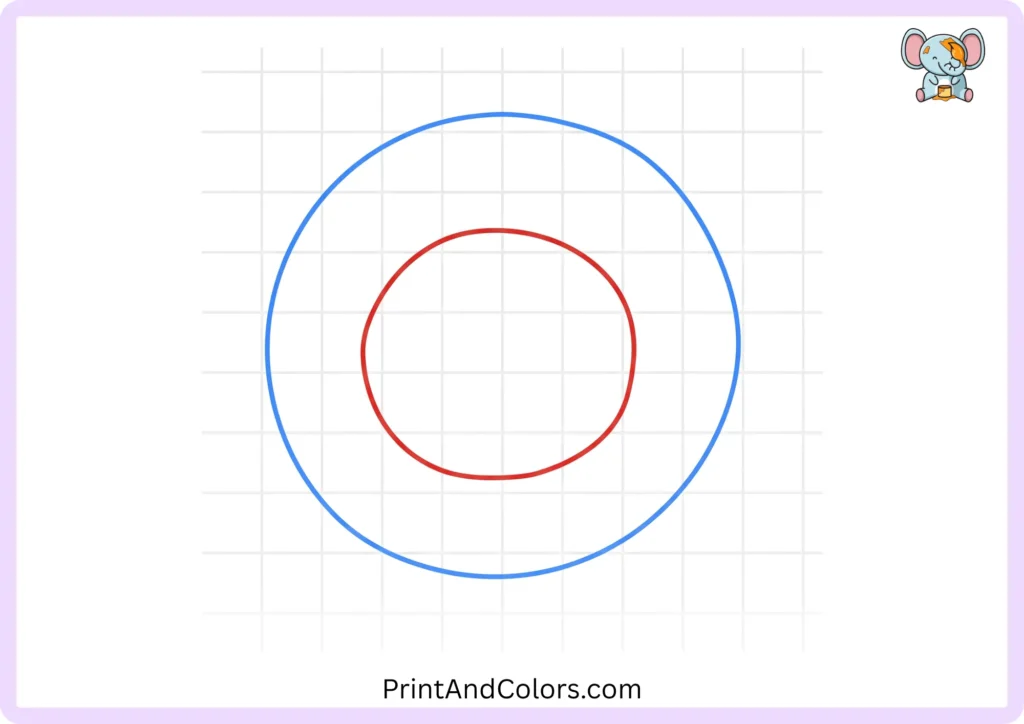
Start on the left side of your paper so there is plenty of room for the lion’s body and tail.
Draw a large, round shape for the outer edge of the lion’s mane. Inside that, draw a smaller, round shape for the lion’s head.
Don’t worry about drawing perfect circles; these are merely guide shapes to help determine the size and placement of the head.
Drawing tip: Leave plenty of empty space around the mane. A large mane will help make the lion instantly recognizable.
Step 2: Build Out the Mane Shape
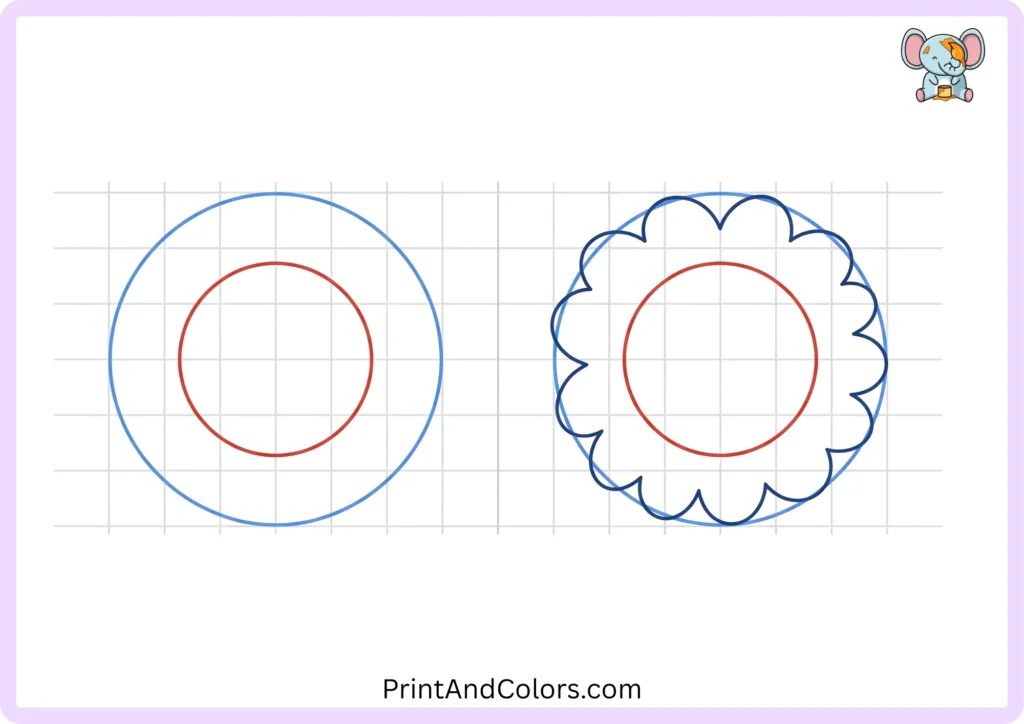
Now, begin transforming the lion’s simple, initial mane outline into a thick, full mane.
Draw curved and slightly uneven lines along the outer edge. Instead of making the hair perfectly smooth, incorporate slight ridges and tufts; natural, irregular lines make the mane look more appealing.
Keep the inner outline of the head visible, as we will draw the facial features within it later.
Step 3: Refine the Mane and Its Flow
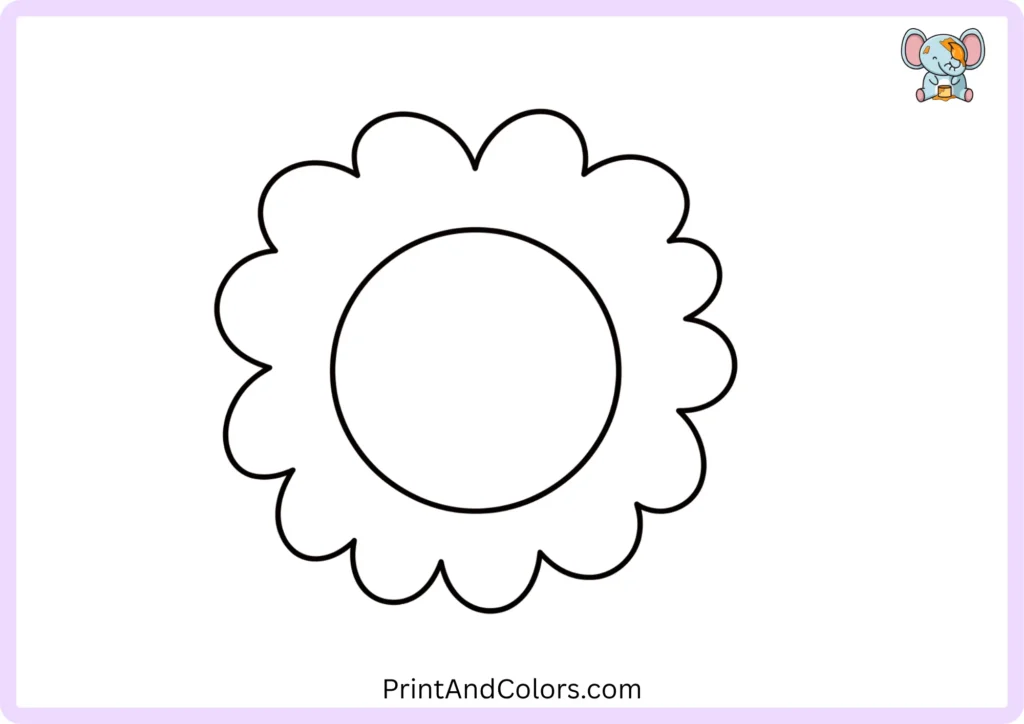
Make the lion’s mane stand out more clearly by drawing several curved lines extending outward from its head.
You do not need to draw hundreds of individual hairs. Creating a few large sections or flowing shapes for the mane is easier for beginners and results in a clean outline that is ready for coloring.
Think of the lion’s mane as a few large locks of hair rather than a collection of fine lines.
Step 4: Add the Lion’s Rounded Body
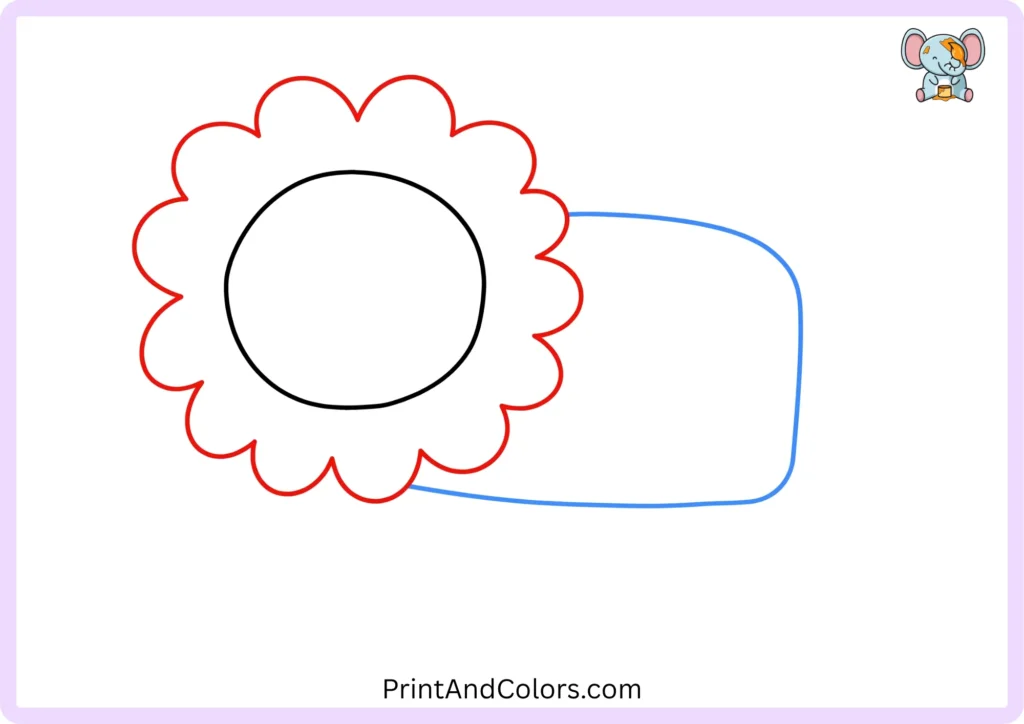
Start from the right side of the lion’s mane and outline its body.
Draw a long, rounded shape extending backward from the mane. Keep the back relatively smooth and leave enough space underneath for the four legs.
The body does not need to be anatomically perfect. The main goal is to create a simple, friendly-looking lion that is easy to recognize and color.
Step 5: Place the First Pair of Legs
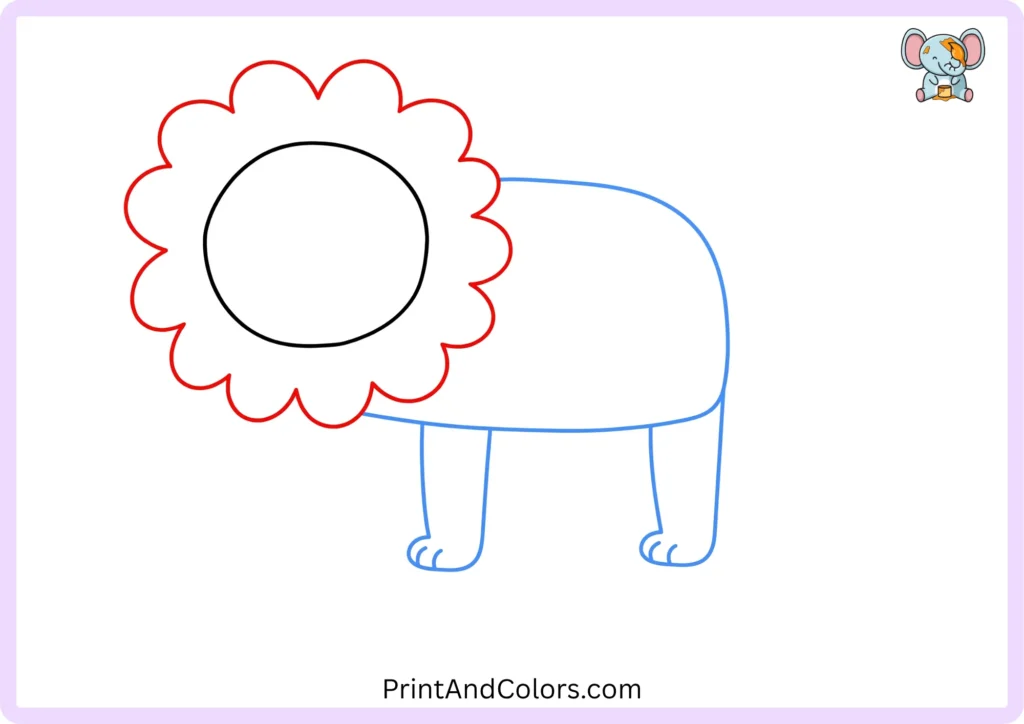
Let’s draw the lion’s legs.
Draw the front leg below the mane and the hind leg towards the rear of the body. Keep the legs slightly wider at the top and taper them towards the paws.
Create the paws by drawing a rounded shape at the bottom of each leg.
Keep your initial pencil lines light. This makes it easier to adjust the position of the legs, especially if they appear too close together.
Step 6: Separate the Legs From the Body
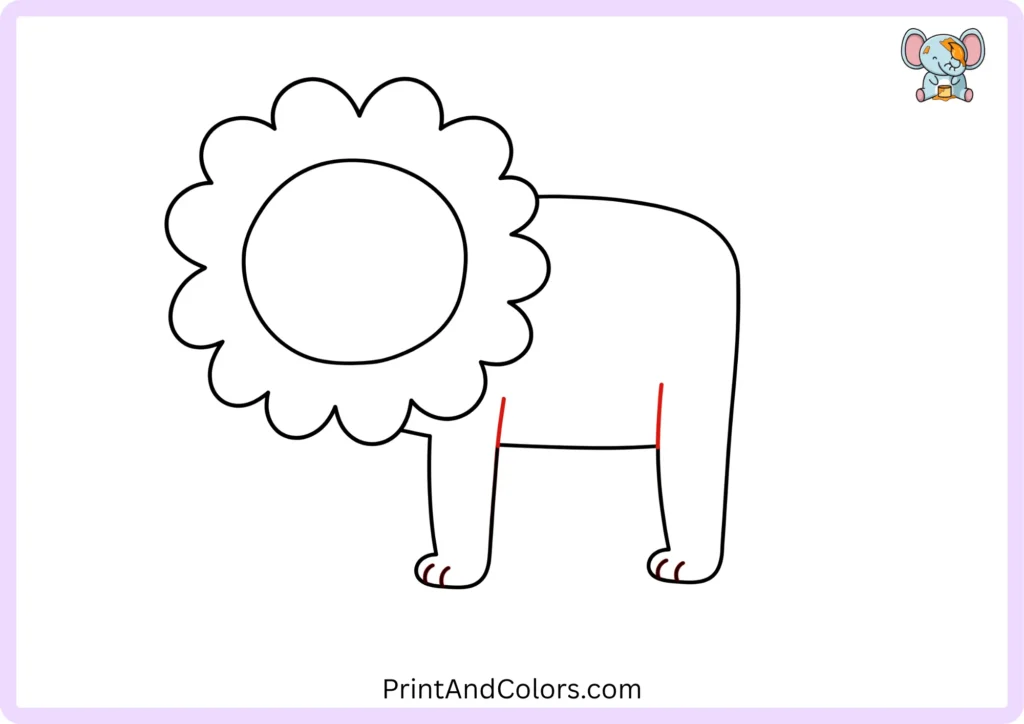
Where the legs meet the body, draw two lines curving inwards.
These lines indicate the front and back legs while also creating space for the second pair of legs.
This is a useful method for those learning to draw: you do not need to sketch the outline of every single part separately. A few carefully drawn lines can effectively show where one part ends and another begins.
Step 7: Complete All Four Legs
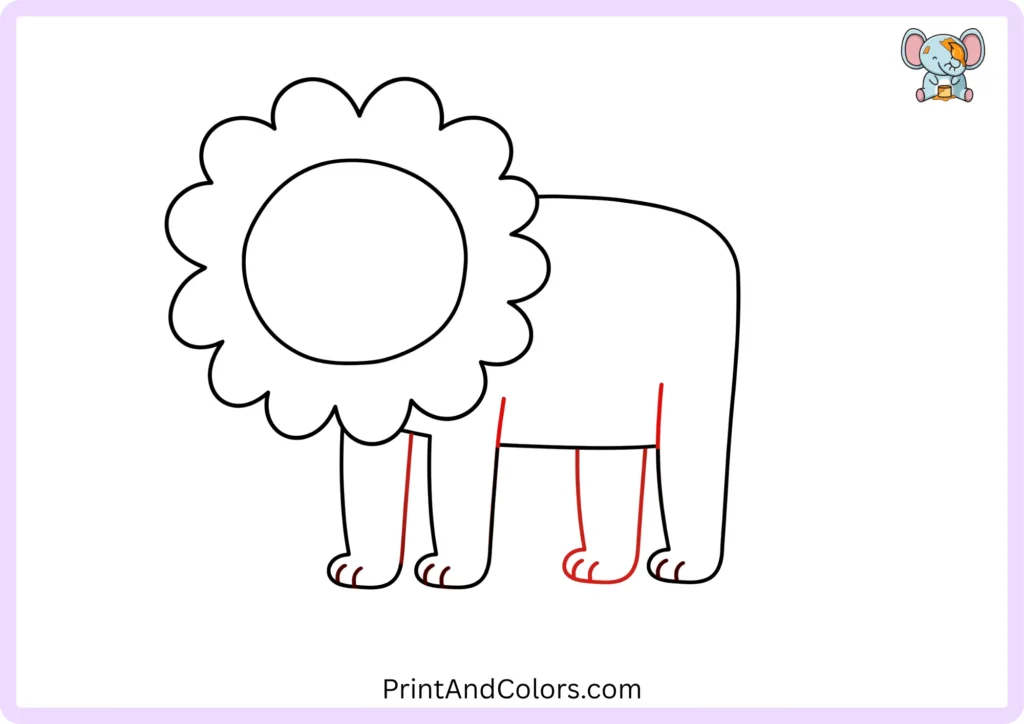
Now, draw the remaining front and hind legs behind the first pair.
The hind legs can be slightly smaller or less prominent, as they are positioned further away. Draw rounded paws at the bottom and use simple curved lines to indicate the toes.
At this stage, your lion’s body, mane, and all four legs should be clearly visible.
Step 8: Sweep in the Curved Tail
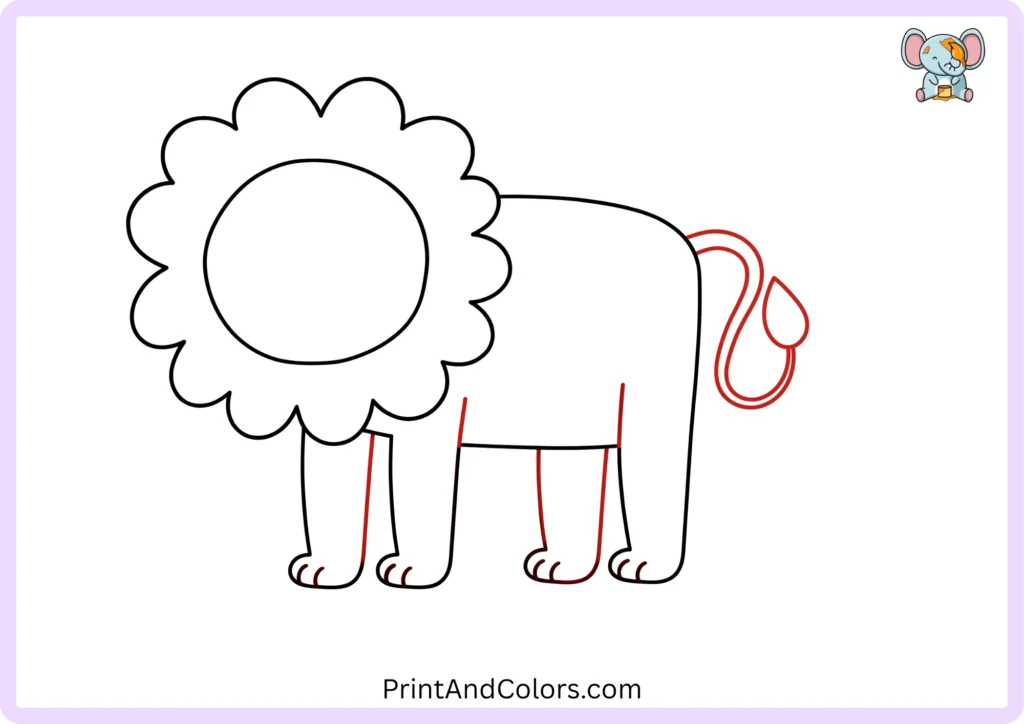
Move to the rear of the lion and draw the tail.
Use two long, fluid, and curved lines that extend outward from the body and sweep upwards. Finish by adding a small tuft of hair at the end.
The tail is the easiest place to add a touch of individuality to the character. You can make it gently curved, raised high, or slightly bent.
Try to avoid drawing the tail perfectly straight; a slight curve will make it look more natural.
Step 9: Shape the Ears
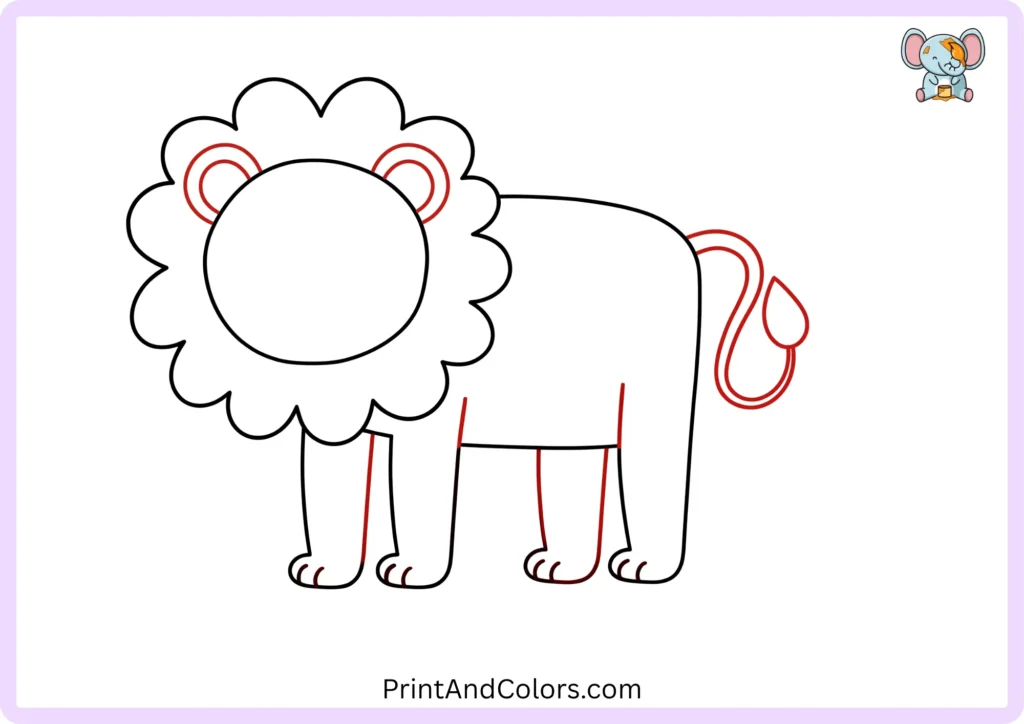
Return to the lion’s head and draw two round ears.
Draw one ear on each side of the top of the head. Draw a small curved line inside each ear to indicate the inner ear.
Keep the ears relatively small compared to the lion’s mane. The large mane surrounding the head should stand out as the most prominent feature.
Step 10: Build the Face With Eyes and Muzzle
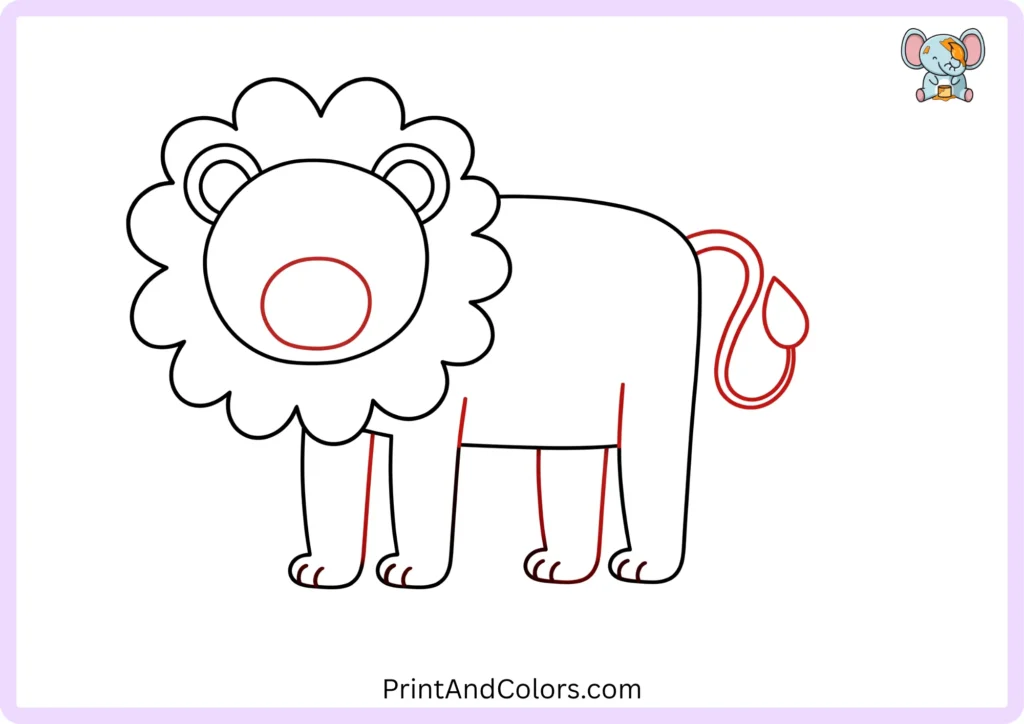
Now it is time to give your lion a distinctive look (or personality).
Draw two small eyes in the upper-middle part of the face. Position them roughly symmetrically on either side of the center of the head.
Below the eyes, draw the rounded, protruding area of the mouth (the muzzle). You can visualize this as two soft, interconnected shapes surrounding the mouth.
The face does not require complex anatomical detail; simple, balanced shapes are particularly well-suited for a beginner-level lion drawing.
Step 11: Finish the Nose and Friendly Mouth
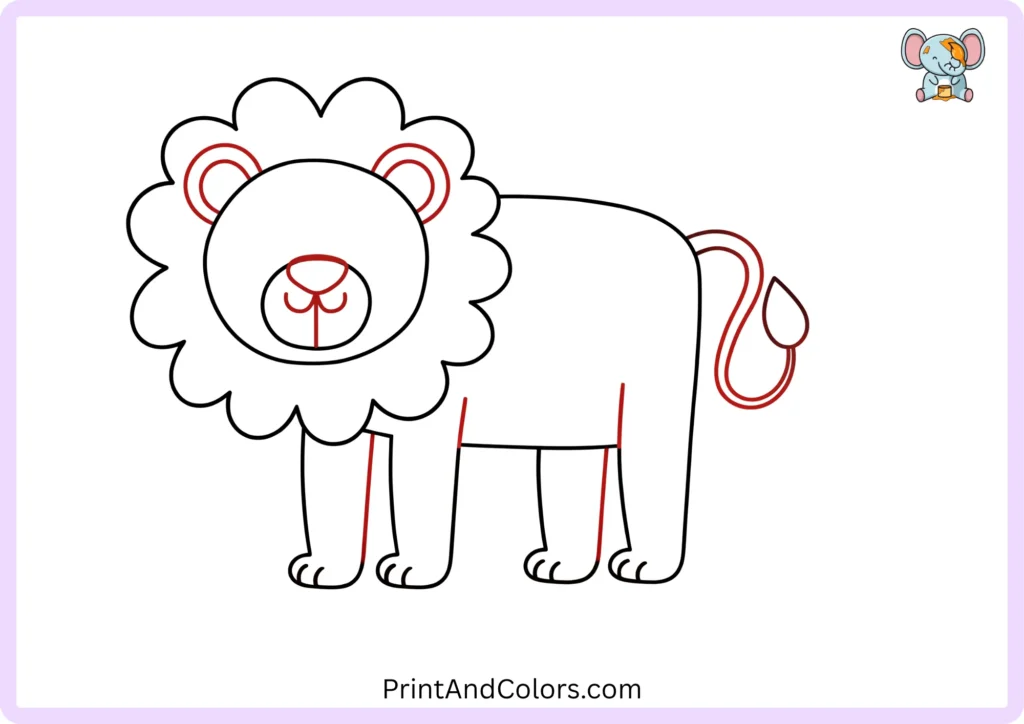
Draw the lion’s nose near the upper part of its muzzle.
A triangle with rounded corners, or an inverted triangle with soft edges, works well for this. Below the nose, draw two small curved lines that meet and extend to form the shape of the mouth.
You can give the mouth a slight curve to create a friendly expression on the lion’s face.
If you want more defined features, you can also add a few small lines around the muzzle.
Step 12: Add Whiskers and Final Mane Details
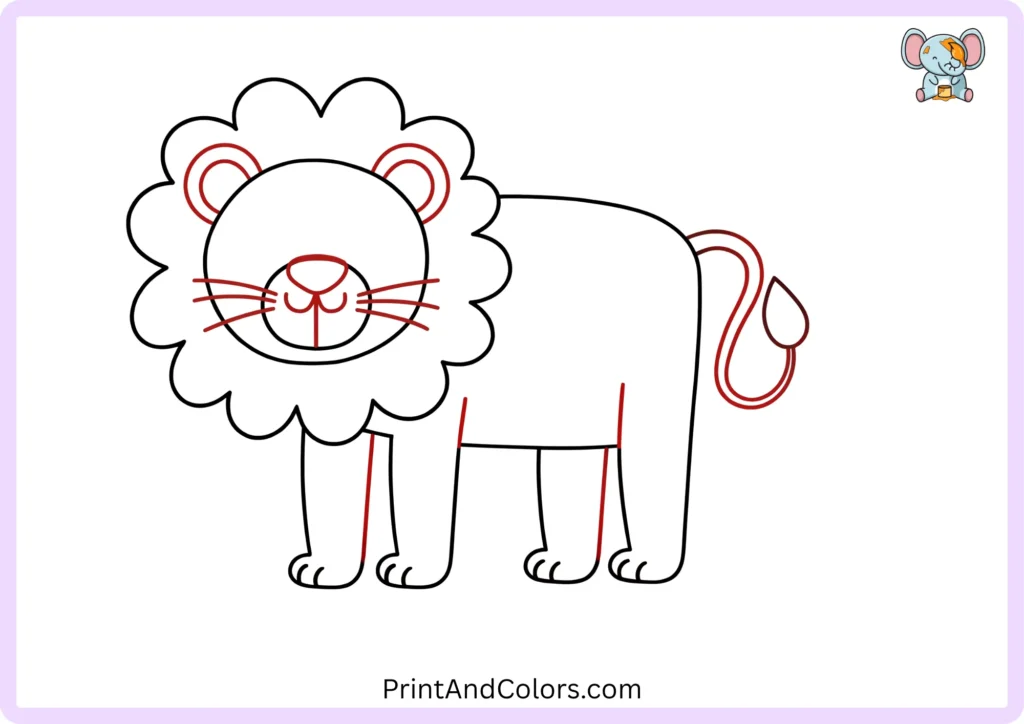
Your lion is almost complete.
Draw three or four curved whiskers extending from both sides of the lion’s muzzle. Vary their lengths slightly rather than making them all identical.
Next, if you want details to the lion’s mane, add a few more flowing lines. You can also draw small, curved marks around the paws and tail to suggest the texture of fur.
Finally, erase the initial construction lines that are no longer needed.
Step 13: Bring Your Lion to Life With Color
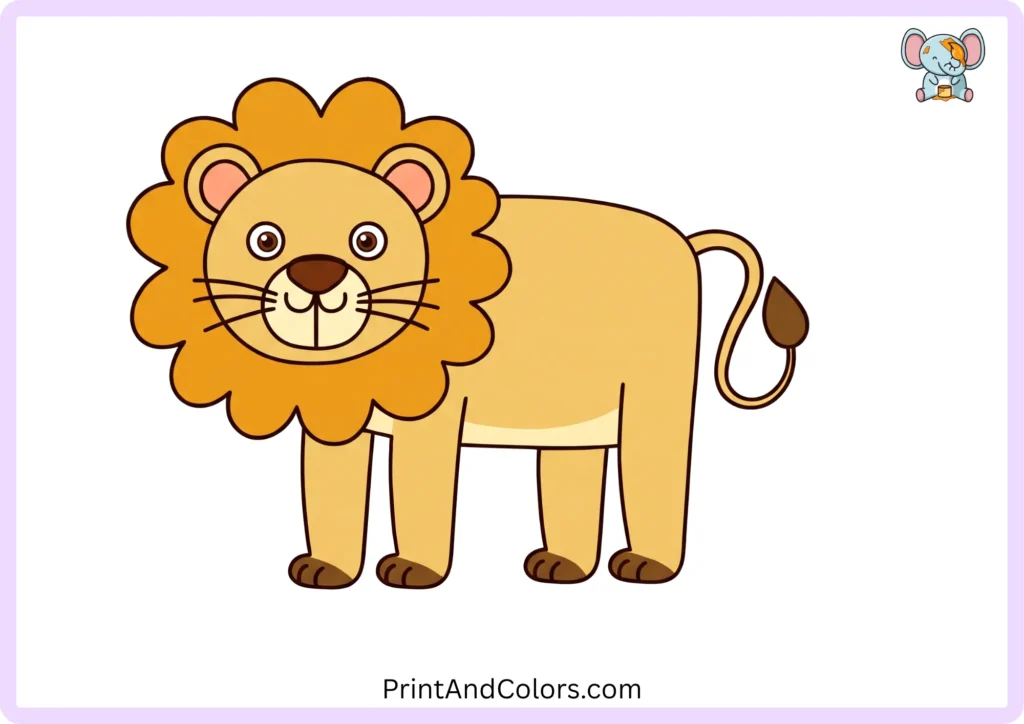
Now comes the fun part, coloring!
For a traditional lion, you can try:
| Lion Part | Suggested Colors |
|---|---|
| Body | Golden yellow, tan, or light orange |
| Mane | Brown, dark golden brown, or warm orange |
| Muzzle | Light cream or peach |
| Nose | Black or dark brown |
| Inner ears | Pink or light peach |
| Eyes | Brown, amber, or black |
| Tail tuft | Dark brown |
| Paws | Golden yellow or tan |
You don’t have to use realistic colors. Try a bright yellow lion, an orange lion, or even a rainbow-maned lion if you’re creating an imaginative artwork.
Printable Lion Drawing PDF & Book
We have prepared a printable PDF of a turkey drawing that consolidates the entire drawing process into a single, easy-to-follow guide. You can print these pages, practice each step with a pencil, and color in your finished turkey once the drawing is complete.
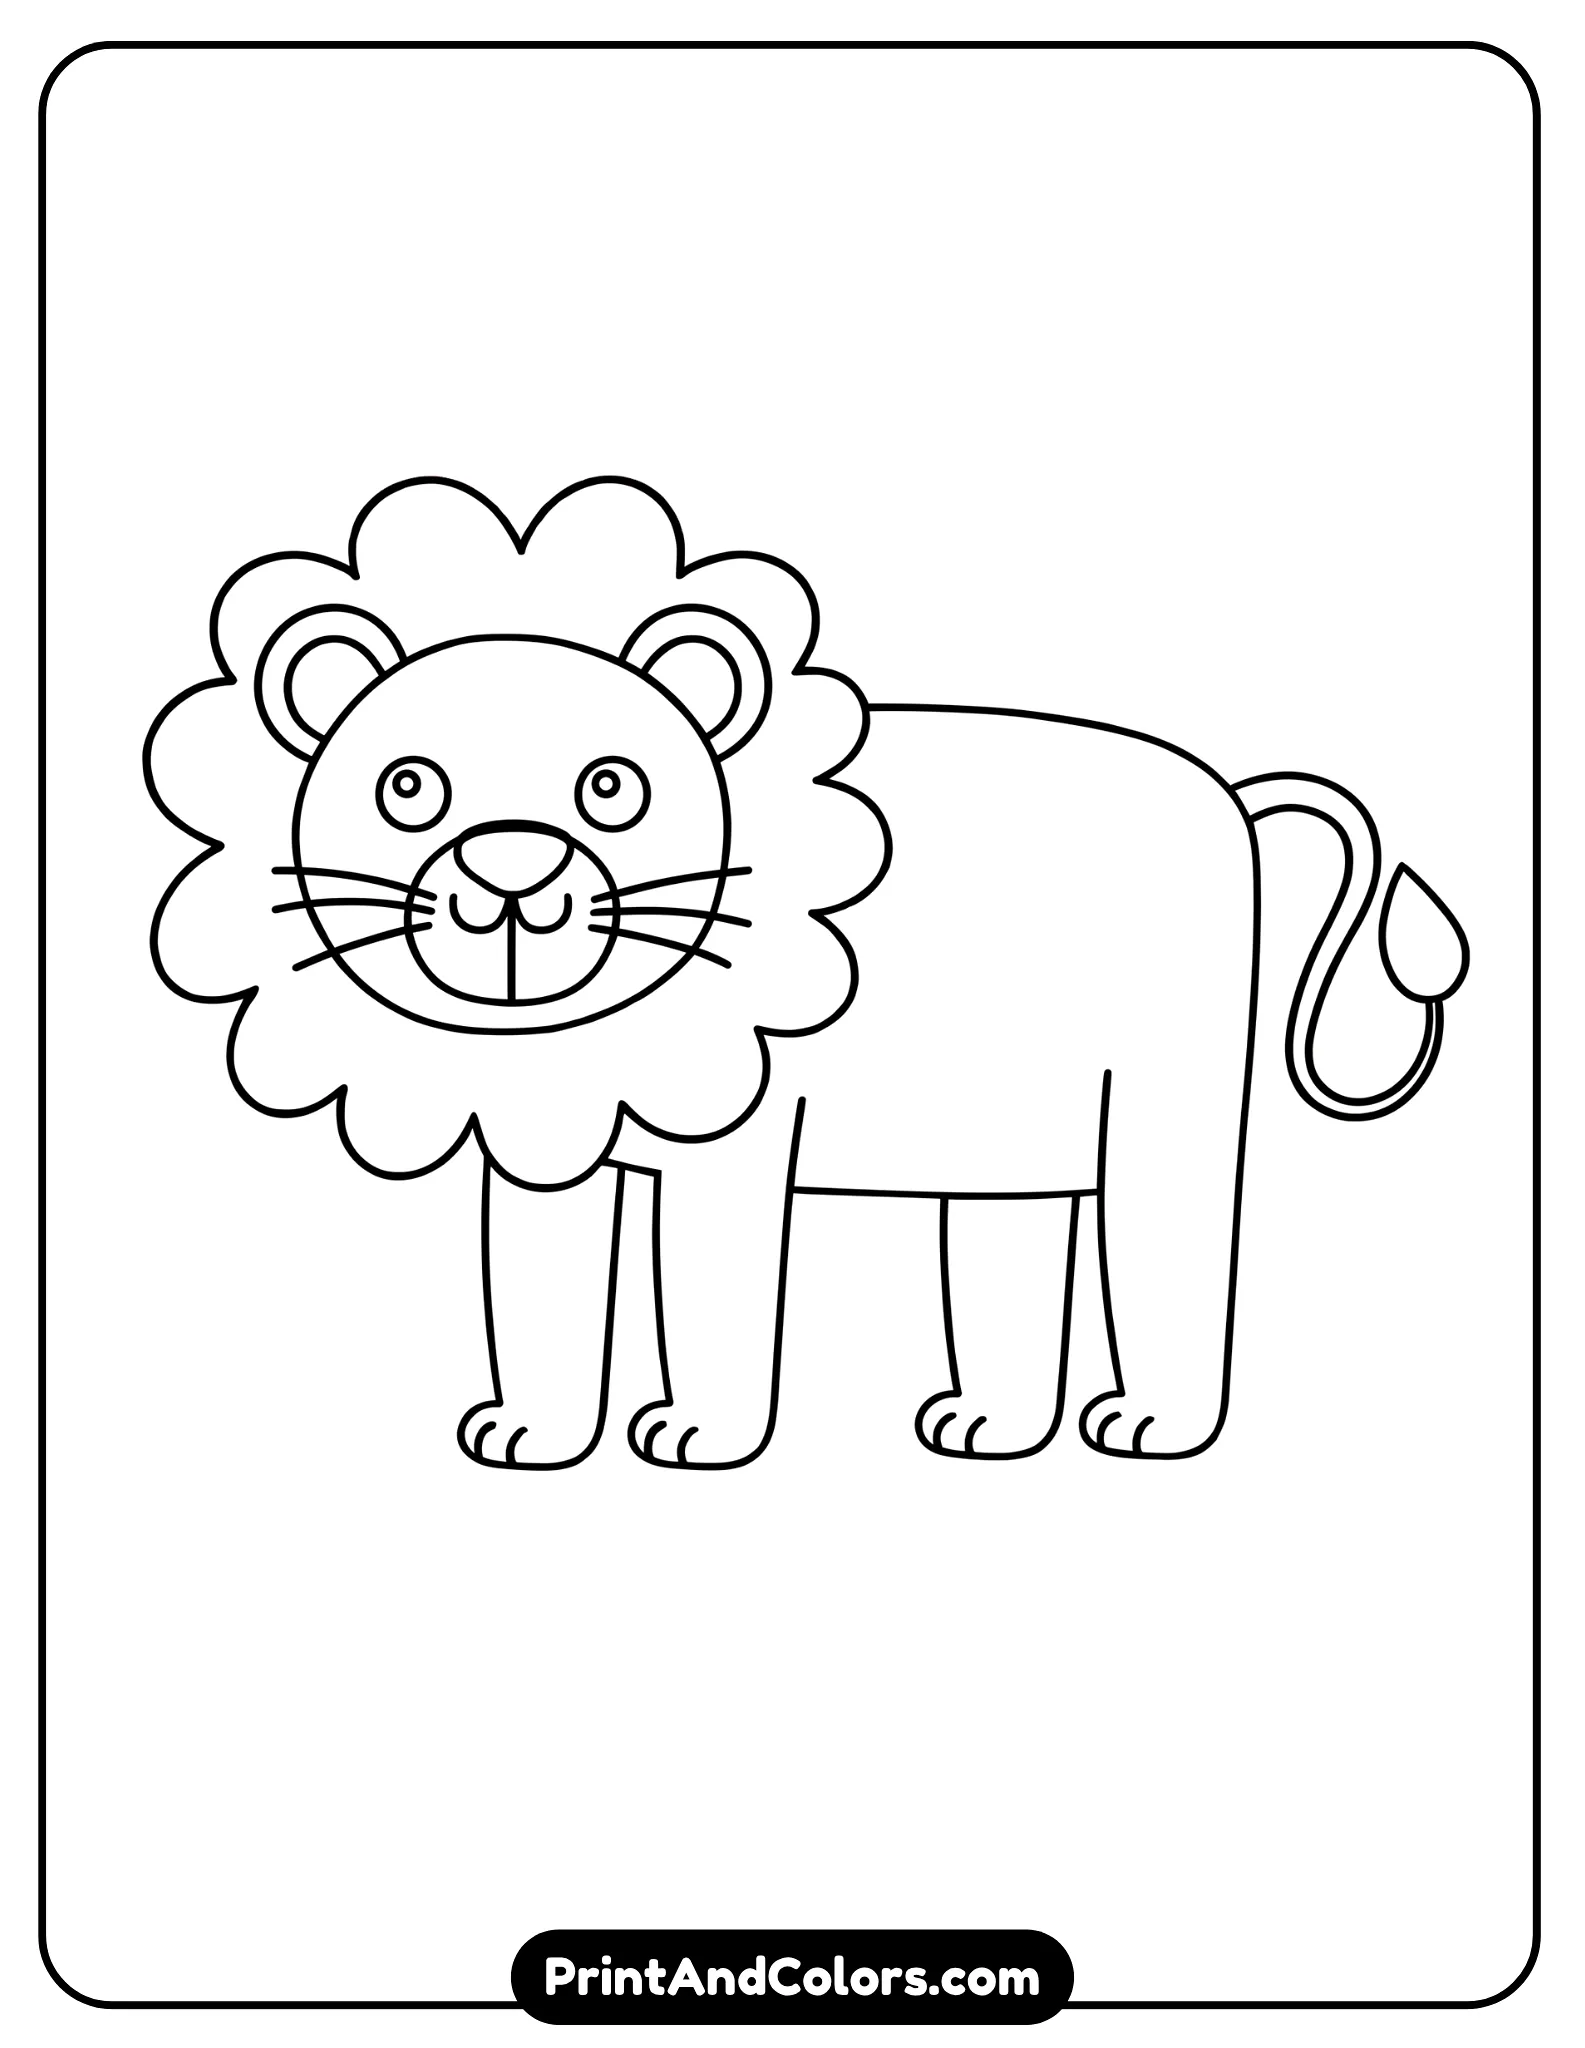
Printable Lion Drawing PDF & Book
Printable Lion drawing PDF book showing step-by-step Lion drawing and coloring pages for kids
Finished drawing, or want a version you can use away from the screen?
We’ve prepared a Printable Lion Drawing PDF Book containing the complete sequence from the first simple shapes to the finished lion.
The printable version is useful for:
- Kids’ drawing practice
- Classroom art activities
- Homeschool lessons
- Parent-and-child drawing time
- Tracing and pencil practice
- Coloring after the drawing is complete
- Keeping a physical drawing guide beside your paper
The PDF should present the drawing stages in sequence so children can print the pages, follow each stage, and practice without needing to keep returning to the website.
Easy Tips for a Better Lion Drawing
If your first lion doesn’t look exactly like the example, that’s completely normal. Drawing improves through repetition.
Keep these tips in mind:
- Start lightly: Construction lines should be easy to erase.
- Use simple shapes: Circles, ovals, curves, and rounded rectangles can build most of the drawing.
- Check proportions: The head and mane should be large enough compared with the body.
- Don’t overdraw the fur: A few well-placed fur lines usually look better than hundreds of tiny strokes.
- Keep the face balanced: Place the eyes on either side of the center and keep the muzzle underneath them.
- Practice the mane: Since the mane is the most recognizable feature, experiment with different shapes and textures.
- Color creatively: There is no single correct color for a child’s lion artwork.
Frequently Asked Questions About Drawing a Lion
How do you draw a lion step by step?
Start with simple shapes for the lion’s mane, head, and body. Then, draw the legs, tail, ears, eyes, muzzle, nose, mouth, and whiskers. Once the sketch is complete, erase any unnecessary lines and color the lion. Breaking the drawing down into small steps makes the process much easier for learners.
What is the easiest way to draw a lion for kids?
The easiest approach is to use basic shapes rather than immediately attempting to create a realistic anatomical structure. Start with a large shape for the mane, draw a simple face within it, form a rounded body, and then add four simple legs and a curved tail. Sketching lightly with a pencil makes it easier to make corrections.
How do you draw a lion’s mane?
Shape the mane around the head into a large, rounded, or wavy form. Incorporate several curved sections that appear to extend outward from the face. If you are a beginner at drawing, focus on large clumps of hair rather than individual strands. Keeping the edges slightly uneven makes the mane look fuller and more natural.
What colors should you use for a lion drawing?
Traditional lion colors include golden yellow, tan, light brown, orange, and darker brown. The mane can be darker than the body, while the muzzle can be cream or peach. For children’s artwork, however, any colors are fine—creative coloring is part of the fun.
Can I print this lion drawing tutorial?
Yes. The printable version can be used as a practice guide for home, school, or classroom activities. The Printable Lion Drawing PDF Book is designed to keep the drawing stages together in sequence so children can follow the lesson on paper.
Is this lion drawing suitable for beginners?
Yes. The drawing is designed around simple shapes and gradual additions rather than advanced animal anatomy. Beginners can work slowly through each stage, erase construction lines when necessary, and then add color once the final outline is complete.
Your Lion Is Ready!
You started with a few simple shapes and gradually built a complete lion, with its mane, head, body, four legs, paws, curved tail, ears, eyes, muzzle, nose, mouth, and whiskers.
The important part isn’t making every line perfect. It’s learning how large shapes connect and practicing until drawing the lion becomes easier.
Now print the Lion Drawing PDF Book, grab your favorite pencils or crayons, and draw another lion. Each attempt gives you another chance to change the mane, expression, colors, or pose and make the drawing your own.
And when you’re ready for your next animal, explore more step-by-step drawing and printable coloring activities from Print And Colors.
Bring Every Imagination to Life
Premium Coloring Books & Instant Digital Printables
Transform your creative vision into high-quality, personalized coloring products perfect for gifts, education, or special events. Our team of illustrators crafts unique designs tailored to your exact needs.
8 Comments