How To Draw a Tree
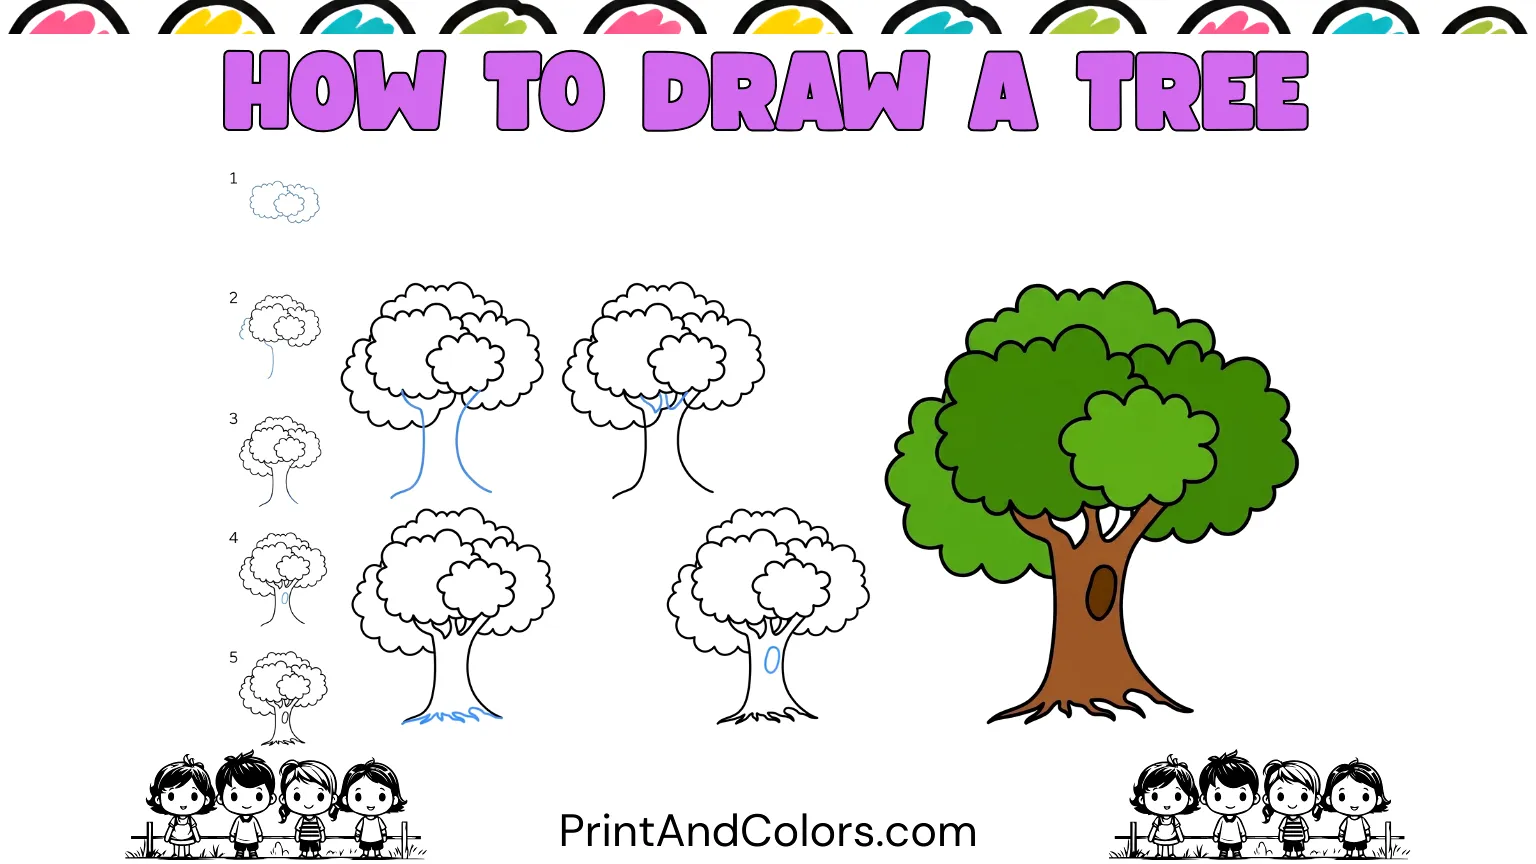
You don’t need to start with hundreds of tiny leaves or intricate branches to learn how to draw a tree. A tree can be created using just a few simple curved shapes, and once those shapes are in place, the finished image looks surprisingly natural.
In this easy, step-by-step tree drawing tutorial, we will first create the leafy crown, then add the trunk, branches, and roots, along with a small knot for character. Finally, you can color your tree and turn the entire lesson into a printable drawing activity.
This method is designed specifically for children, beginners, parents, teachers, and anyone else who wants to draw a simple tree without worrying about achieving perfect lines.
Your next masterpiece awaits—try these stunning pages!
Step 1: Start the Leafy Crown With a Small Cluster
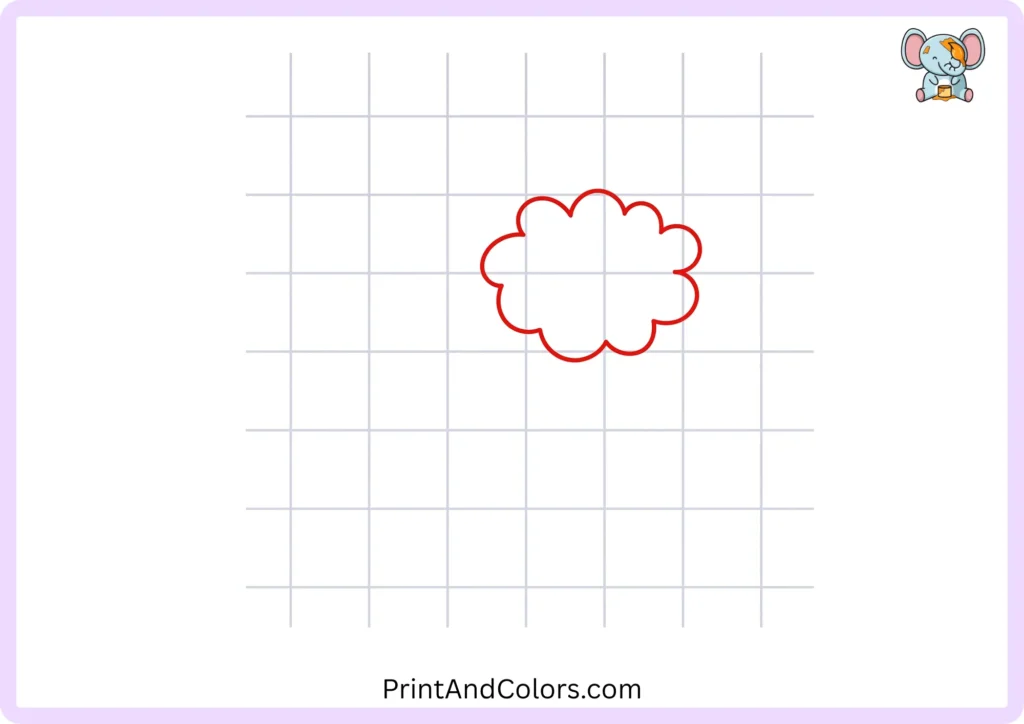
Start near the top-center of your paper with a small, round cluster of leaves.
Use a series of connected, curved lines to create a soft, fluffy shape. It doesn’t need to be perfectly symmetrical or uniform; natural trees have irregular edges, and these small variations will make your drawing more interesting.
Drawing tip: Keep your initial lines light so you can adjust or correct the shape later.
Step 2: Build Out the Left Side of the Canopy
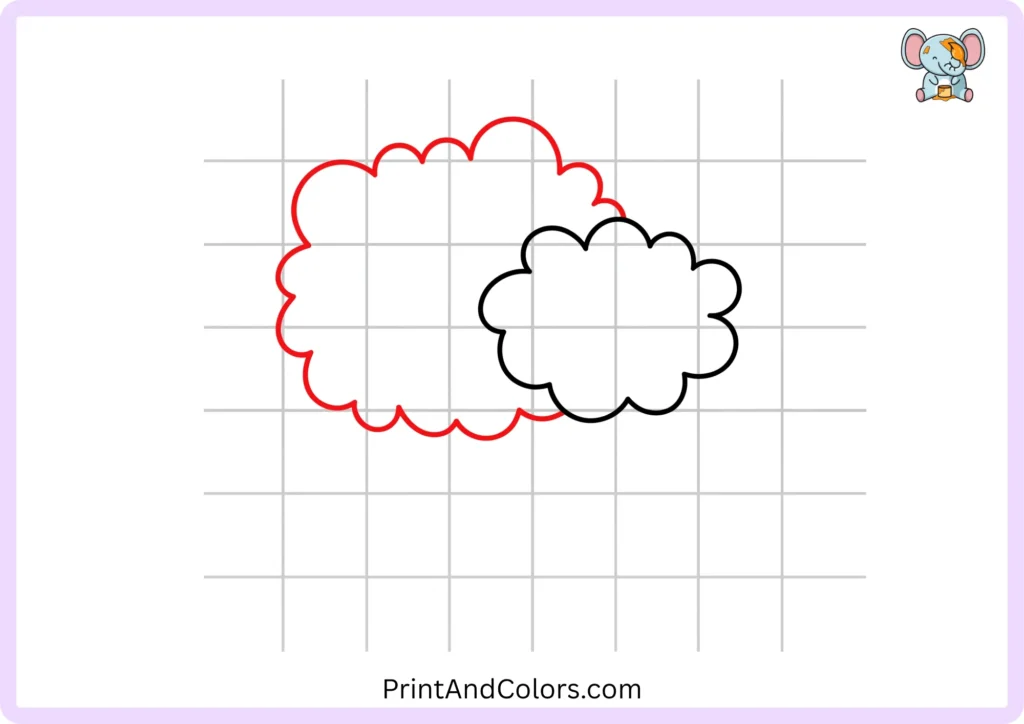
Create another cluster of leaves to the left of the first one.
Position this cluster slightly lower and make it a bit larger than the first. Use smooth, rounded curves that partially overlap the original shape.
These overlapping sections give the tree’s crown a dense, full appearance, rather than looking like a simple, smooth cloud.
Step 3: Shape the Upper and Right Foliage
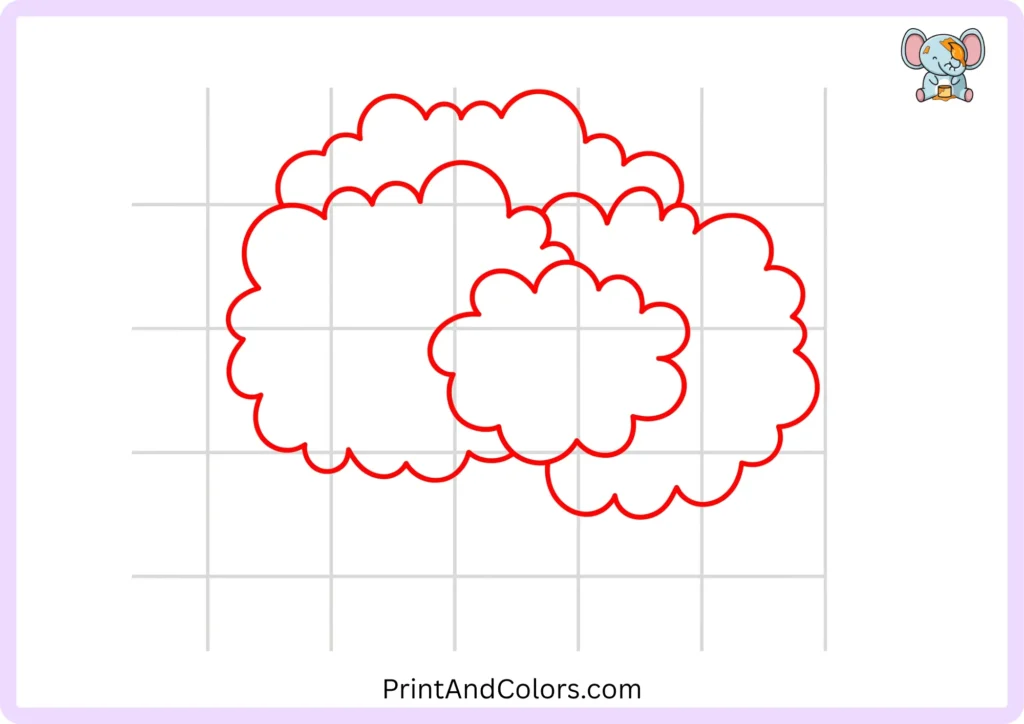
Now, continue building the upper part (crown) of the tree by adding another large, round cluster of leaves on the right side.
Position this section slightly behind the smaller cluster you created earlier. Varying the size and placement of the leaf clusters gives the tree a more natural and realistic appearance.
You are not drawing individual leaves at this stage; instead, visualize each section as a collection or mass of foliage.
Step 4: Complete the Lower Leafy Section
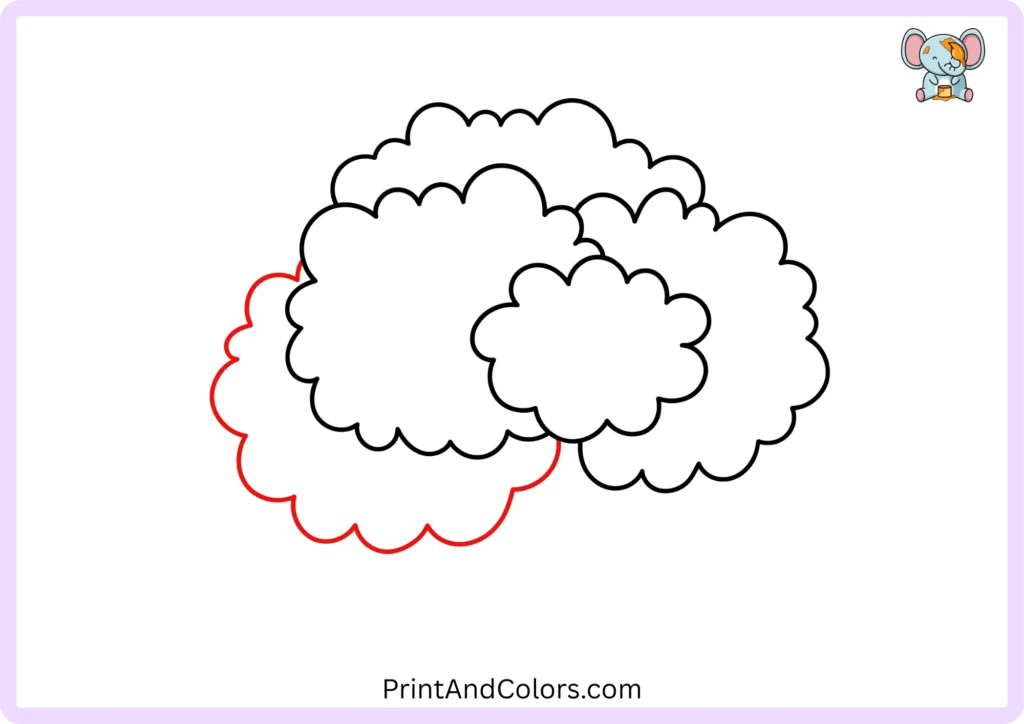
Add the final large cluster of leaves toward the lower-left section of the crown.
Once again, use interconnected curved lines and position parts of this section behind the leaves you have already drawn.
With this, the main part of the tree’s foliage (the canopy) is complete. Notice how much easier it is to draw the tree when the foliage is broken down into several simple shapes, rather than trying to create a single, complex outline.
Step 5: Extend the Crown Into a Strong Trunk
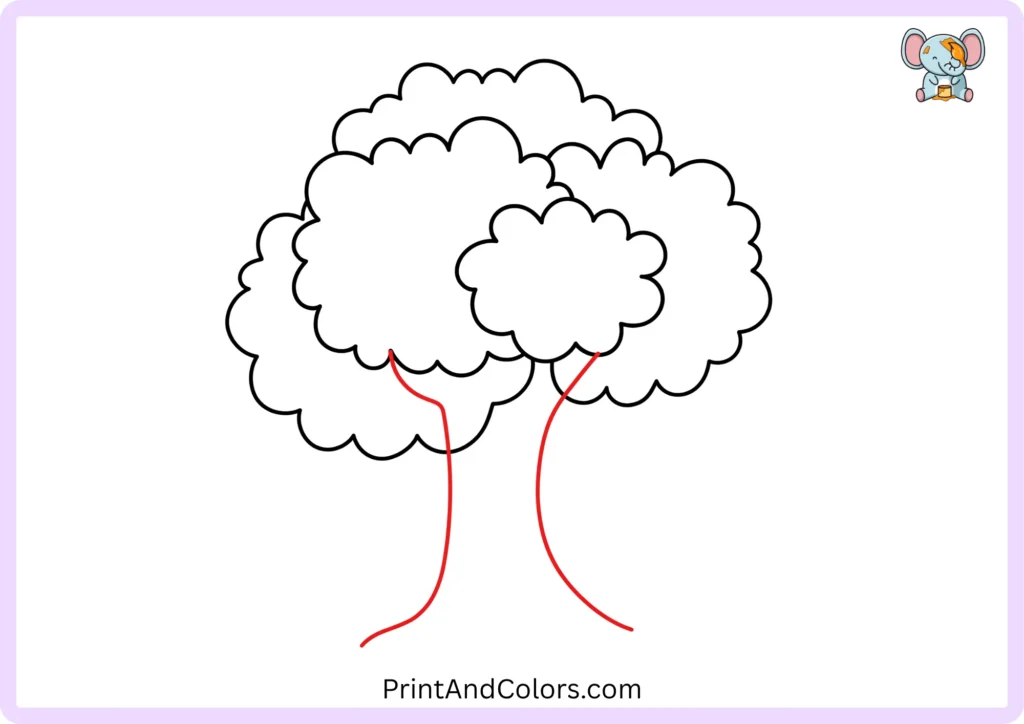
Look beneath the dense canopy of leaves and draw two long, slightly curved lines extending downwards.
These lines form the tree’s main trunk.
Allow the trunk to widen as it extends downwards; a slightly irregular curve usually looks more natural than two perfectly straight lines.
Leave enough space at the bottom of the trunk for the roots.
Step 6: Add Branches Between the Trunk and Leaves
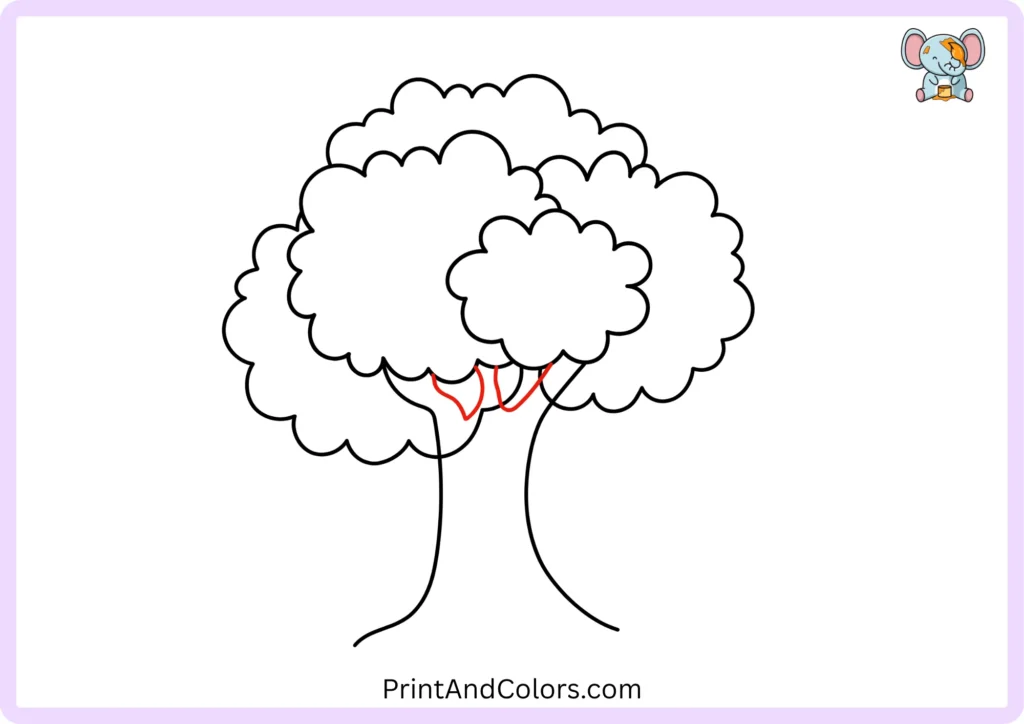
Next, connect the trunk to the leafy section (the crown) using several curved branches.
Start with the large branches near the trunk and make them progressively thinner as they extend outward. You do not need to detail every small twig.
The branches give the tree’s upper section (canopy) a distinct structure and help visualize how the foliage connects to the trunk.
Simple curved lines suffice for a basic drawing. However, branch patterns, texture, and shading can be used to add depth to more detailed and advanced tree drawings.
Step 7: Spread the Roots Along the Ground
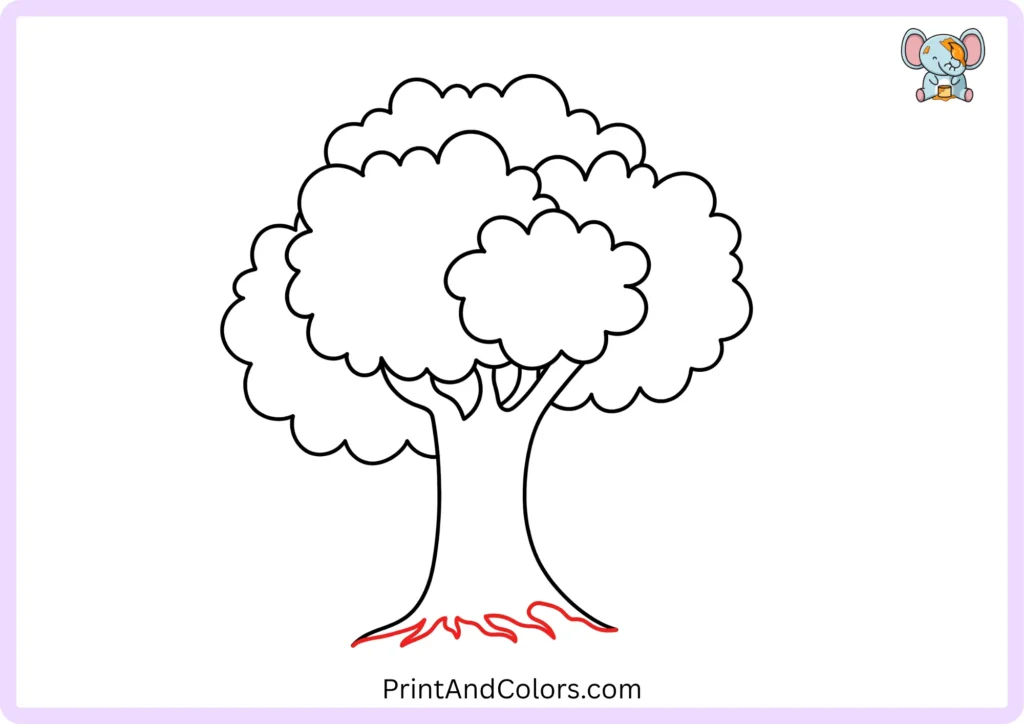
Move to the lower part of the trunk and draw several pointed, curved shapes extending outwards.
Some roots can extend to the left and others to the right; try to ensure they are not all identical.
Roots help visually anchor the tree to the ground and make the bottom of the drawing more distinct and appealing. They show the trunk connecting to the earth, rather than simply ending at the bottom edge of the page.
Step 8: Give the Trunk Some Character(Knot)
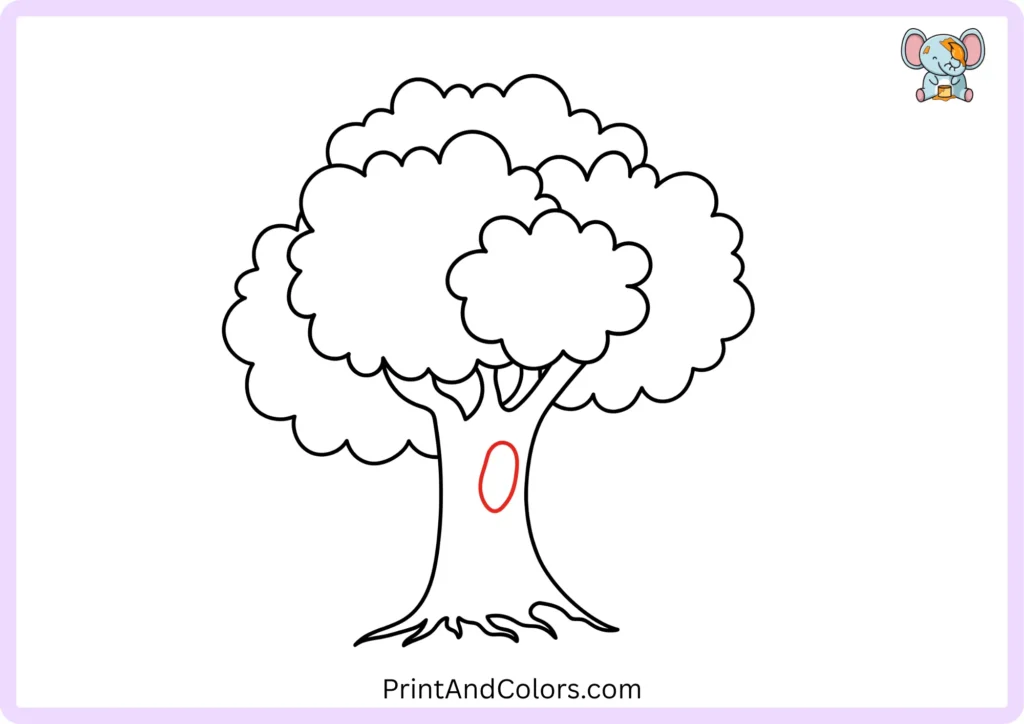
Now, draw a small, oval-shaped knot on the tree trunk.
This minor detail can make a simple tree drawing much more interesting. You can also add lightly curved lines to the trunk to suggest the texture of the bark.
Don’t overdo it. For a beginner-level coloring page, it is usually better to include a few prominent details rather than filling the entire trunk with intricate markings.
Step 9: Bring Your Tree to Life With Color
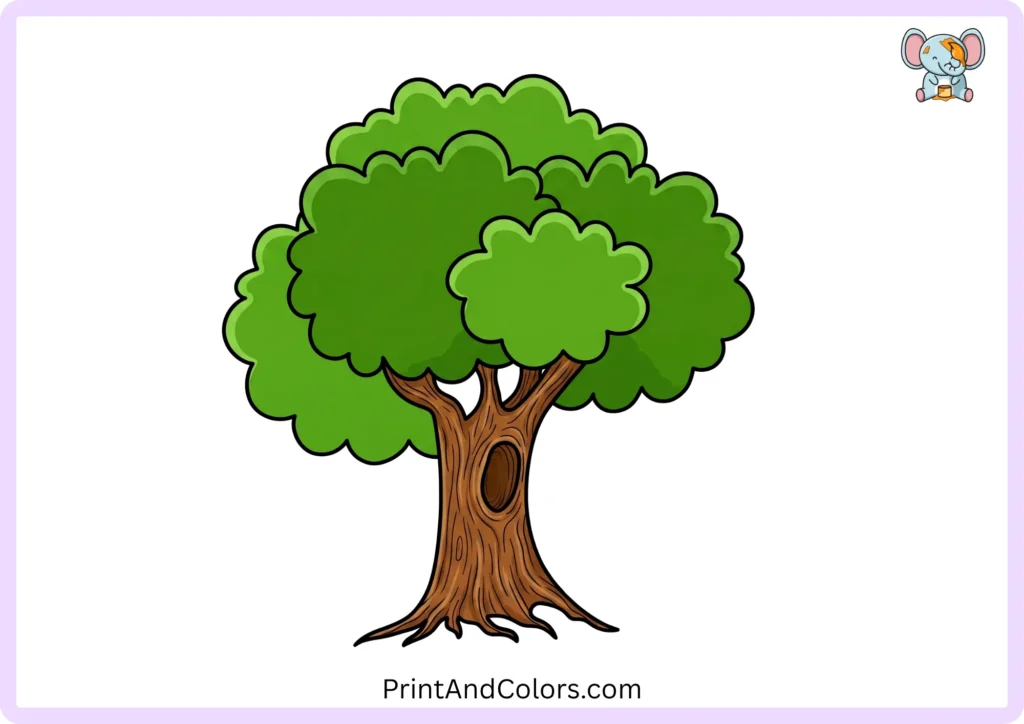
Your tree drawing is complete, so now comes the fun part: coloring!
For a classic tree, try:
- Light green for brighter leaves
- Dark green for deeper foliage
- Brown for the trunk and branches
- Dark brown for the trunk knot
- Yellow or orange for extra highlights
You can also change the season completely with your colors.
- For a spring tree, try fresh green and small pink or white flowers.
- For a summer tree, use several shades of green.
- For an autumn tree, experiment with yellow, orange, red, and brown.
- For a winter tree, leave most of the branches bare and use cool colors for the background.
Printable Tree Drawing PDF & Book
Want to practice without looking at the screen?
We’re preparing a Printable Tree Drawing PDF / Tree Drawing PDF Book containing the complete step-by-step sequence in one convenient printable resource.
The book-style PDF brings all the drawing stages together so kids can work through the activity one page at a time. It can be useful for home drawing practice, classroom activities, homeschool art lessons, or a quiet creative activity.
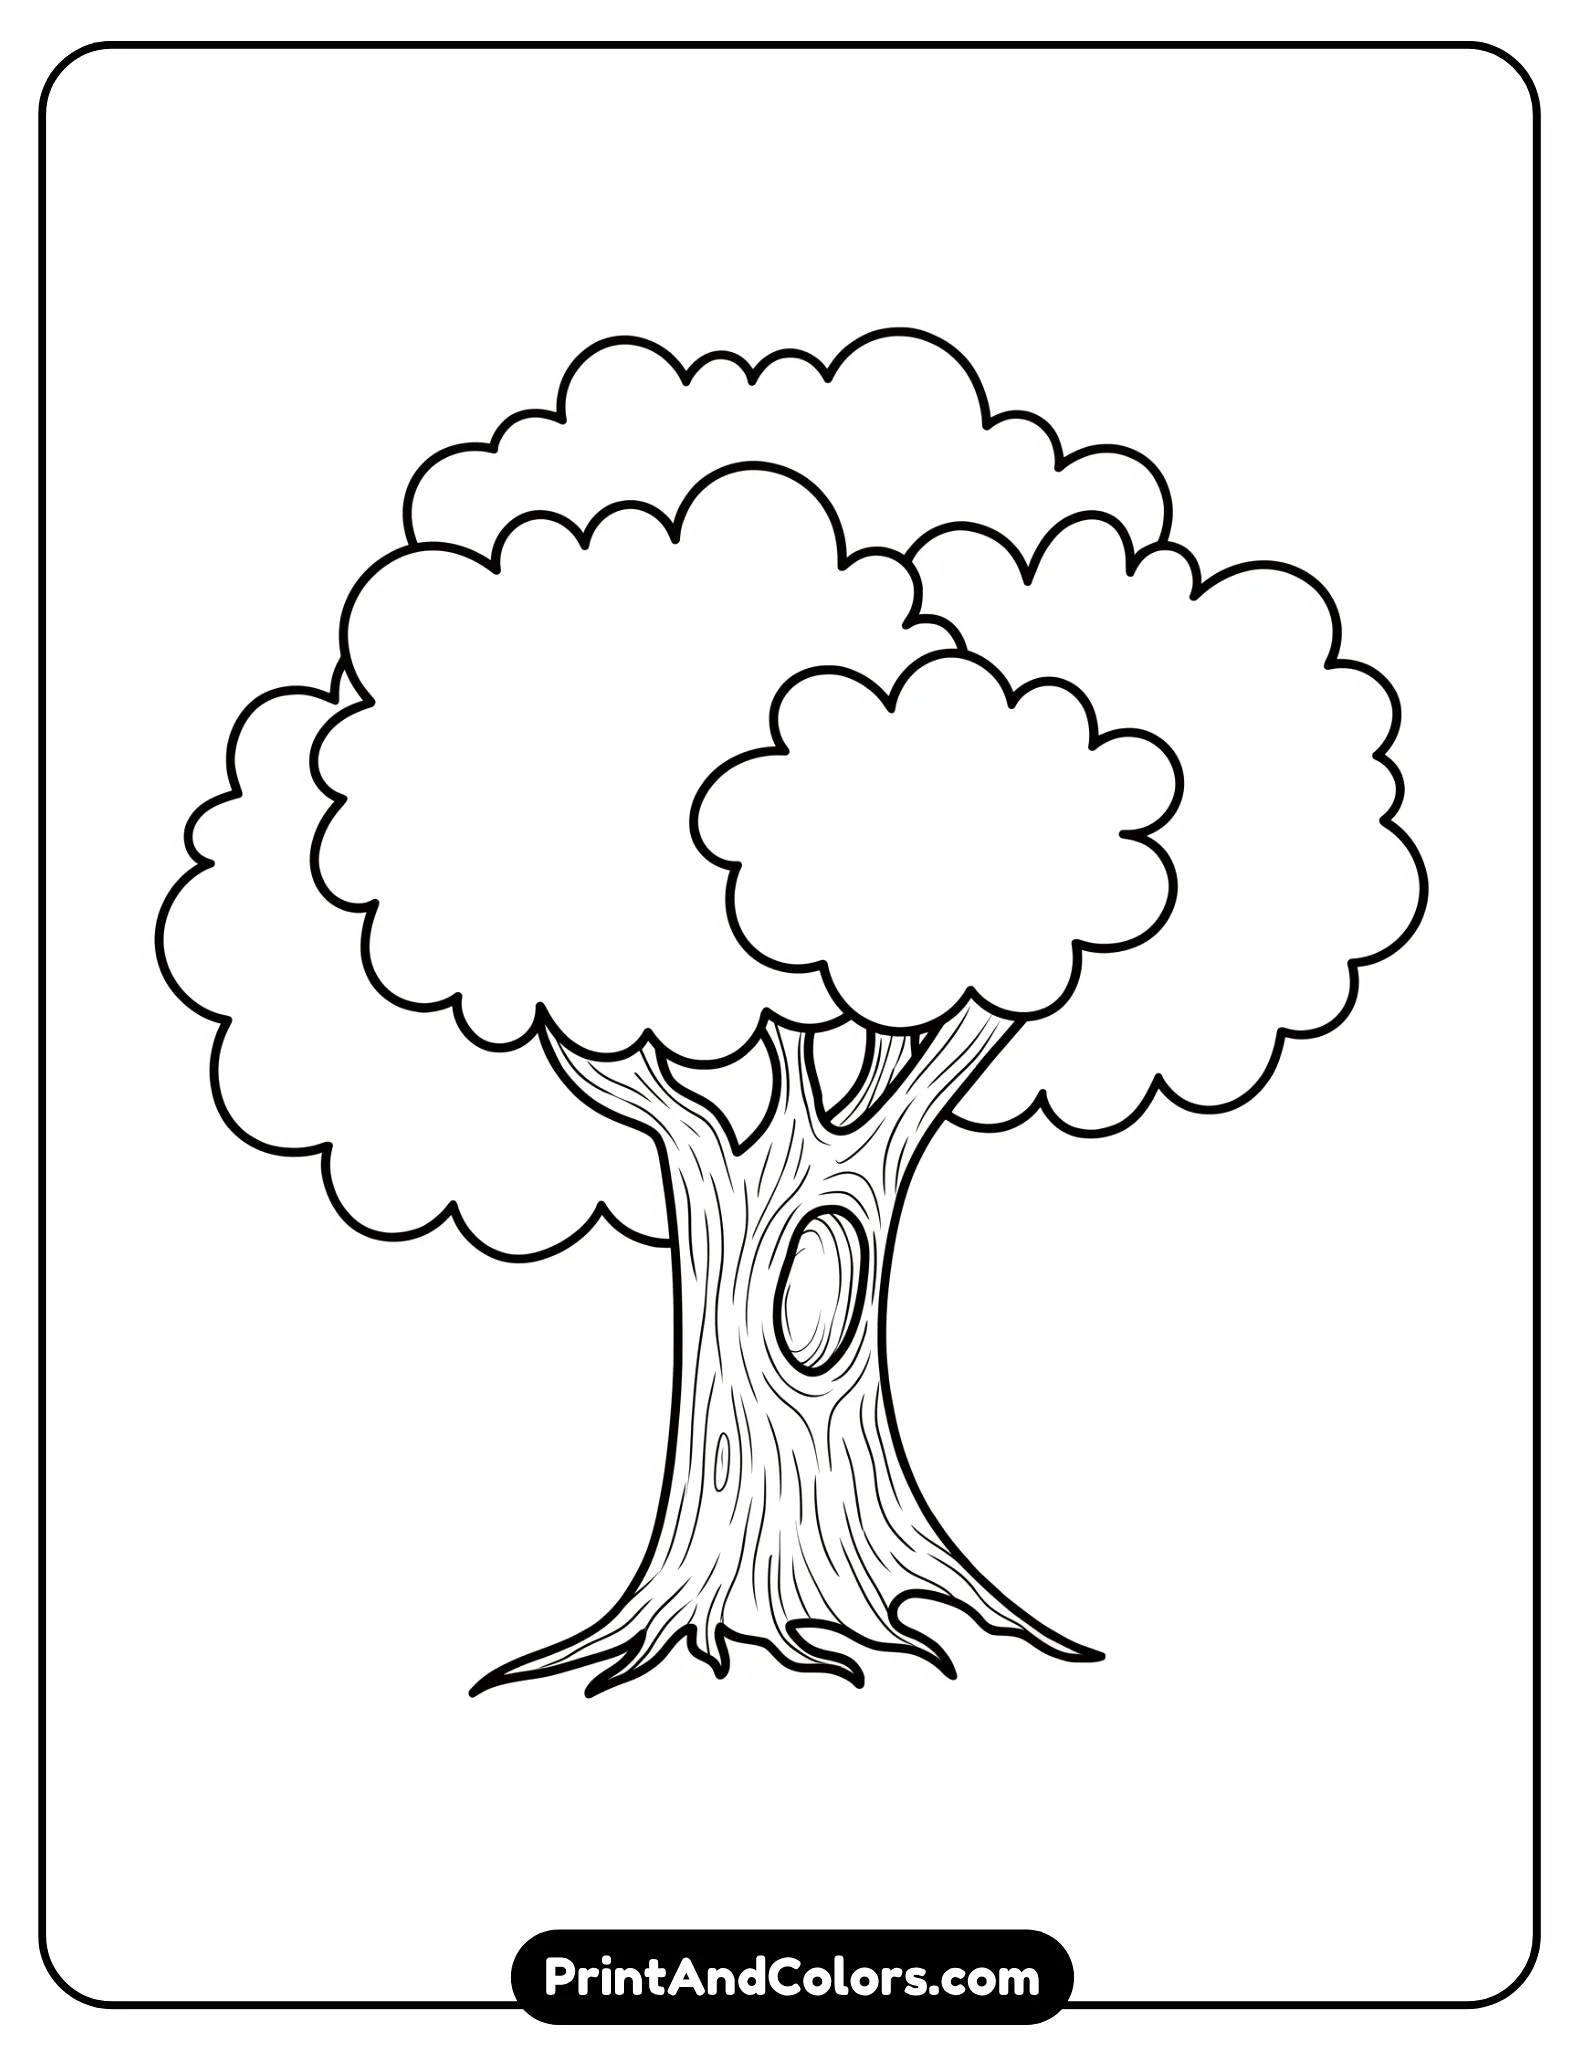
Printable Tree Drawing PDF & Book
Printable tree drawing worksheet with easy step-by-step instructions for kids
Frequently Asked Questions
How do you draw a tree step by step?
Start with the upper part of the tree (the leafy crown) and form it using several rounded clusters. Next, draw the trunk extending downwards, and then add the branches, roots, and other details of the trunk. Once the sketch is complete, fill in the colors for the leaves and the trunk. Breaking the tree down into simple shapes makes it very easy for beginners and children to draw.
What is the easiest way to draw a tree for kids?
The easiest approach is to simplify the tree into a leafy crown and a curved trunk. Use rounded lines for the foliage rather than drawing individual leaves. Add a few branches and roots, then color the finished picture. This keeps the activity simple while still producing a recognizable tree.
How do you draw leaves on a tree without drawing every leaf?
Draw leaves as clusters or groups instead of individual leaves. Use small bumps, curves, and irregular shapes around the outside of each cluster. Leaving a few small spaces between foliage masses can also make the canopy look more natural and less like one solid shape.
What colors should you use for a tree drawing?
Green and brown are the easiest choices for a traditional tree. However, you can use yellow, orange, and red to create an autumn tree, lighter greens for spring or summer, or mostly bare branches for winter. There is no single correct color palette for a creative drawing.
How can I make a simple tree drawing look more realistic?
Start by drawing the trunk wider near the roots and tapering it towards the branches. Vary the sizes of the leaf clusters, avoid perfect symmetry, and add some texture lines to the bark. To enhance the drawing, create an effect of light and shadow; depict darker leaves towards the bottom and incorporate small areas of ‘negative space’ (empty gaps) between the leaf clusters.
Your Tree Is Ready!
You now have a complete and simple drawing of a tree created from basic shapes and lines. More importantly, you have learned a technique you can use again, break a complex subject down into smaller shapes, establish the basic structure first, and add details only once the main form is correct.
Are you ready to practice? Print out the complete PDF guide on drawing trees, follow each step at your own pace, and create your own colorful tree. Then, add your personal touch using details like foliage, textures, background elements, and colors.
Bring Every Imagination to Life
Premium Coloring Books & Instant Digital Printables
Transform your creative vision into high-quality, personalized coloring products perfect for gifts, education, or special events. Our team of illustrators crafts unique designs tailored to your exact needs.