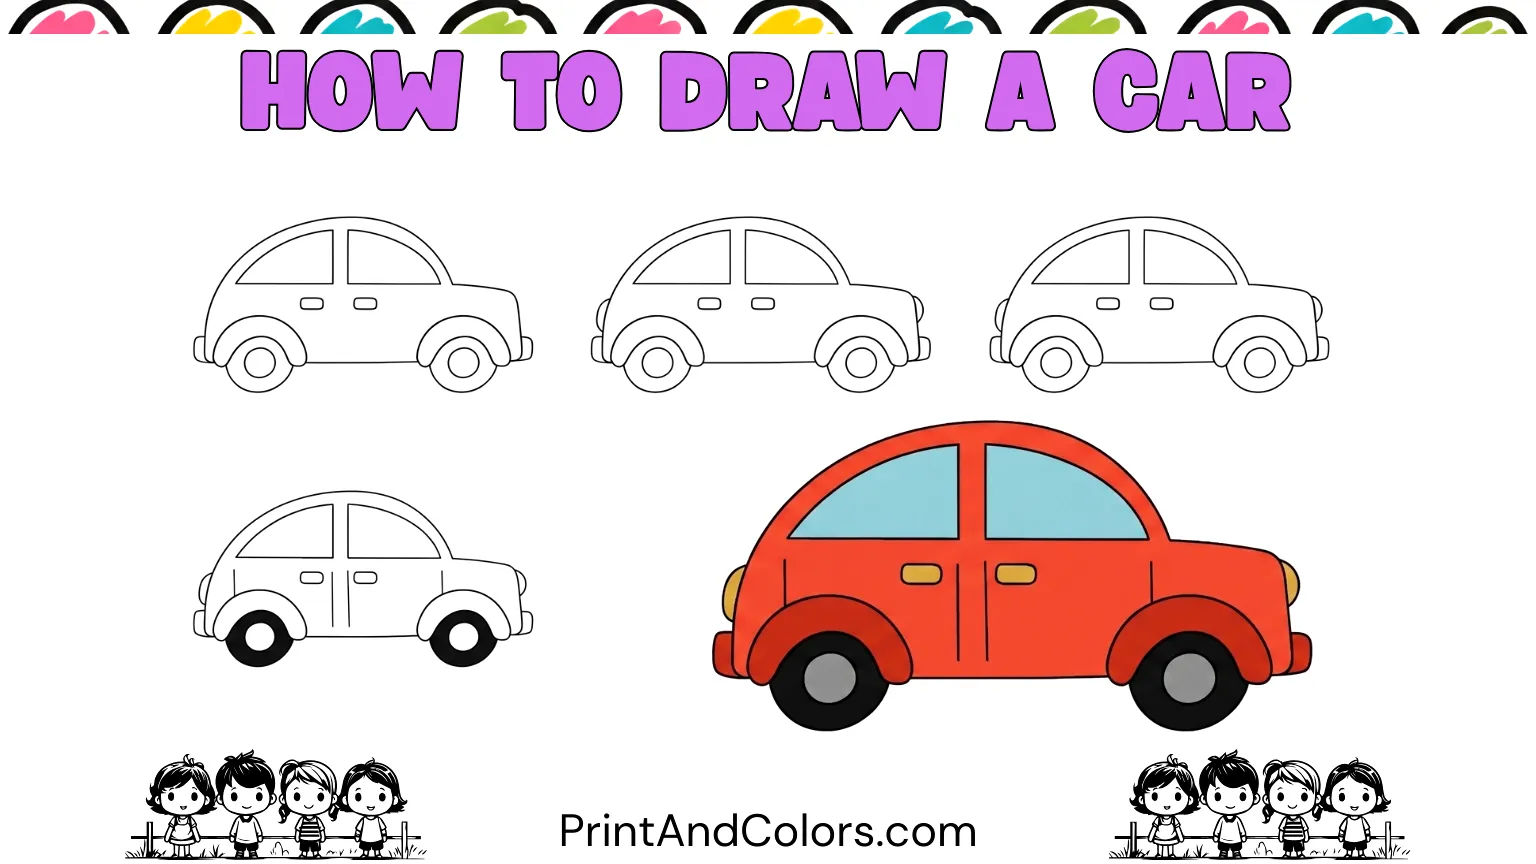
How to Draw a Car
Drawing a car might seem difficult when you look at the complete picture. It involves wheels, windows, doors, lights, bumpers, and many curved lines that need to be drawn accurately.
An easy way to approach this is to build the car one simple shape at a time.
In this simple car-drawing tutorial, we will create a pleasing ‘side view’ of a car using basic lines, curves, circles, and small details. You do not need advanced drawing skills for this. Start with the car’s main body shape, gradually add the roof and wheels, and then finish it off with smaller details and your favorite colors.
This tutorial is especially useful for children, beginners, parents, and teachers looking for a simple drawing activity. Once the task is complete, you can also practice the entire process offline using a printable PDF of the car drawing and the accompanying book.
Your next masterpiece awaits—try these stunning pages!
Step 1: Sketch the Main Car Shape
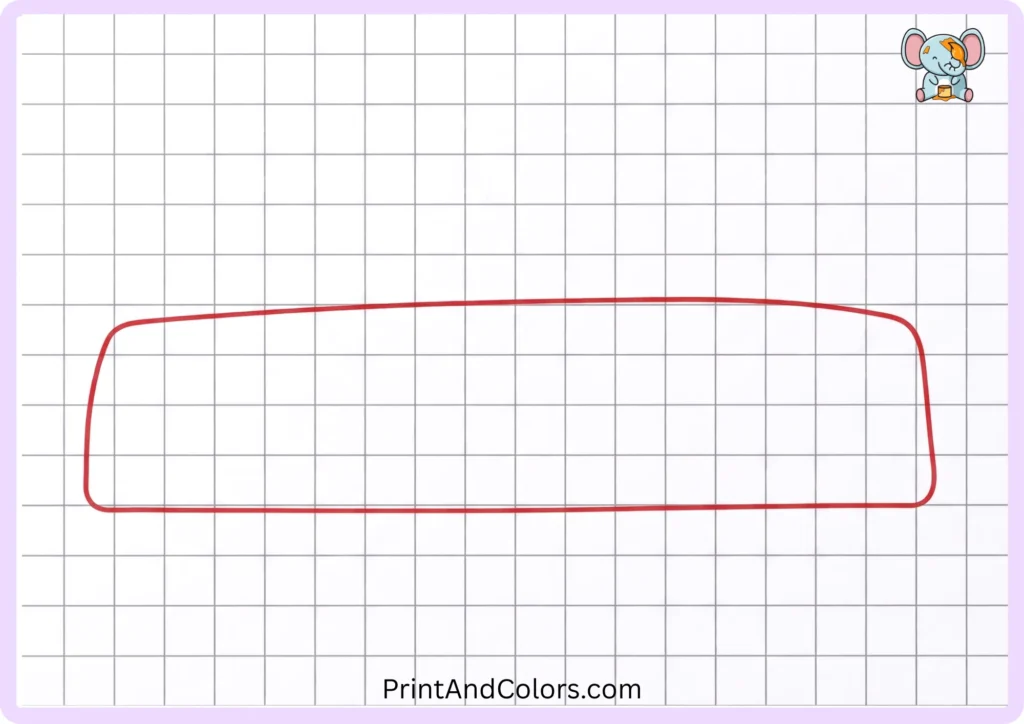
Start by drawing a long, rounded, outline-like shape for the lower part of the car.
Keep the bottom section relatively straight, while rounding off the corners at the front and rear. Don’t worry about making the line perfect; this initial shape serves as the foundation for everything that follows.
Step 2: Curve Upward to Form the Roof
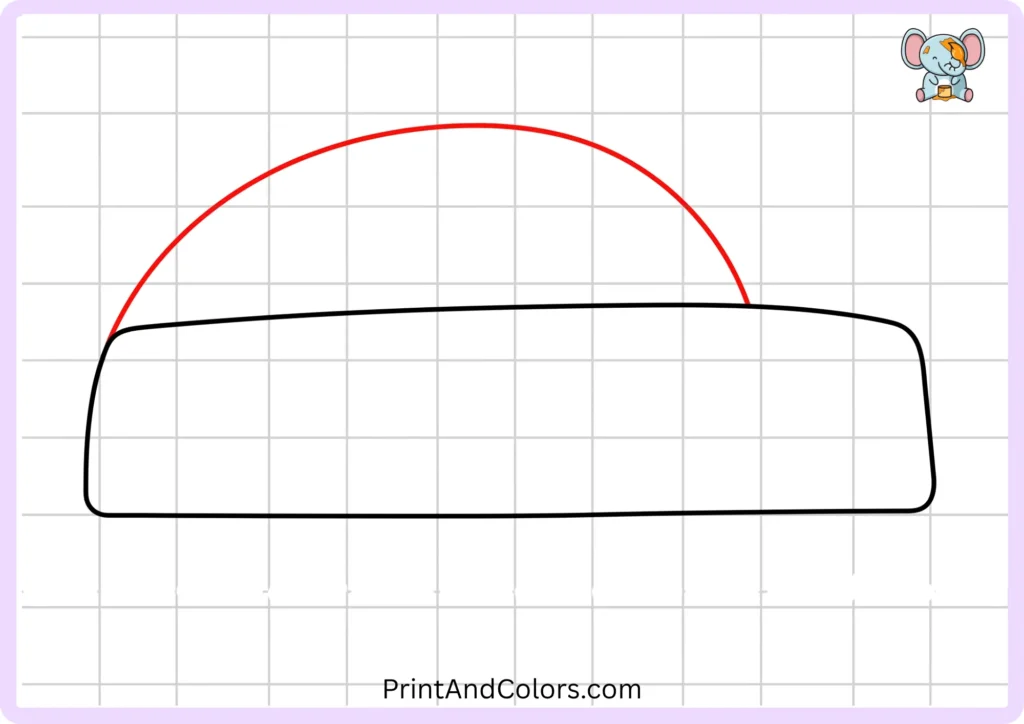
Now, give your car its recognizable upper profile.
Starting near the rear of the body, draw a large, curved line upwards and then bring it back down towards the front. Smoothly connect the roof to the upper part of the body.
Try to ensure the curve is gentle rather than sharply angled. A smooth roof gives the car a pleasing, cartoon-like appearance.
Step 3: Add the Two Side Windows
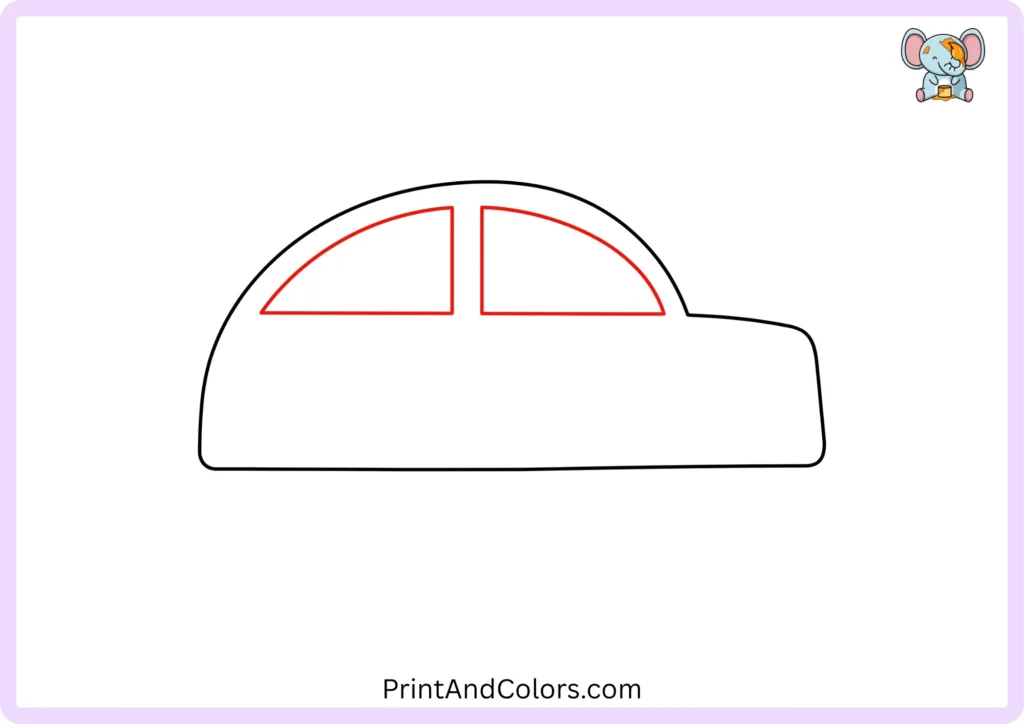
Now it is time to shape the empty section of the roof to resemble a real car.
Create two large windows on the roof. Leave a small gap between them and keep their bottom edges relatively straight, while their top edges should follow the curve of the roof.
The windows do not need to be identical, but keeping them similar will ensure the car looks balanced.
Step 4: Shape the Wheel Openings
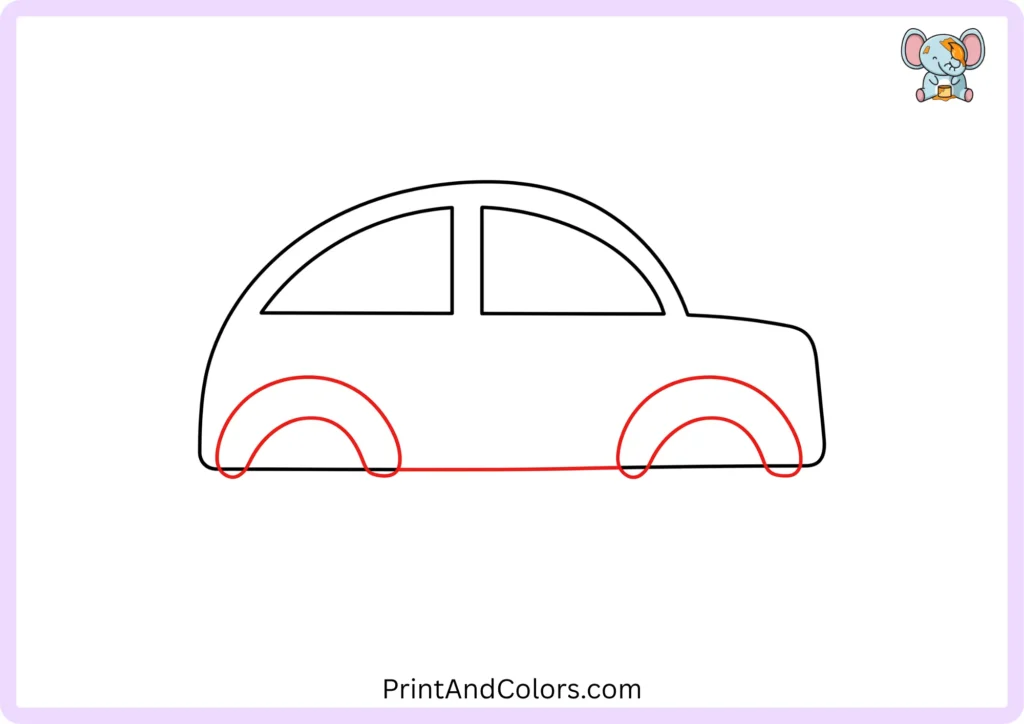
Look along the lower edge of the car body and mark where the wheels will be placed.
Draw a large curved arch near the front section and another near the rear. Then, draw another curved line inside each arch to give the wheel opening a thicker, more defined shape.
These arches serve as guides for the wheels you will draw next.
Step 5: Place the Two Big Wheels
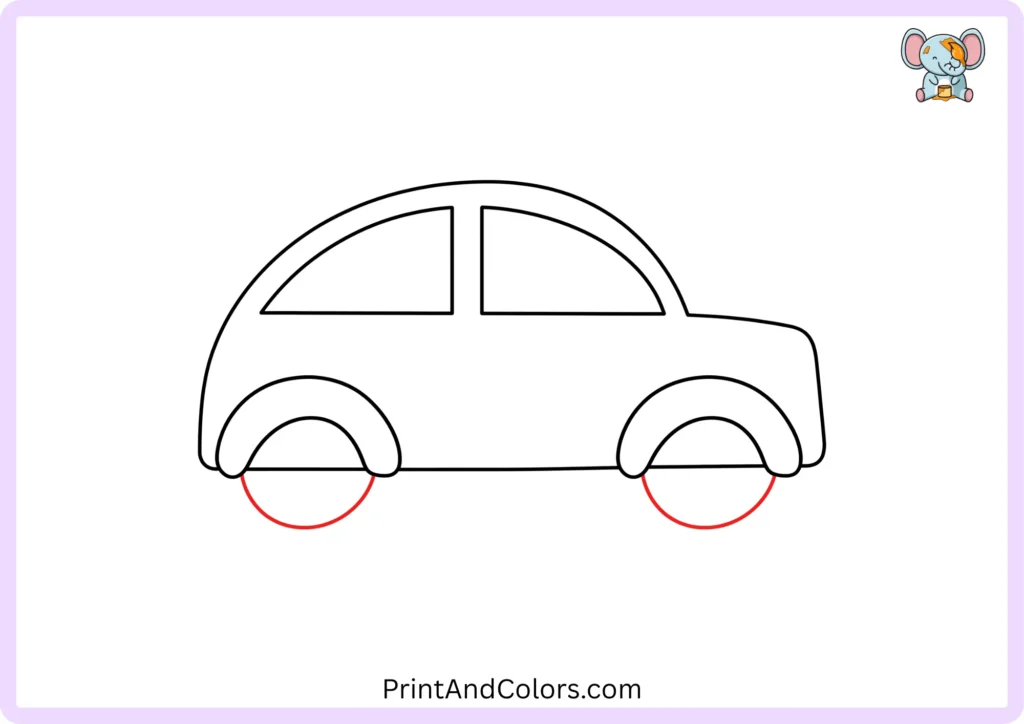
Draw a large circle beneath the space (open area) for each wheel.
Try to make both wheels roughly the same size and position them at the same height. If your circles aren’t perfect, don’t keep erasing them; even with minor imperfections, the wheels can still be part of a charming beginner-level drawing.
The important thing is that the wheels are aligned with each other.
Step 6: Give the Wheels Their Centers
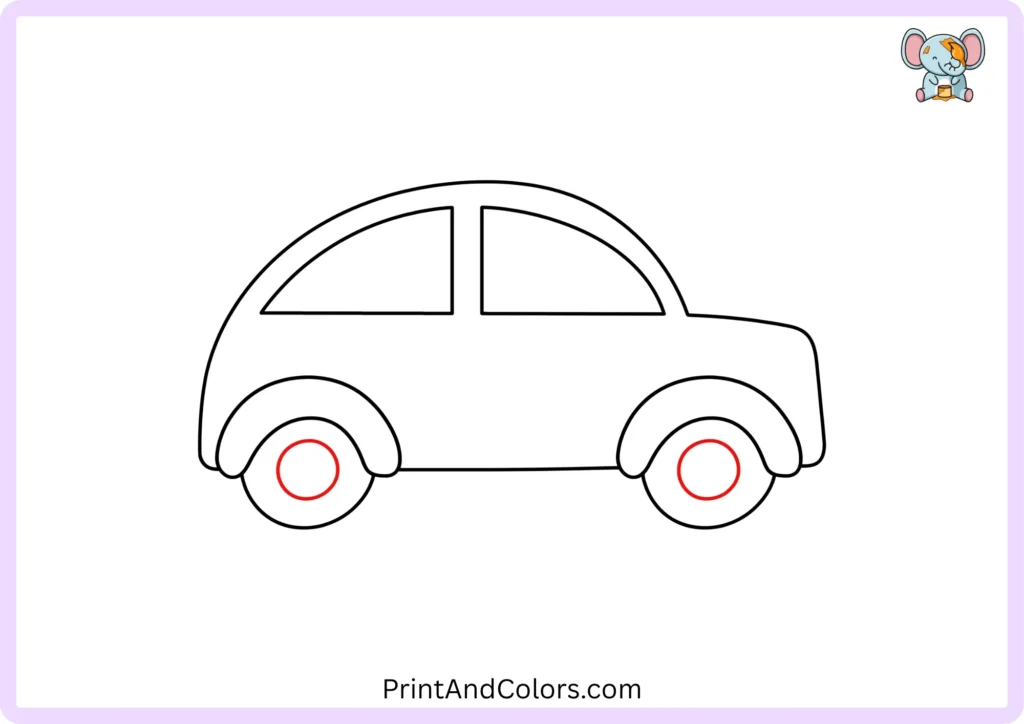
Draw a small circle inside each tire.
Position the center of each circle as close as possible to the middle of its wheel. These inner circles can represent simple wheel hubs or center caps.
For added detail, you can later include spokes or decorative patterns.
Step 7: Mark the Door Handles
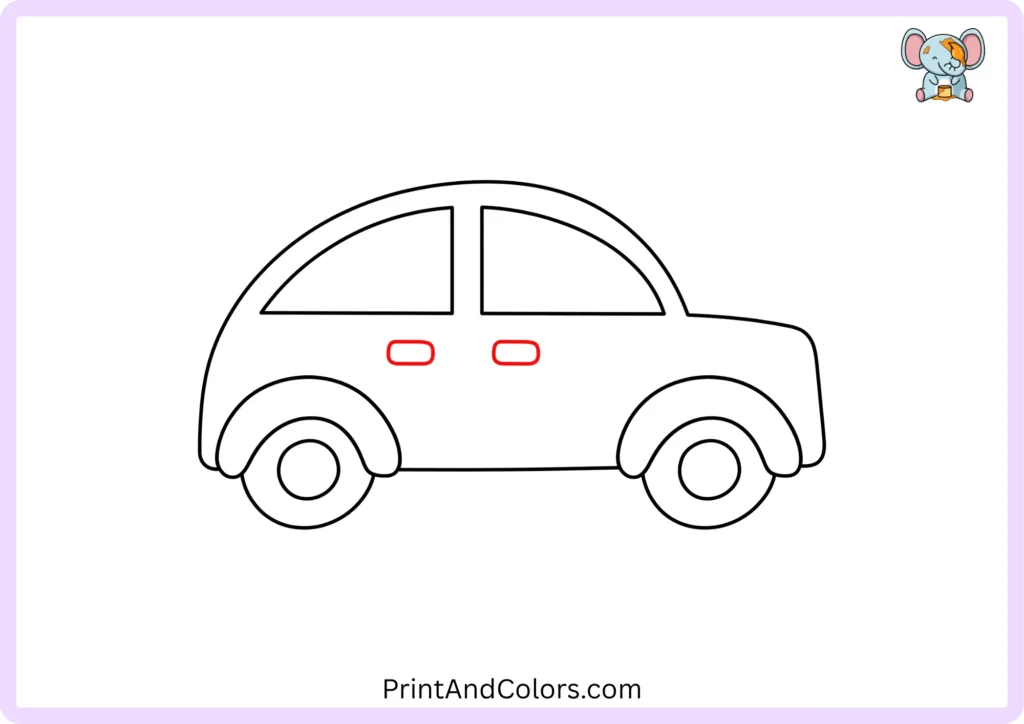
Now, focus your attention on the middle section of the vehicle.
Draw two small, round shapes below the windows to represent the door handles. Position them at roughly the same level.
These small details instantly transform the simple outline into something that looks like a real passenger vehicle.
Step 8: Finish the Front and Rear Bumpers
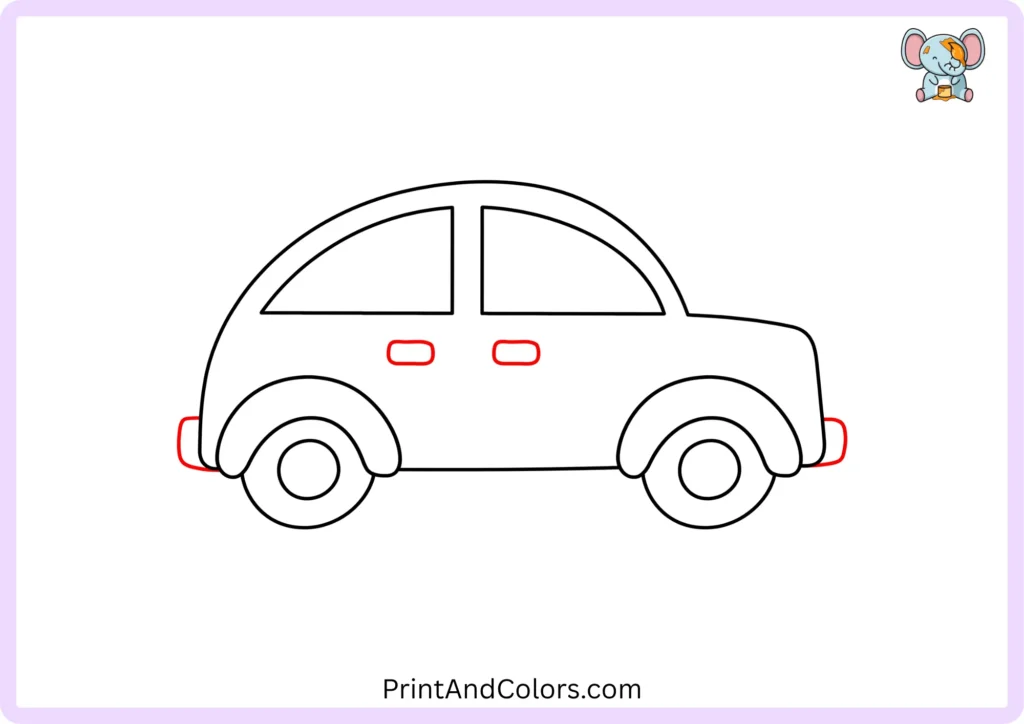
Draw small, round bumpers at both ends of the car.
Keep the bumpers short and slightly curved so they harmonize with the car’s overall cartoon style. You do not need to include intricate mechanical details; the goal is to create a simple, clean image that is easy to color.
Step 9: Add the Headlight and Rear Light
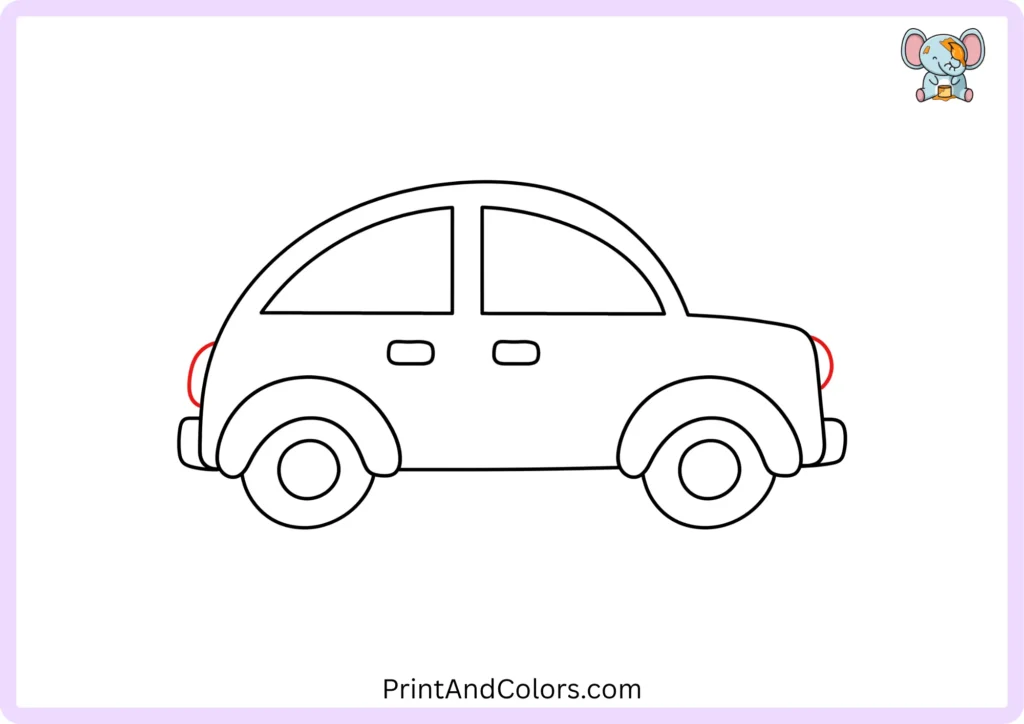
Draw a small round light near the front and another light near the rear.
Position them above the bumpers. You can also extend each light slightly towards the outer edge of the vehicle’s body.
This area is also perfect for experimenting with colors later on: yellow or light orange works well for the front light.
Step 10: Define the Doors and Side Details
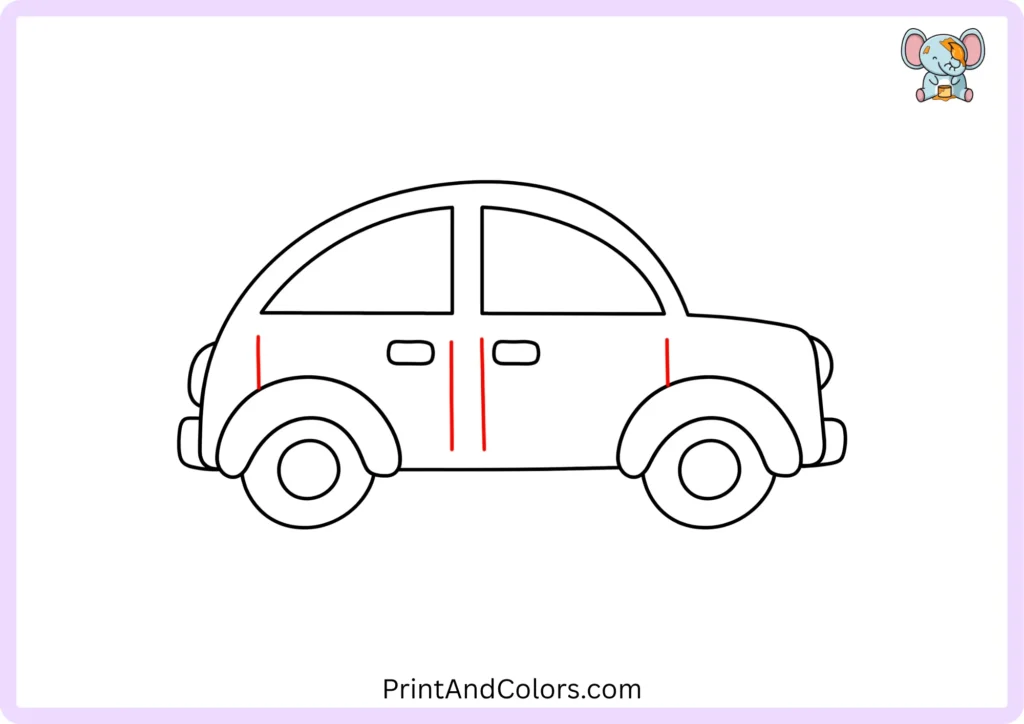
Your car is almost complete.
Draw vertical lines beneath the windows to indicate the doors. Carefully extend these lines down toward the lower part of the car’s body, but do not make them too dark.
To further define the side of the car, you can also draw a few small lines above the wheel arches.
At this stage, review your drawing and erase the initial construction lines that you no longer need.
Step 11: Bring Your Car to Life With Color
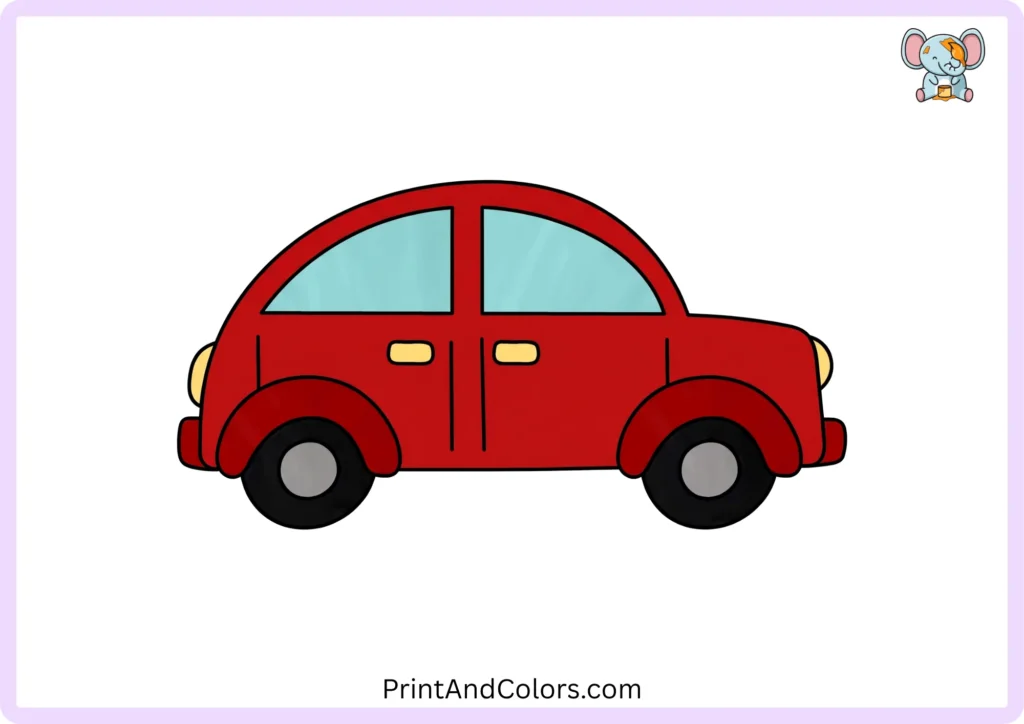
Now comes the fun part coloring!
You can follow a realistic color scheme or invent a completely original car. For example:
- Car body: blue, red, green, purple, orange, or turquoise
- Windows: light blue or gray
- Tires: black or dark gray
- Wheel centers: gray, silver, or another color
- Lights: yellow, orange, or pale white
- Bumpers: gray or a darker shade of the body color
There is no single correct color for your drawing. Let your imagination decide.
Your easy car drawing is complete!
Printable Car Drawing PDF & Book
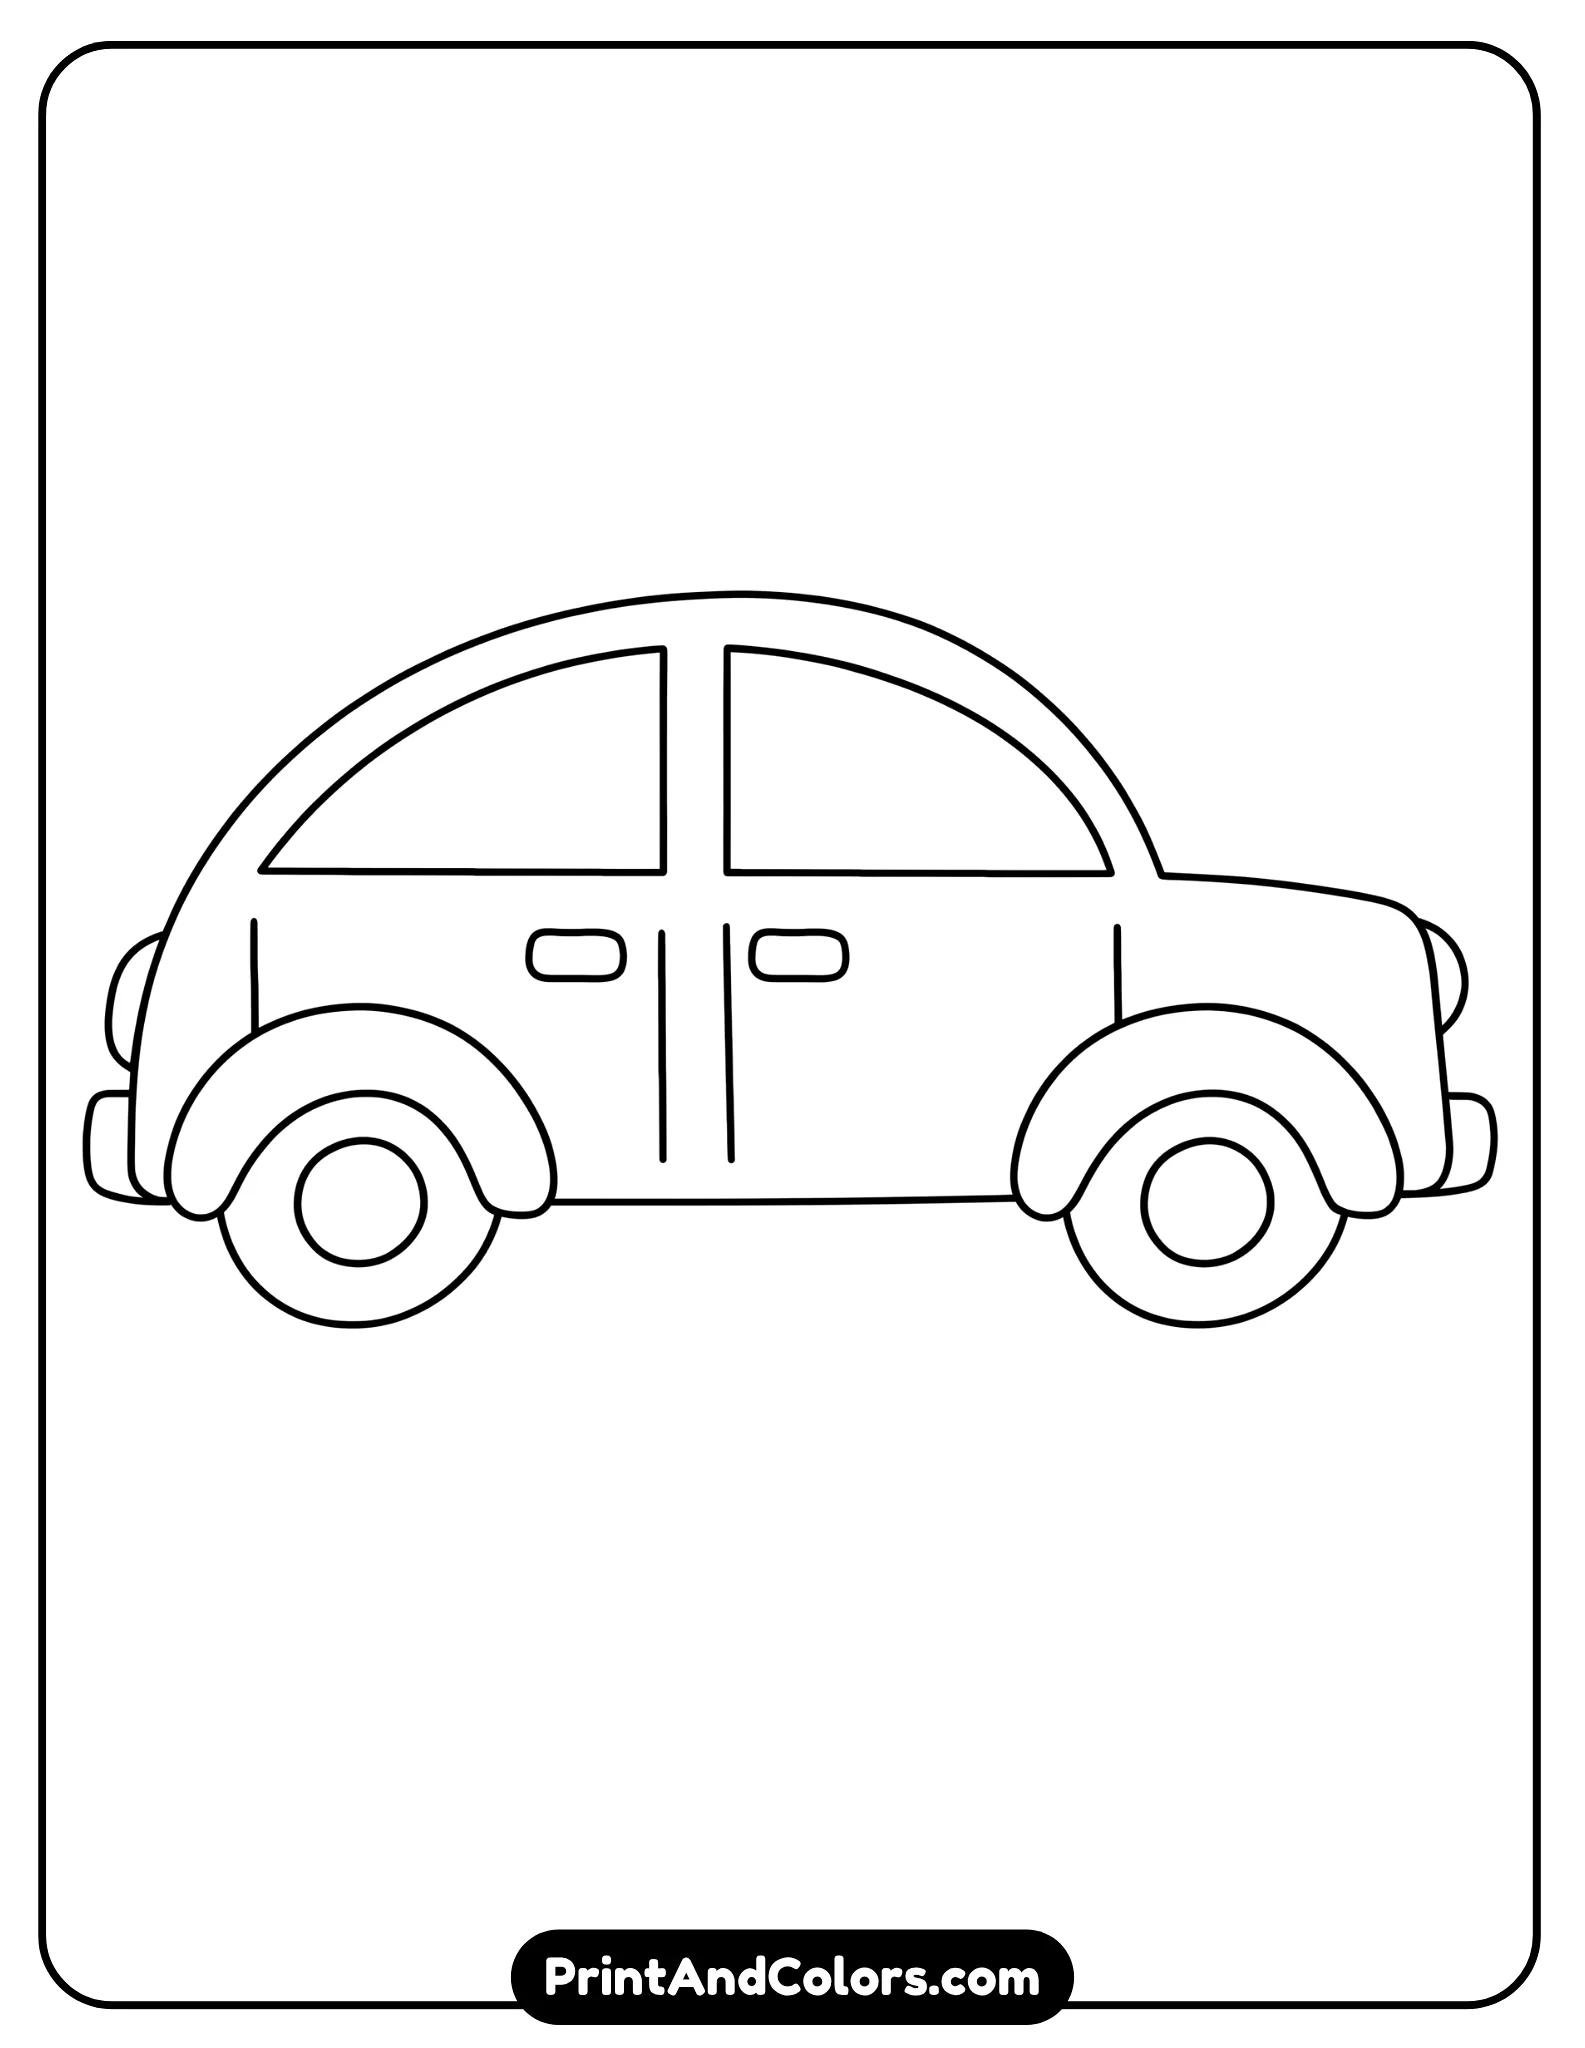
Printable Car Drawing PDF & Book
Easy car drawing for kids showing a colorful side-view car with simple shapes and details
Want to practice without keeping the website open?
We have created a printable car-drawing PDF that presents the entire drawing sequence in a convenient offline format. You can print the pages at home, use them for classroom activities, or keep the full set as a simple drawing practice book.
The printable version follows the same step-by-step progression, from the initial sketch to the finished, colored drawing, allowing children to work on one stage at a time.
Print the pages, grab your pencils and crayons, and start drawing your own car.
How to Make Your Car Drawing Look Better
Once you’ve completed the basic version, try a few simple improvements:
- Keep the two wheels close to the same size.
- Leave similar spacing between the wheels and car edges.
- Use lighter pencil pressure for your first sketch.
- Erase unnecessary construction lines before coloring.
- Add a darker outline around the finished car.
- Experiment with different window shapes.
- Add stripes, numbers, stickers, or racing designs.
- Turn the drawing into a police car, taxi, race car, or colorful cartoon vehicle.
If you are learning to draw, do not worry about making every line absolutely flawless. Drawing the same subject multiple times is part of the process. Even simple, repetitive practice helps you become familiar with curved lines, circles, proportions, and the placement of shapes.
Frequently Asked Questions
How do you draw a car easily?
The easiest way is to break the car down into basic shapes. Start with a long body (frame) and add a curved roof, windows, wheel arches, and two round wheels. Complete the drawing by adding smaller details, such as doors, handles, bumpers, and lights, before coloring it in.
How do you draw a car for kids?
Use a simple ‘side-view’ design featuring large shapes and clear steps. Children can start by drawing the outer outline of the body and then add the roof, windows, wheels, and other recognizable details. Keeping the drawing simple makes it easy to follow and provides children with a complete picture that they can color in.
What should I use to draw a car?
A pencil, paper, and eraser are sufficient to complete the basic drawing. Afterward, use crayons, colored pencils, markers, or other art supplies to add color. A black marker can also be used to highlight or define the final outline.
How can I make my car drawing look realistic?
Start by focusing on proportions and alignment. Keep the wheel sizes uniform, position the windows correctly, and observe how the car’s body curves around the wheels. Once the basic proportions are right, you can add shading, reflections, tire details, and more realistic body lines.
Can I print the car drawing steps?
Yes. A printable version is useful when you want to practice away from the screen. The Printable Car Drawing PDF Book can place the complete sequence into a convenient format so children can follow each stage on paper and repeat the activity whenever they want.
What can I draw after learning a simple car?
Once you are comfortable with this car, try changing the body shape and details to create different vehicles. You could draw a race car, truck, bus, taxi, police car, convertible, or futuristic car using many of the same basic construction ideas.
Ready to Draw Your Car?
You don’t need complex techniques to get started. Begin with the car’s body, draw the curved roof, carefully add the wheels, and then include the details that give the car its distinctive look.
Once finished, try drawing the same car again, but this time use a different body color, wheel design, or racing pattern. You might be surprised at how much easier it feels to draw it the second time around.
Bring Every Imagination to Life
Premium Coloring Books & Instant Digital Printables
Transform your creative vision into high-quality, personalized coloring products perfect for gifts, education, or special events. Our team of illustrators crafts unique designs tailored to your exact needs.