
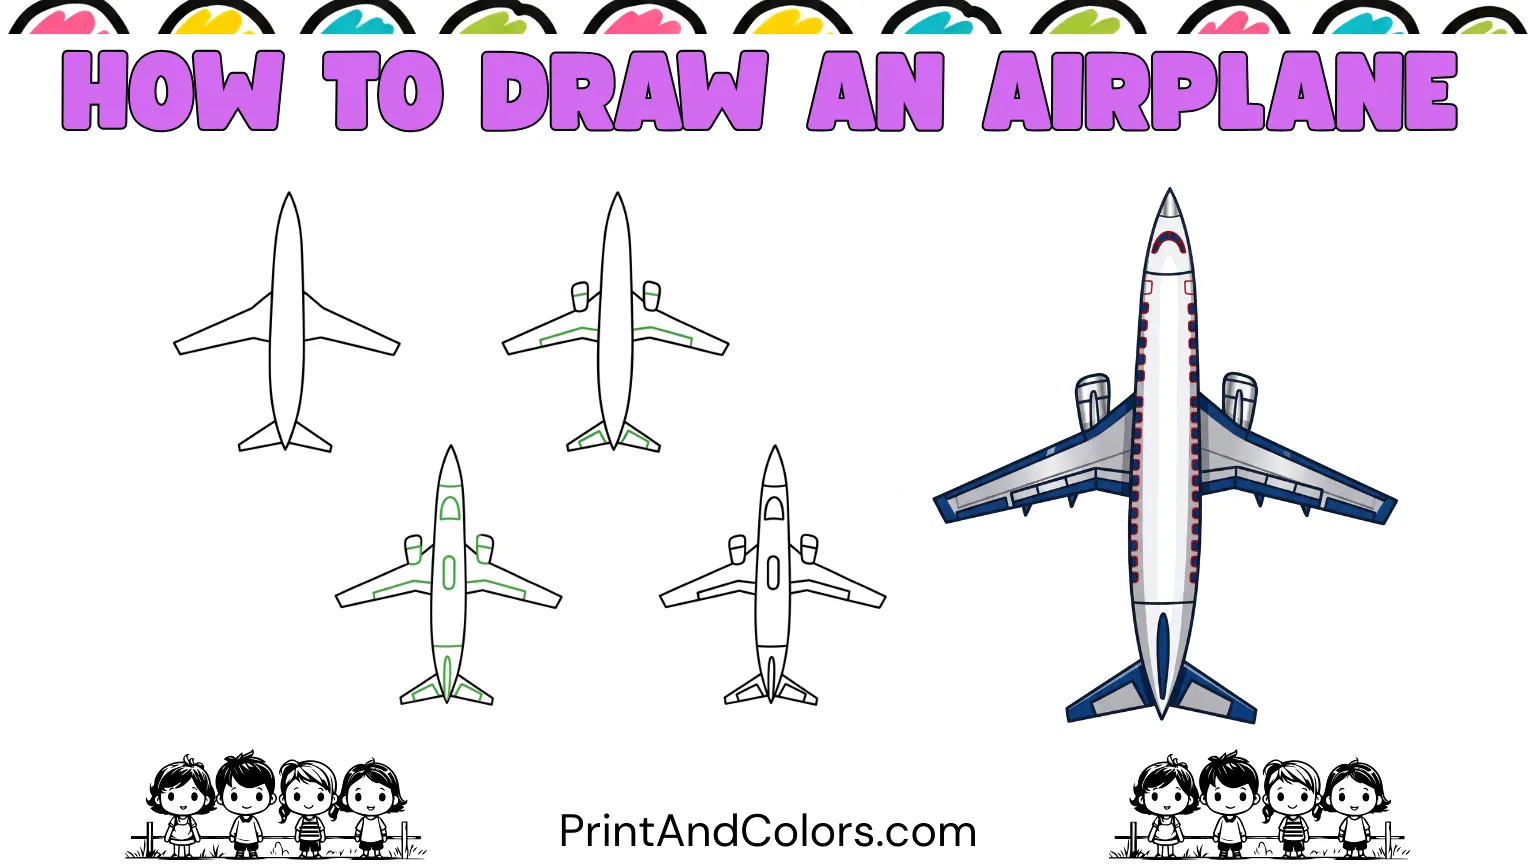
How to Draw an Airplane
Drawing an airplane might seem difficult at first. It involves wings, engines, a long fuselage, a tail, and many small details, but you don’t have to draw everything all at once.
In this easy airplane drawing tutorial, we will create a simple aircraft by working outwards from the center. You will start with the basic shape of the plane, then add the large wings and tail, and finally include the engines, wing details, windows, and color. The finished drawing can also serve as a fun coloring activity.
This tutorial is designed for children, beginners, parents, teachers, and anyone else who wants to create a simple airplane drawing that can be completed step-by-step.
Your next masterpiece awaits—try these stunning pages!
What You Need to Draw an Airplane
You don’t need a large art kit for this activity. Gather:
- A sheet of drawing paper
- Pencil
- Eraser
- Black pen or marker for outlining
- Crayons, colored pencils, or markers
- Optional: a ruler for straight construction lines
If you’re following the printable version, use a landscape-oriented sheet so there is plenty of room for the airplane’s wide wings.
Step 1: Sketch the Long Central Shape
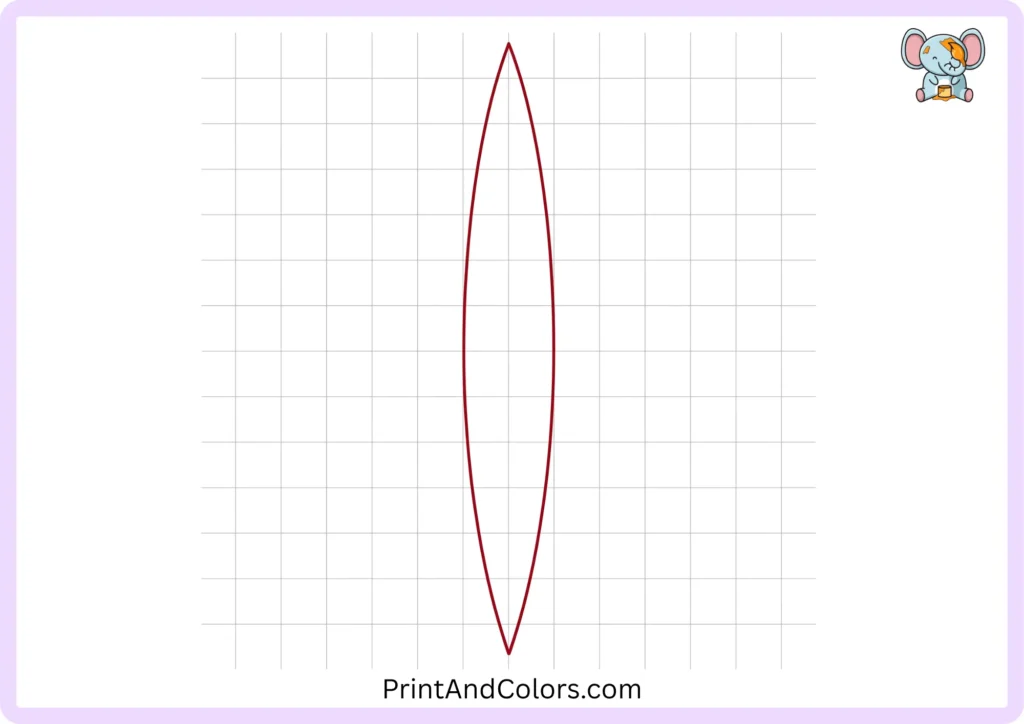
Start with the central part of the airplane, also known as the ‘fuselage’.
Draw a long, narrow shape in the middle of the page. Keep both ends pointed and give the sides a slight curve. Try to keep this shape centered on the page, as the airplane’s wings will extend significantly outward from it later.
Use a light touch with your pencil at this stage. This makes it easier to erase or modify the outline if necessary.
Step 2: Build the Broad Main Wings
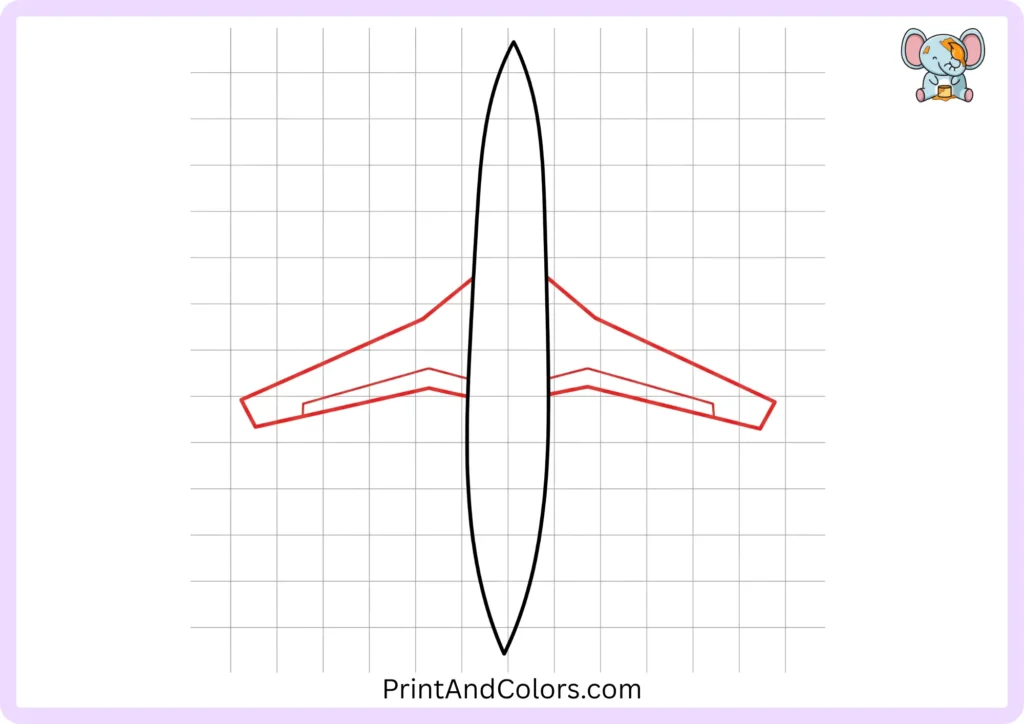
Extend a large wing outward from each side of the body. Keep both sides roughly symmetrical (balanced) and shape the wings to be smooth with a slight angle.
Do not make the wings too small; they should be significantly wider than the body of the airplane.
Step 3: Add the Smaller Rear Wings
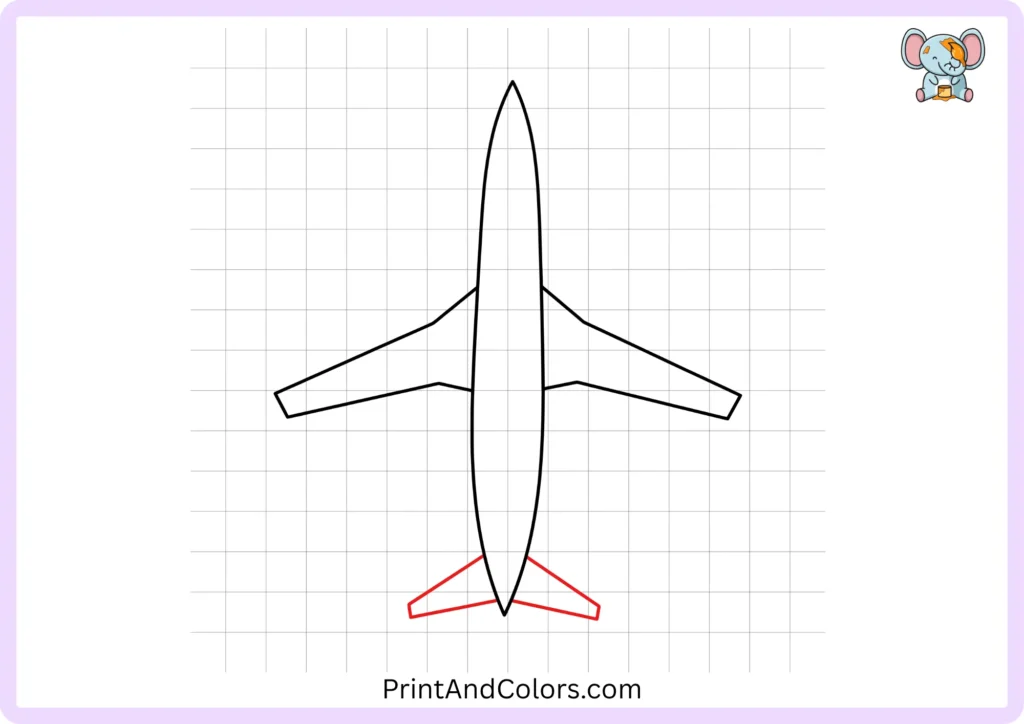
Move toward the rear of the airplane and add the small horizontal tail surfaces.
Create a small, pointed shape on each side of the rear section. These shapes should be smaller than the main wings and positioned at roughly the same angle.
This slight difference in size helps make the aircraft look more realistic without requiring complex perspective techniques.
Step 4: Place the Two Jet Engines
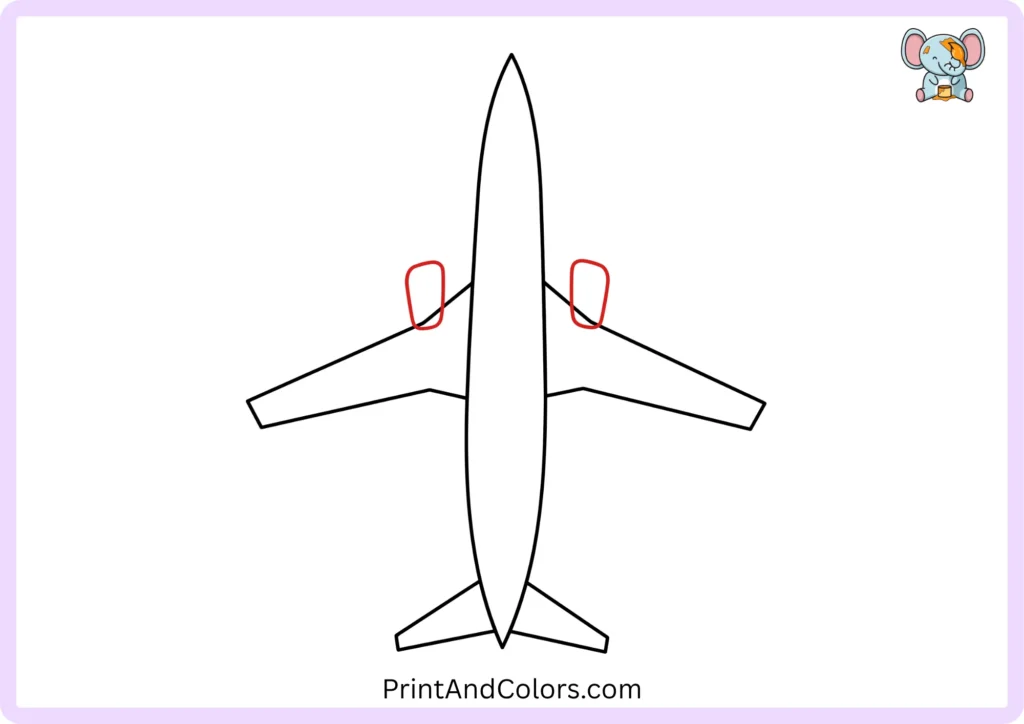
Next, draw the engines.
Draw two circular shapes near the large wings and position them close to the main body of the aircraft. Try to place them at an equal distance from the center to keep the drawing balanced.
Simple circular shapes are sufficient here; you can refine them with additional lines in the next step.
Step 5: Give the Engines Their Structure
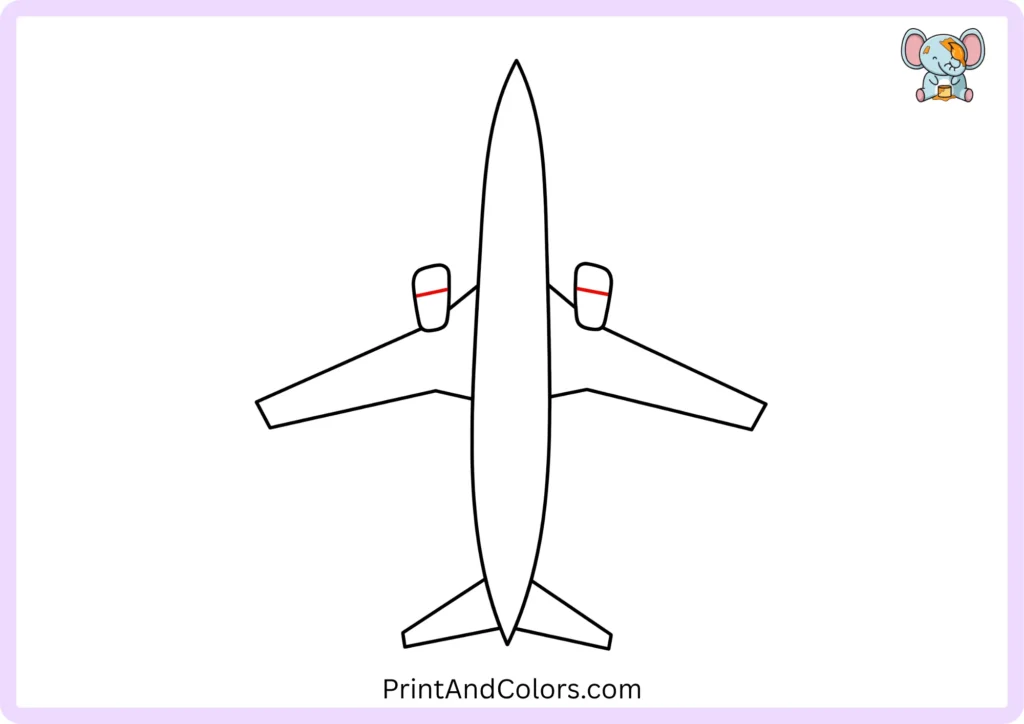
Some additional details need to be added to the engines.
Draw a short curved or straight line (or mark) on each engine to distinguish its sections. Keep these marks simple and uniform on both sides.
Thanks to this small addition, the engines begin to look like actual aircraft components rather than just simple circles or tubes.
Step 6: Refine the Main Wing Surfaces
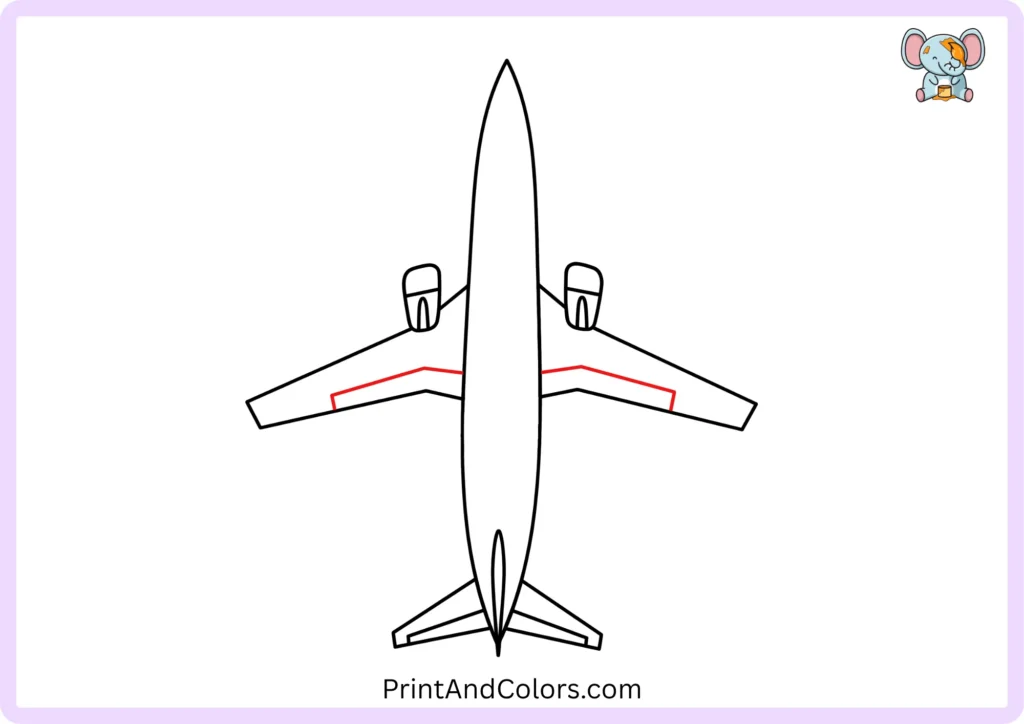
Let’s add more detail to the large wings.
Inside each large wing, draw a long, diagonal line that follows the direction of the wing. Leave enough space around the line to keep the wing’s appearance clean and neat.
These lines add structure to the wings while keeping the drawing simple enough for beginners to follow easily.
Step 7: Finish the Tail and Wing Details
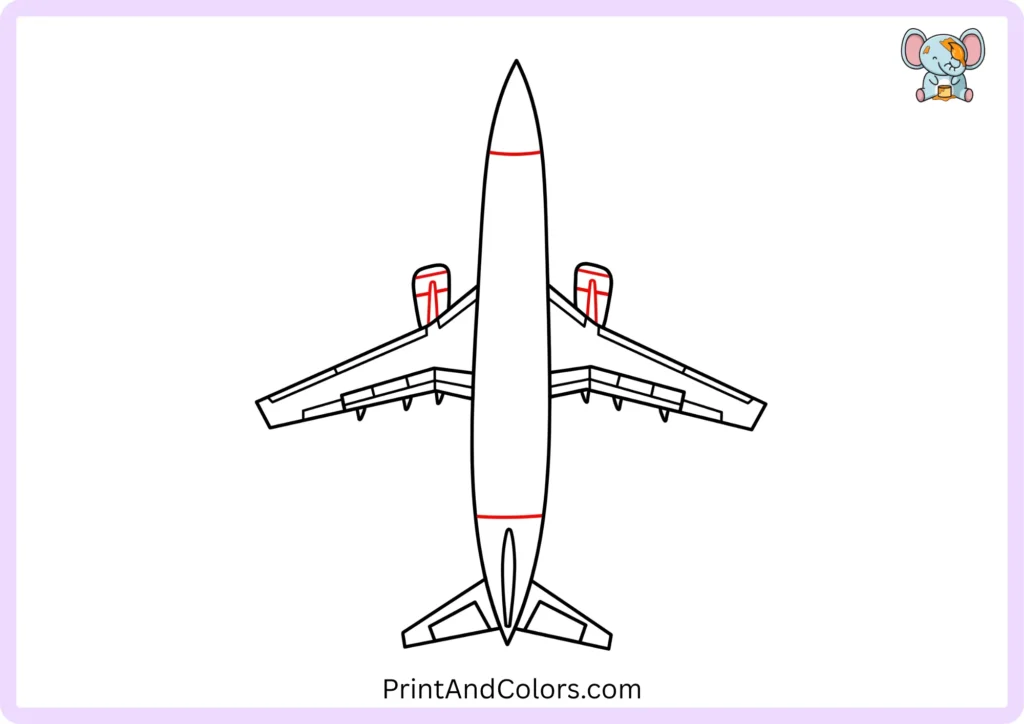
Return to the small tail feathers and add a simple detail to the inner side of each one.
Instead of drawing a perfectly straight line, follow the outer contour of the feather. The goal is for the inner detail to harmonize with the feather’s shape.
Take a moment to compare both sides. If one side appears larger, lightly erase and correct it before proceeding.
Step 8: Add the Aircraft’s Windows and Section Lines
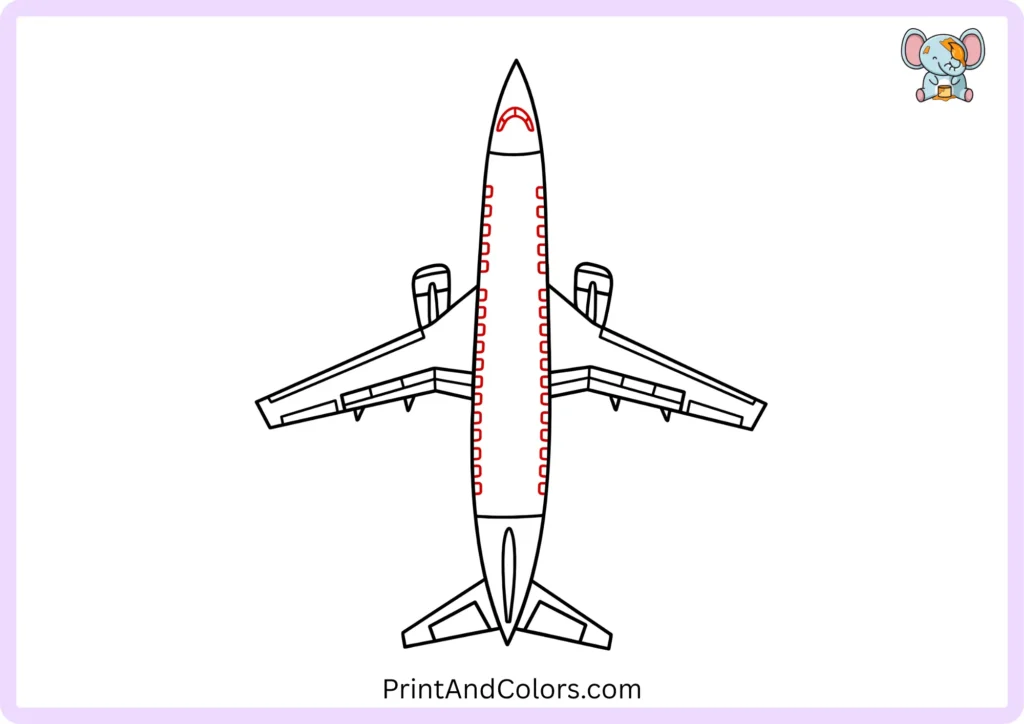
Your airplane is almost complete.
Draw some curved lines on the front and rear sections of the airplane. Then, draw windows on the main body (fuselage) of the plane.
Small circles or round shapes work well for simple children’s drawings. Space them evenly and align them so that the finished airplane looks neat and well-made.
You can also add a cockpit window or create your own unique airplane design by changing the shape of the windows.
Step 9: Outline and Color Your Airplane
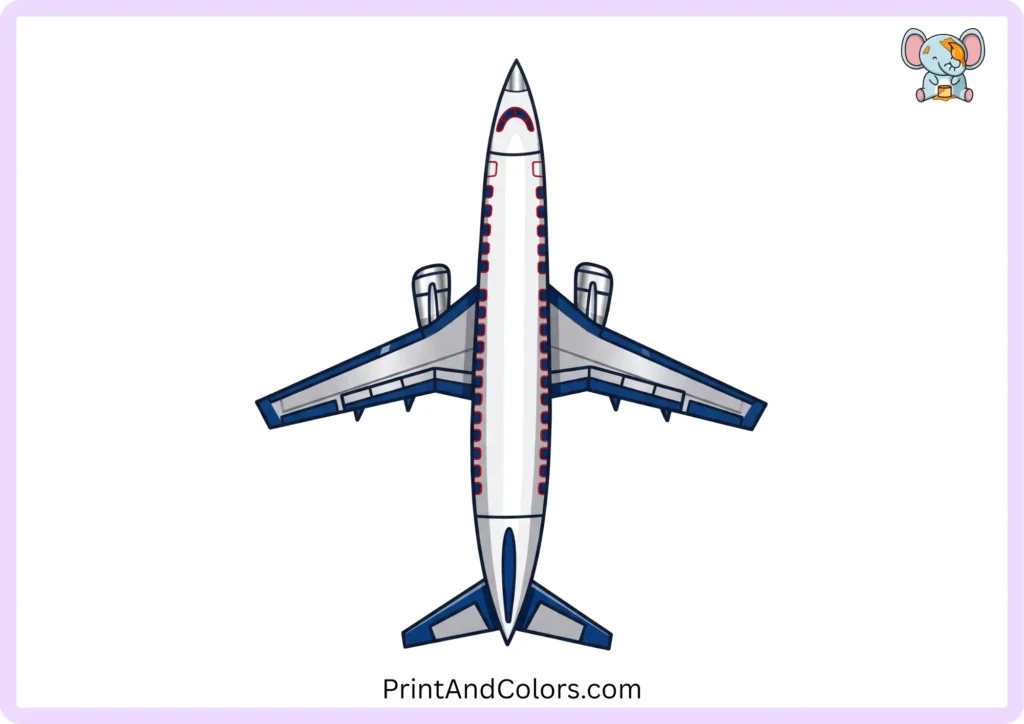
Now it’s time for the fun part: coloring.
First, check your pencil drawing and erase any unnecessary construction marks. If you want stronger outlines, carefully trace the finished airplane with a black marker or dark pencil.
Then choose your colors.
You could create:
- A blue and white passenger airplane
- A bright red and yellow aircraft
- A silver and gray jet
- A colorful fantasy airplane
- Your own airline-inspired design
There is no single correct color scheme. Use your favorite colors and make the airplane your own.
Printable Airplane Drawing PDF & Book
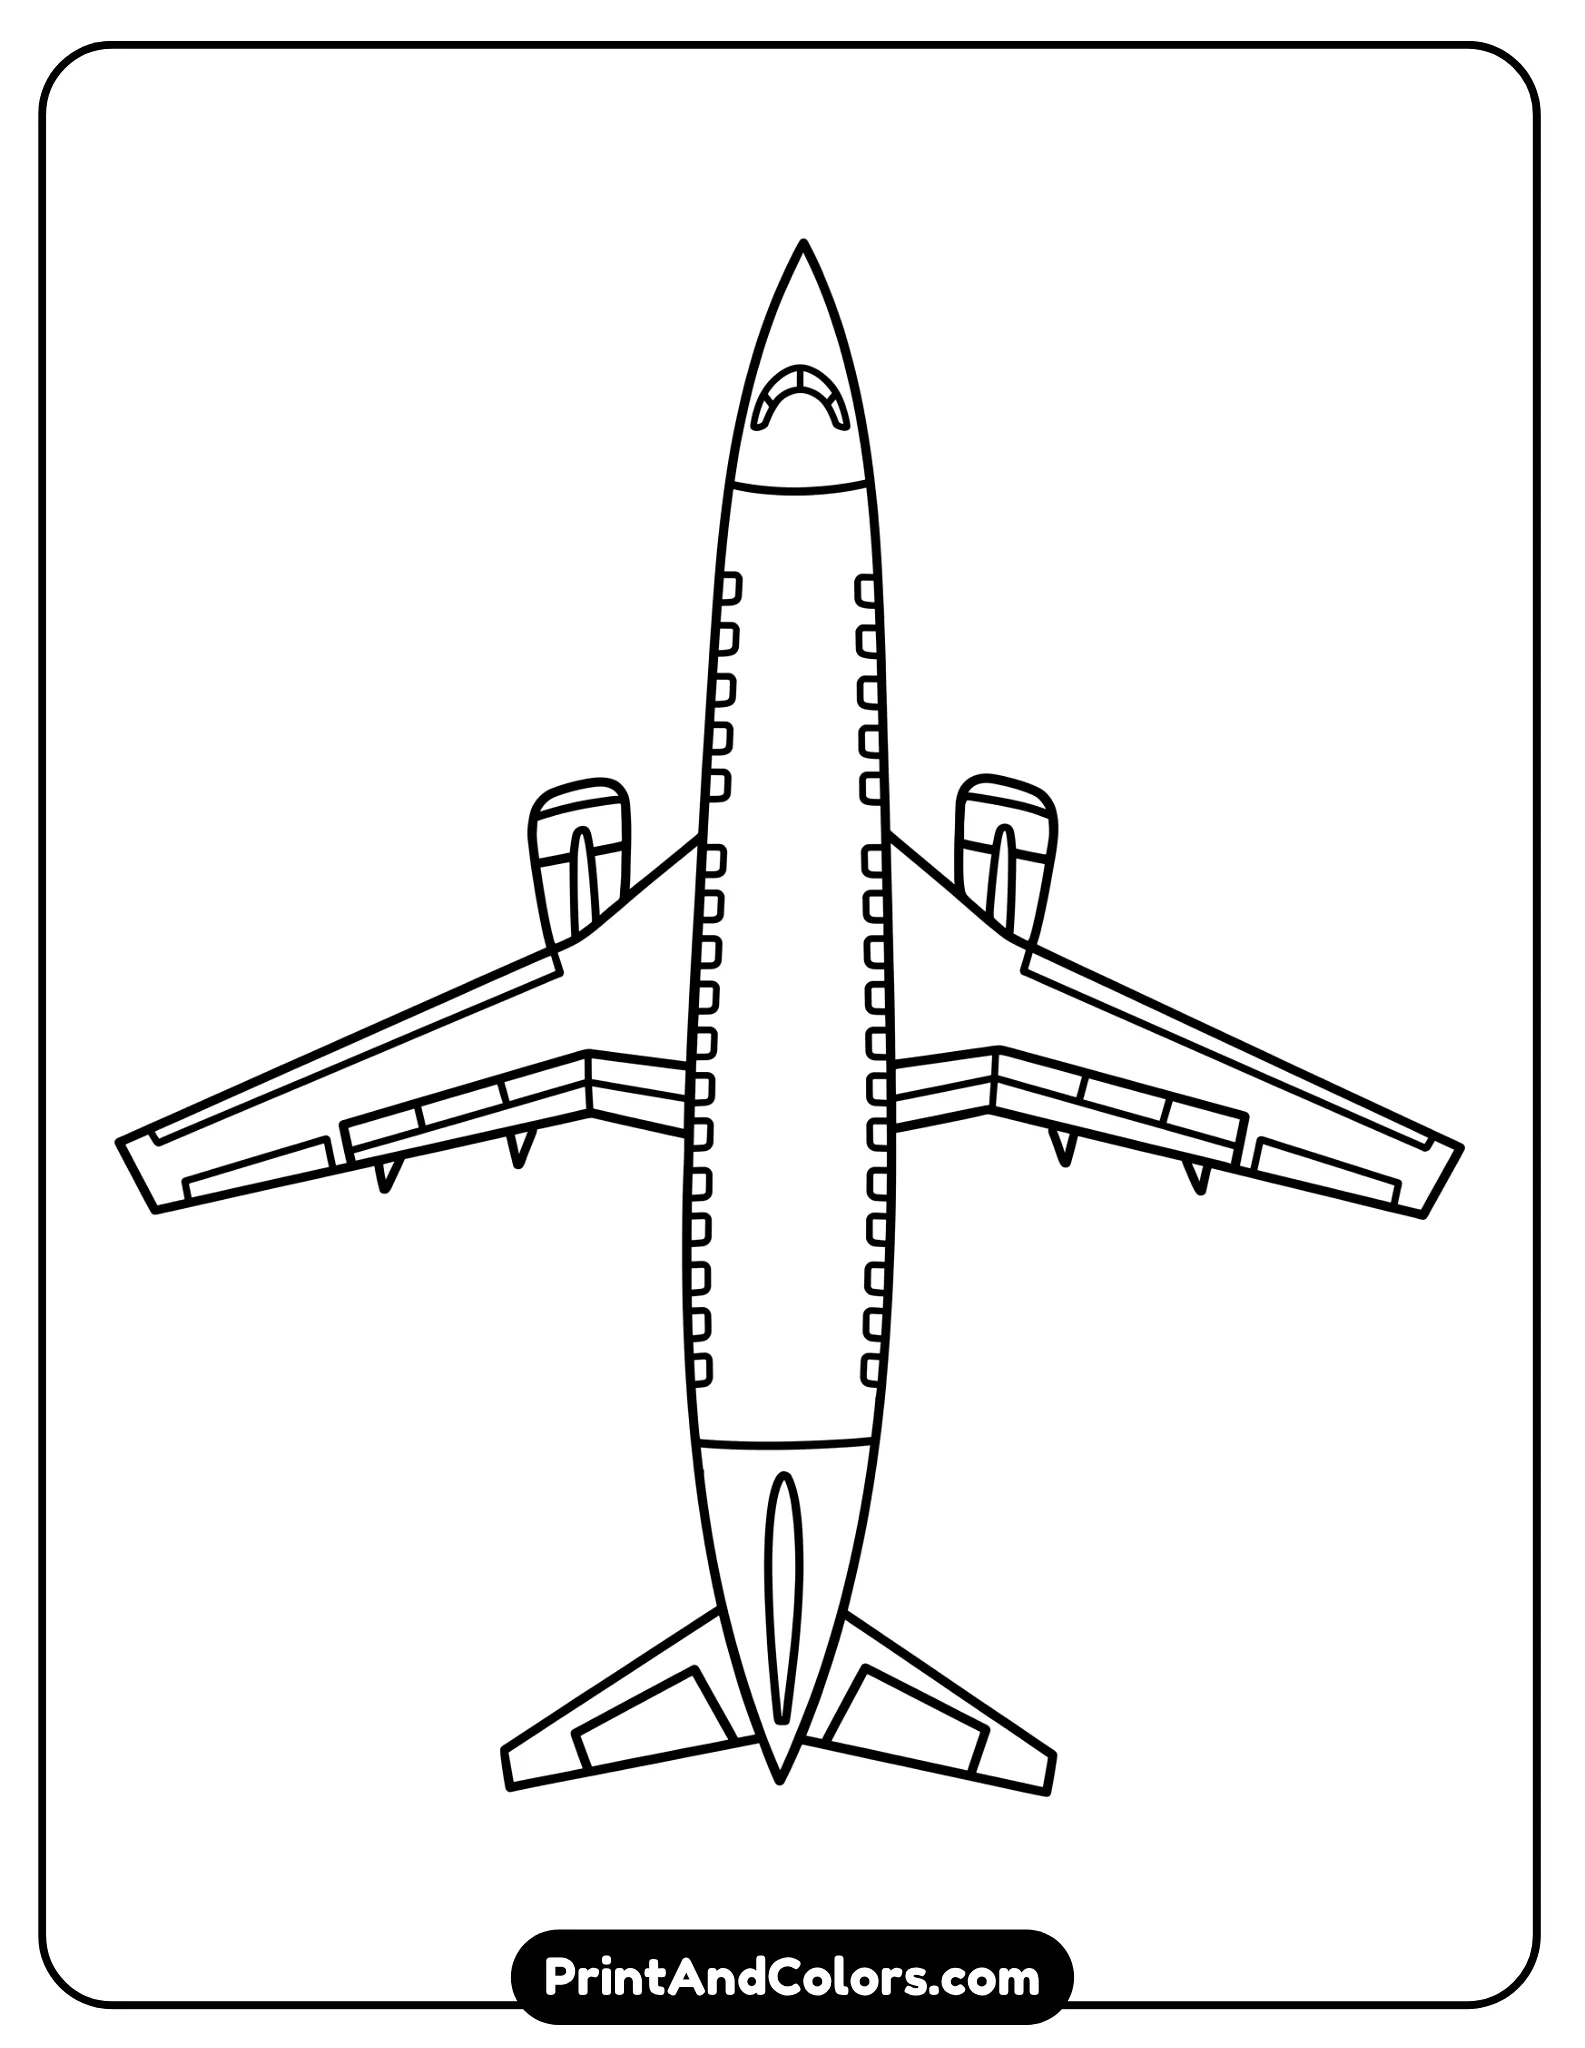
Printable Airplane Drawing PDF & Book
Printable airplane drawing worksheet showing the completed aircraft outline with its fuselage, main wings, tail wings, engines, and windows, ready to print and color.
Want to practice without looking at the screen?
We’ve put all of the airplane drawing stages together into a printable airplane drawing PDF book. The pages follow the same sequence as the tutorial, so you can print the complete activity and work through the airplane one stage at a time.
The printable version is useful for:
- Kids’ drawing practice
- Classroom art activities
- Homeschool lessons
- Transportation-themed activities
- Coloring practice
- Tracing and pencil practice
- Offline drawing time
- Parents looking for a simple printable activity
Print the pages, grab some pencils and crayons, and let young artists work through the airplane at their own pace.
FAQ:
What is the easiest way to draw an airplane?
The easiest method is to break the airplane down into simple parts. First, draw the long body (fuselage), then add the large wings and tail section, followed by the engines and windows. Starting with large shapes and moving on to smaller details makes drawing easier for children and beginners.
How do you draw a simple plane for kids?
Start with a long central section and keep the shapes large and simple. Draw two large wings, a smaller tail fin, round engines, and windows. First, make light pencil lines, then draw the final outline and color the airplane.
What should I use to color an airplane drawing?
Crayons, colored pencils, and markers, they all work great. Blue, gray, white, red, yellow, and black are popular choices, but children can use any colors they like. Creating a unique color scheme is also a fun way to give the finished airplane a personalized look.
Can I print this airplane drawing tutorial?
Yes. This printable PDF featuring airplane drawings is designed for offline practice. It compiles the drawing steps into a convenient, printable format, allowing children, parents, and teachers to follow along without needing to keep the webpage open.
Is this airplane drawing suitable for beginners?
Yes, the airplane is built up gradually, moving from large, simple shapes to smaller details. Beginners can focus on one step at a time instead of trying to recreate the entire aircraft all at once.
Final Takeoff
Your airplane is ready to fly.
You have learned how to create a complete airplane drawing by combining a simple fuselage, wings, tail, engines, and windows, and then finishing it with your favorite colors and creative details.
For the next activity, print out the airplane drawing PDF, complete each step on the paper, and turn the final outline into a colorful picture of an airplane. Once you have finished, try drawing another mode of transport and build your own collection of vehicles. You might be surprised at how much easier it feels to draw it the second time around.
Bring Every Imagination to Life
Premium Coloring Books & Instant Digital Printables
Transform your creative vision into high-quality, personalized coloring products perfect for gifts, education, or special events. Our team of illustrators crafts unique designs tailored to your exact needs.
One Comment