
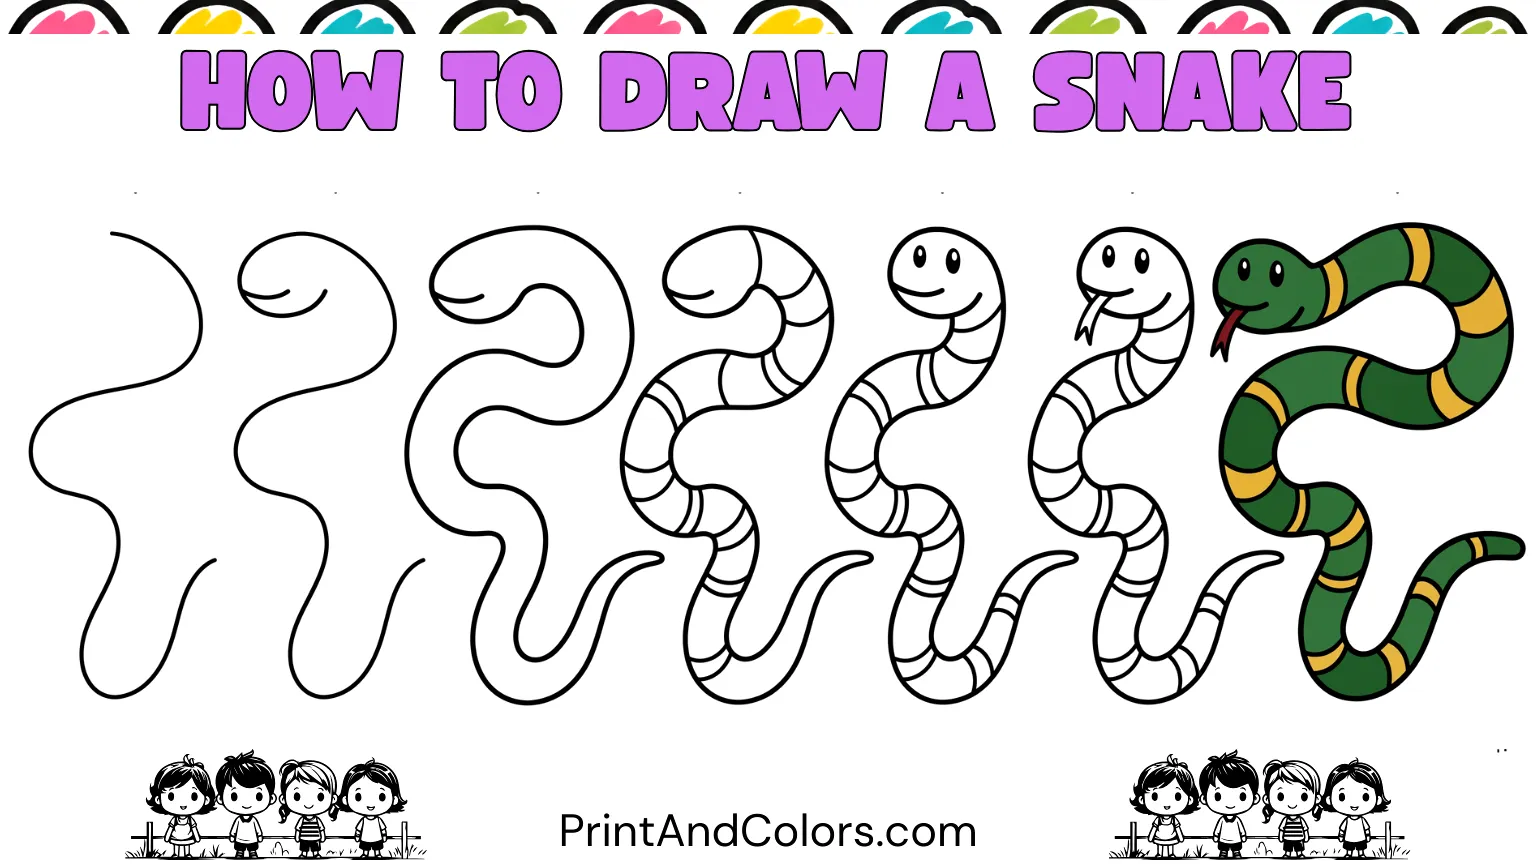
How to Draw a Snake
Learning to draw a snake isn’t difficult. The trick is to start with a smooth, flowing guideline and build the snake’s body around it, rather than trying to draw the entire animal all at once.
This easy snake-drawing tutorial is designed for children, beginners, parents, teachers, and anyone looking for a simple, printable drawing activity. You will learn how to draw the snake, including its guideline, head, curved body, patterns, eyes, and forked tongue, before finishing it off with color.
This method also works well as a snake-drawing worksheet, since only a few new lines are added at each stage. While typical drawing guides generally rely on simple curves, basic shapes, and printable practice pages, this version makes the progression particularly clear by separating the snake’s structural construction from its decorative details.
Your next masterpiece awaits—try these stunning pages!
Easy Snake Drawing Step by Step
What You Need to Draw a Snake
You only need a few basic supplies:
- Drawing paper or a printable worksheet
- Pencil
- Eraser
- Black marker or pen
- Green, yellow, brown, or other colored pencils or crayons
Start with a light pencil. The early guide line is there to help you control the shape, so there is no need to press hard.
Step 1: Draw the Snake Guide Line
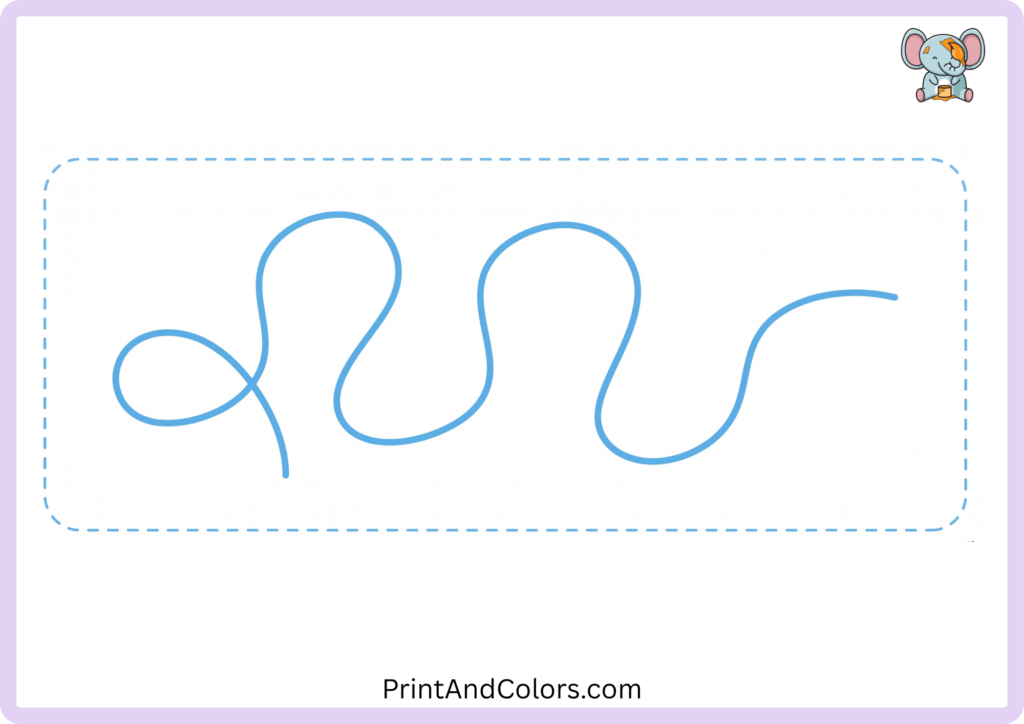
Start by drawing a long, smooth, and curved line on your page.
Think of this line as the snake’s spine. Instead of making it straight, let it curve gently from side to side so that it resembles an ‘S’ shape or a winding line.
This initial line determines how your snake will move across the page. A snake created from a fluid, curved line will look far more natural and realistic than one formed by a series of stiff, straight lines.
Drawing tip: Keep this initial line light. You will use it as a guide for your sketch, and you might want to erase parts of it later.
Step 2: Add the Snake Head Shape
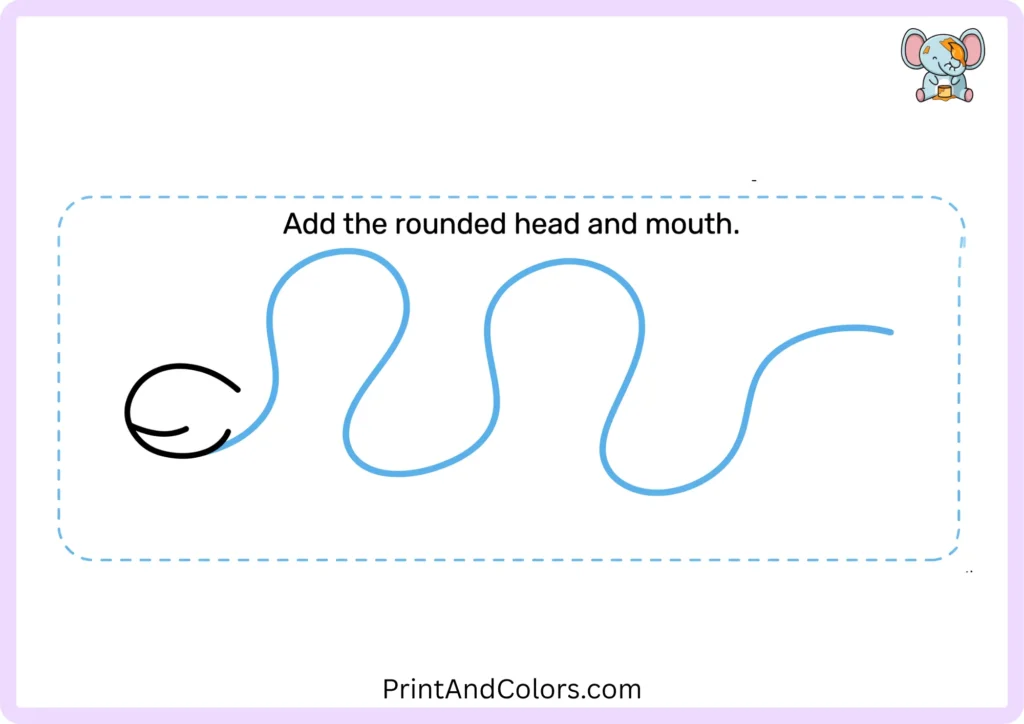
Now, draw the snake’s head at one end of your guide line.
Draw a small, round head at the end of the curved line. Keep the head noticeably small compared to the snake’s long body so that the shape remains simple and easily recognizable.
Draw a curved line inside the head to represent the mouth.
For this beginner-level drawing, you do not need complex anatomical details. A round head, a simple mouth, and eyes added later are enough to give your snake a friendly, cartoon-like appearance.
Step 3: Draw the Body Outline
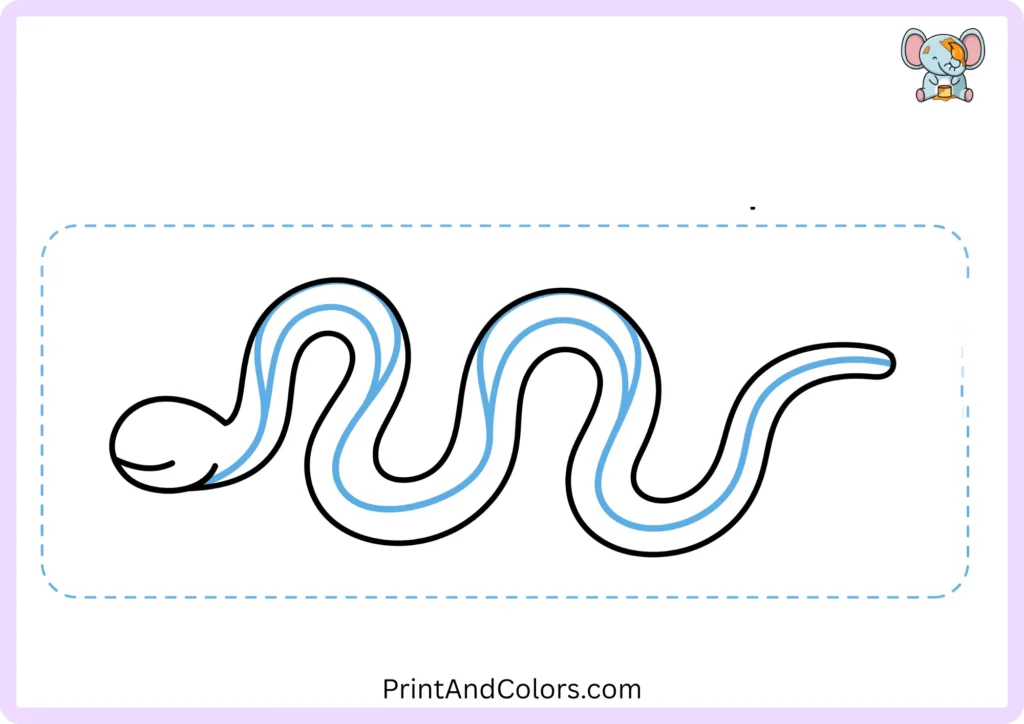
Next, shape your initial guide line into the form of the snake’s full body.
Draw another long, curved line alongside the guide line; mirror the same curves and turns, keeping the distance between the two lines relatively uniform.
As you move toward the tail, gradually taper the body until the two lines meet to form a pointed or rounded tip.
It is important to follow the flow or direction of your original guide line; if the guide line curves to the left, the body should curve to the left as well.
Once the outline is complete, you should be able to clearly recognize the snake before adding details like the face or body patterns.
Step 4: Draw the Pattern Lines
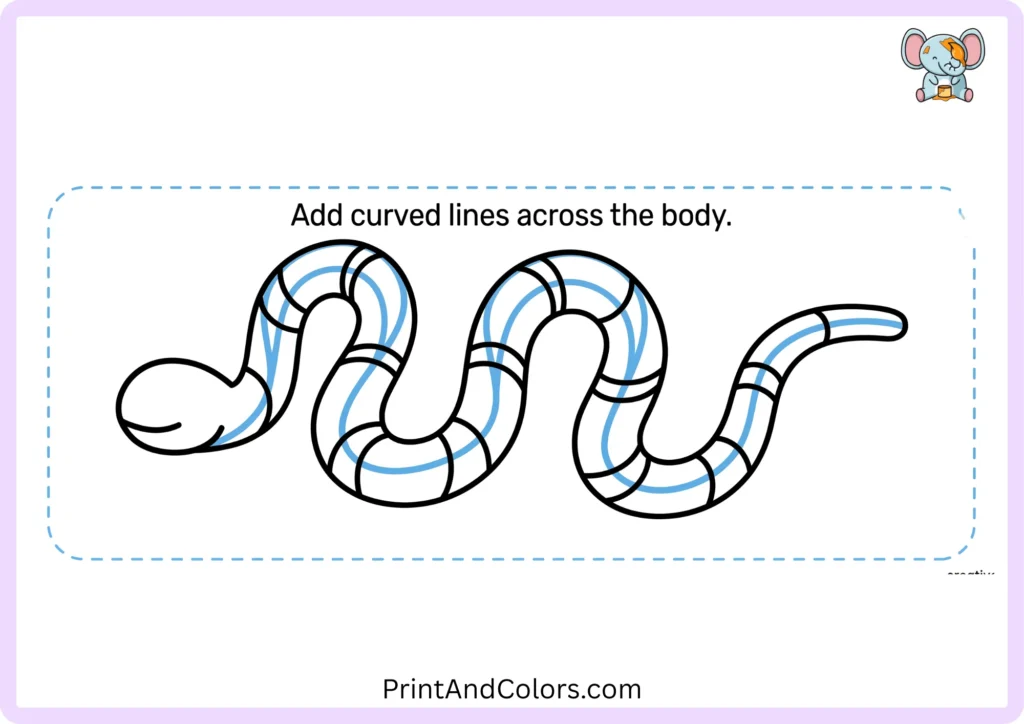
Now give your snake some character with simple pattern lines.
Draw several curved lines across sections of the body. You can make them:
- Curved stripes
- Rounded spots
- Simple bands
- Diamond-like shapes
- Wavy markings
There is no single correct snake pattern. Real snakes display an enormous variety of colors and markings, so this is a good opportunity for young artists to experiment.
For a very easy coloring-page style, use several curved bands across the body. Leave enough white space between the markings so children can color each section easily.
Step 5: Draw the Eyes
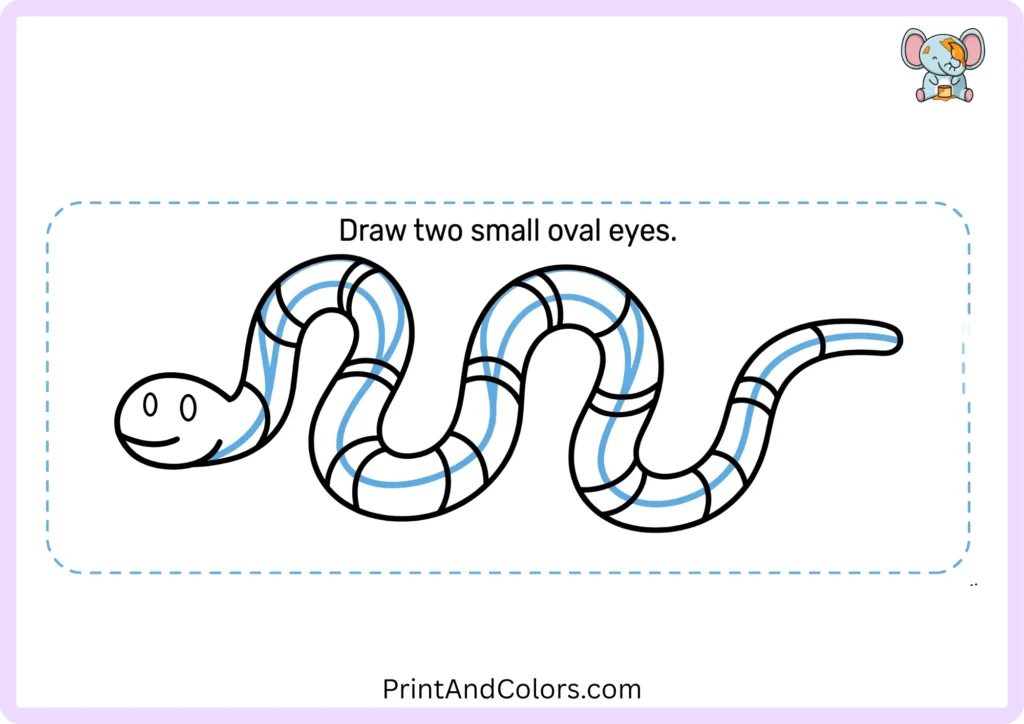
Now, let’s draw the eyes.
Draw two small oval or round eyes on the upper part of the snake’s head. Add a small black dot inside each eye to represent the pupil.
If you want to create a cute, cartoon-style snake, slightly larger eyes can make the character look friendlier. However, if you prefer a more realistic look, keep the eyes smaller and position them closer to the contours of the head.
You can also add nostrils for extra detail, though they aren’t strictly necessary for this basic sketch.
Step 6: Add the Tongue
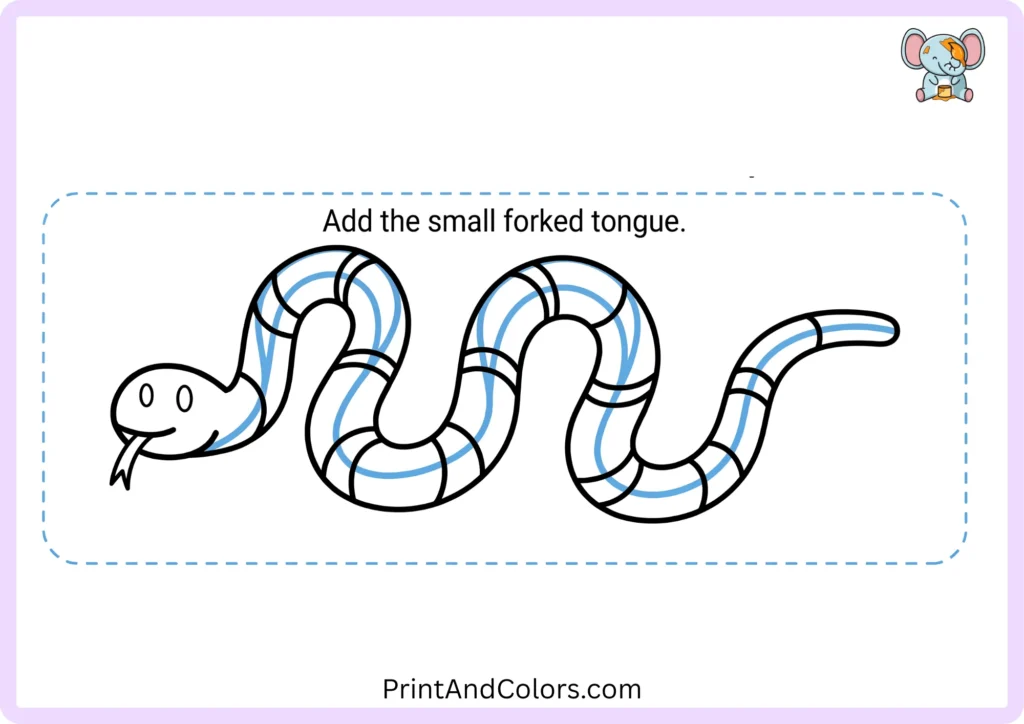
Now, add the feature that instantly makes the drawing look like a snake: its forked tongue.
Draw two thin lines extending outward from the mouth. Split the ends into a small V-shape to create the fork.
A forked tongue is more than just a fun detail in a drawing. Snakes use their tongues to gather chemical information from their surroundings and transfer those chemical signals to Jacobson’s organ, located inside the mouth.
For your drawing, however, you only need a few light, curved lines.
Step 7: Finish the Snake Details
Before coloring, look over your drawing and clean up any unnecessary construction lines.
You can:
- Erase parts of the original guide line that are still visible.
- Darken the final outline.
- Add small nostrils.
- Strengthen the mouth line.
- Add more spots or stripes.
- Give the snake a thicker belly pattern.
- Add a few scales if you want more detail.
If you’re drawing with a pencil, this is also a good time to correct the proportions. The body should flow smoothly from the head toward the tail rather than suddenly becoming wider or narrower.
Step 8: Color the Snake
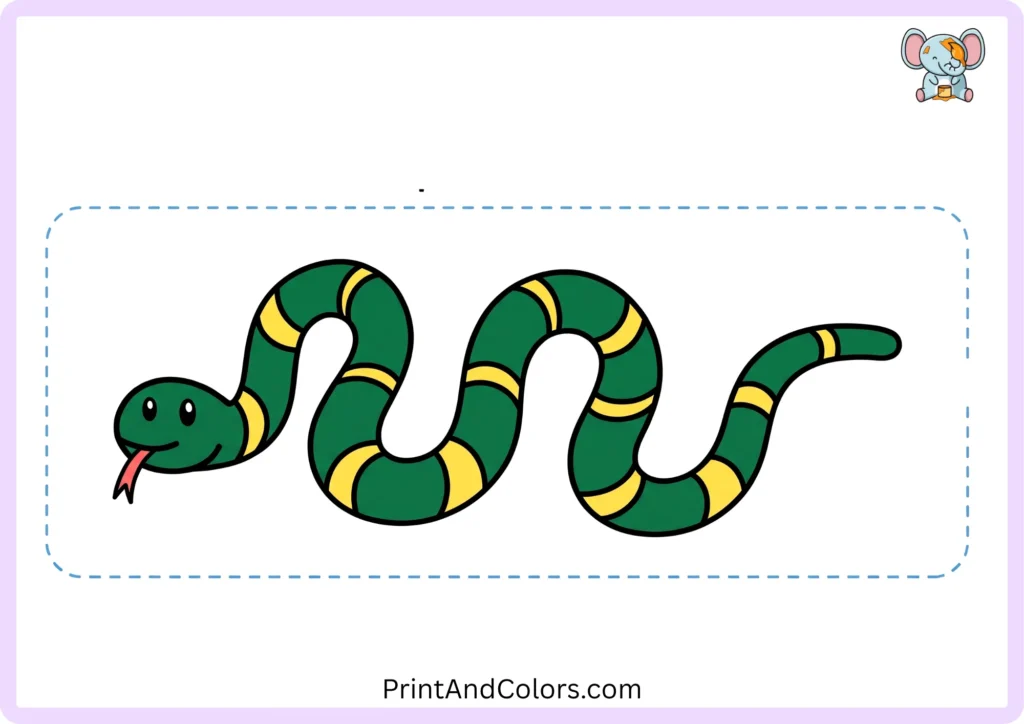
Your snake is ready for color!
A traditional green snake is a simple choice, but you don’t have to stop there. Try:
| Snake Part | Color Ideas |
|---|---|
| Body | Green, brown, yellow, orange, blue |
| Pattern | Dark green, black, brown, red |
| Eyes | Black, brown, yellow |
| Tongue | Pink or red |
| Belly | Cream, yellow, light green |
For a classroom or coloring-page activity, encourage children to create their own snake colors. The goal is not to copy one exact animal but to practice drawing the shape and then make the finished picture their own.
Printable Snake Drawing PDF/Book
Want to practice without following the screen?
Use our Printable Snake Drawing PDF as a simple reference and coloring activity. Print the finished snake outline, place it beside your drawing paper, and use the completed picture to practice the steps again. Also If you would like to access all the drawing steps at once, use the ‘printable snake drawing PDF book.’
This book consolidates the entire drawing process, from the initial guide lines to the fully colored snake, into a single, printable resource. Children can work through each page at their own pace and then use the final outline as a coloring page.
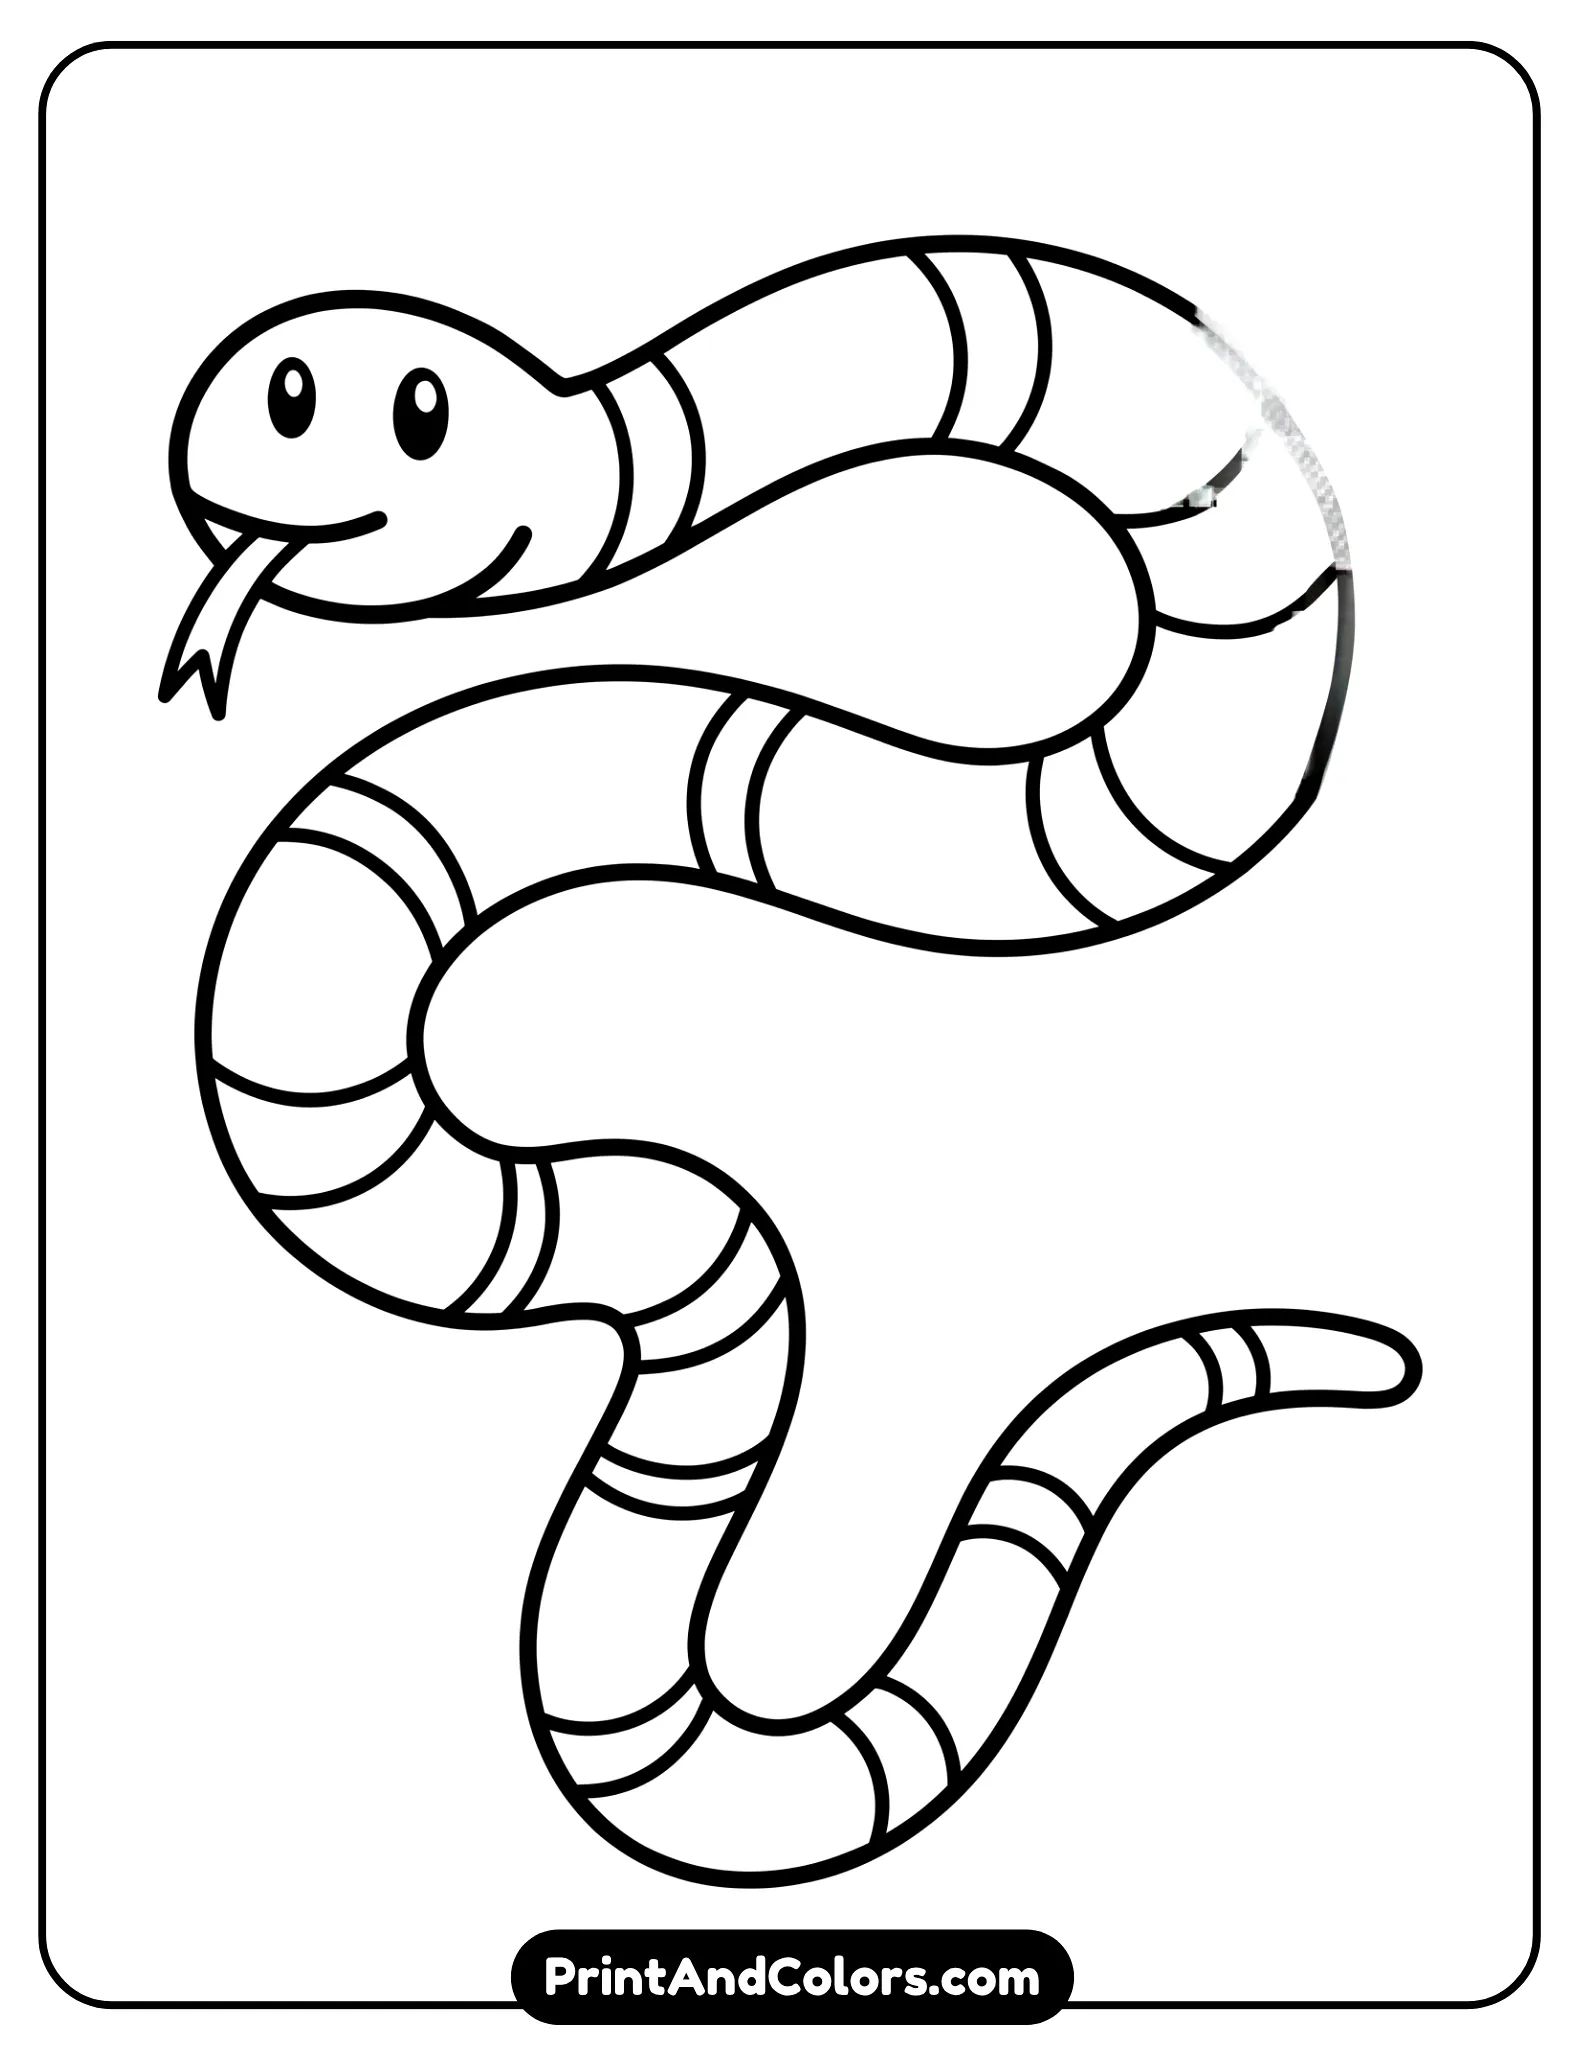
Printable Snake Drawing PDF
Finished snake coloring page showing a cute snake with a clean outline and decorative body patterns
The printable version is particularly useful for:
- Kids’ drawing practice
- Preschool and elementary activities
- Classroom art lessons
- Homeschool activities
- Snake-themed worksheets
- Coloring and tracing practice
- Quiet screen-free activities
Why the Curved Guide Line Makes Snake Drawing Easier
The hardest part of drawing a snake is usually the body. Unlike an animal with legs, a snake’s entire body creates its movement.
That’s why the guide-line method works so well.
Instead of thinking, “I need to draw a whole snake,” think:
Guide line → body width → head → details → pattern → color.
This method breaks down the drawing of a seemingly complex animal into manageable, easily definable parts. It also makes it simple to alter the snake’s pose; a tight curve can depict it coiled up, while a long, S-shaped curve can create the impression of it slithering across the page.
This same approach is used in introductory drawing lessons, where central lines and fluid curves are employed to establish the snake’s overall movement before any details are added.
Easy Ways to Change Your Snake Drawing
Once you can draw this basic snake, try changing its pose.
Draw a Coiled Snake
Make several rounded curves close together, then place the head above the coils. Coiled snakes are a useful next exercise because they teach you how to show overlapping sections of the body.
Draw a Cute Cartoon Snake
Make the eyes larger, give the snake a smiling mouth, and use bright colors. This style is especially suitable for younger children.
Draw a More Realistic Snake
Make the head narrower, reduce the size of the eyes, use more subtle patterns, and add light shading along one side of the body.
Draw a Patterned Snake
Experiment with stripes, spots, diamonds, zigzags, or repeating bands. This can turn the drawing into a fun coloring activity as well as a drawing lesson.
Frequently Asked Questions
Is drawing a snake easy for beginners?
Yes, drawing a snake can be simplified into a flowing guideline accompanied by two curved lines representing the body. Once the basic body structure is established, the head, eyes, tongue, body patterns, and colors can be added one by one. For this reason, drawing a snake is suitable for children and beginners.
How do you draw a snake step by step?
Start with a long curved guide line. Add the head shape, draw the two sides of the body around the guide line, add pattern lines, draw the eyes, add the forked tongue, clean up the outline, and finish by coloring the snake.
What colors can I use for a snake drawing?
You can use almost any colors you like. Green and brown create a familiar natural look, while yellow, orange, blue, purple, or rainbow patterns can make a fun cartoon snake. Encourage children to experiment rather than trying to match one exact color scheme.
How do you draw a cute snake?
Use a rounded head, relatively large simple eyes, a friendly curved mouth, and a small forked tongue. Keep the body smooth and use bright colors or playful patterns. A slightly exaggerated face can make the snake look more like a friendly cartoon character.
How do you draw a realistic snake?
Begin with a flowing center line and build the body around it. Pay attention to the thickness of the body, the shape of the head and tail, and the pattern of the scales. Add subtle shading and more natural markings after the main proportions are correct.
Why does a snake have a forked tongue?
Snakes use their forked tongues to collect chemical information from the environment. The tongue transfers those chemical cues to the Jacobson’s organ, helping the snake detect and investigate scents.
Your Snake Drawing Is Complete!
You have now learned a simple way to draw a snake step by step using a guide line, body outline, pattern lines, eyes, tongue, and color.
The biggest lesson is to start with the snake’s flow, not its tiny details. Once the long curved body looks right, the rest becomes much easier.
Ready to practice? Print the Snake Drawing PDF or the complete Printable Snake Drawing PDF Book, grab your pencil and colors, and draw your own slithering snake.
Bring Every Imagination to Life
Premium Coloring Books & Instant Digital Printables
Transform your creative vision into high-quality, personalized coloring products perfect for gifts, education, or special events. Our team of illustrators crafts unique designs tailored to your exact needs.
3 Comments