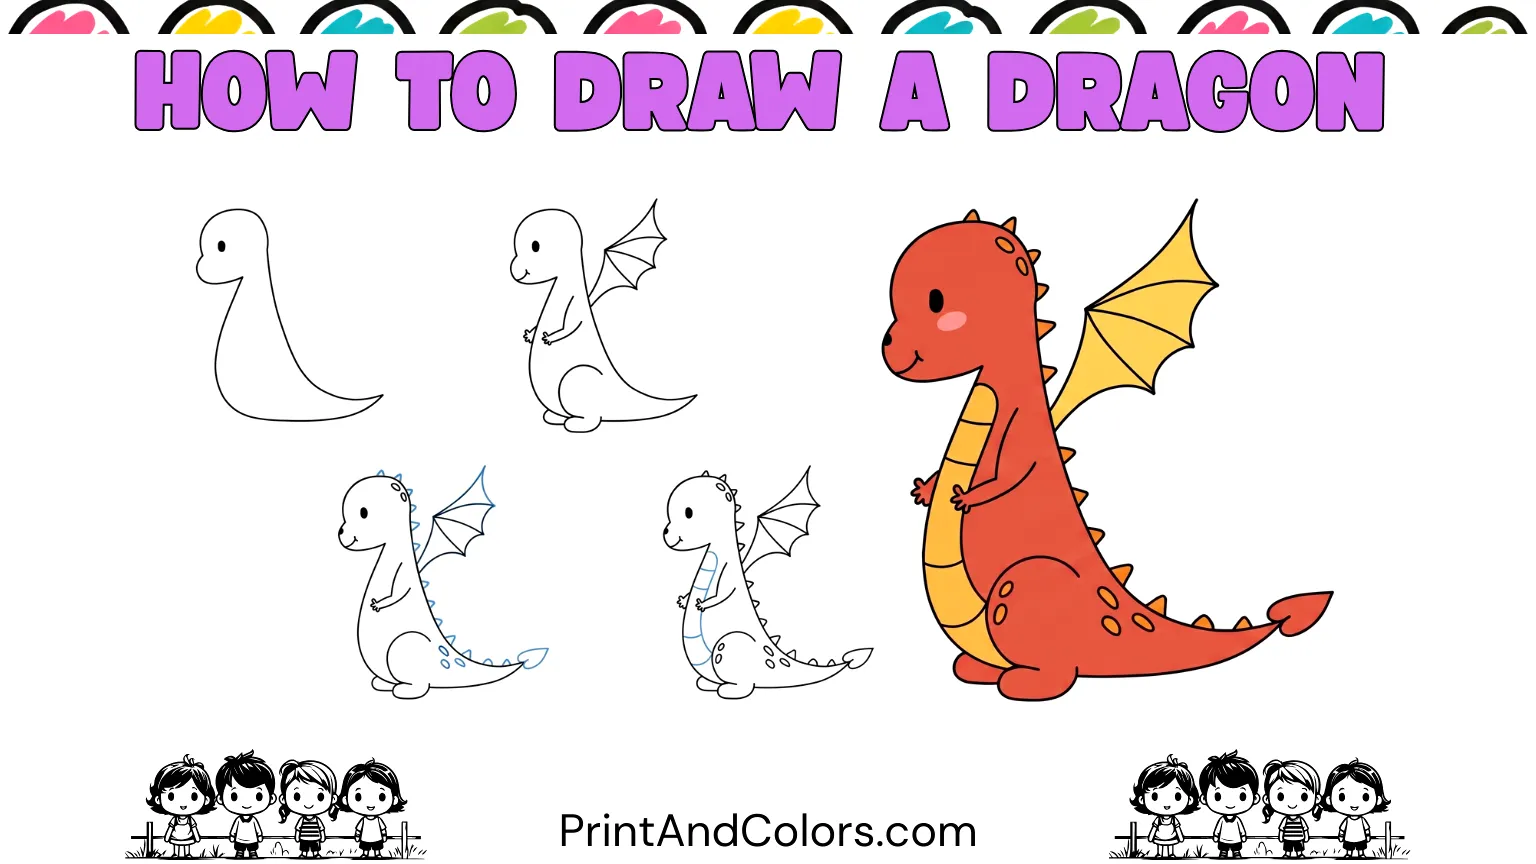
How to Draw a Dragon
Although a dragon’s structure might appear complex, you do not need to be an expert artist to create one. With the help of a few simple basic shapes, curved lines, and small details, you can craft a friendly dragon ready to be colored.
This easy method for drawing a dragon is designed especially for children, beginners, parents, teachers, and anyone interested in the fun activity of drawing fantasy creatures. You will complete the dragon step-by-step, moving from its head and body to its large wings, small claws, tail spikes, friendly face, and colorful details.
Unlike realistic dragon tutorials that may focus heavily on anatomy, scales, teeth, and shading, this lesson keeps the drawing process accessible while giving your dragon recognizable fantasy features. Existing dragon tutorials range from cute, simple characters to highly detailed, realistic creatures; this tutorial focuses on a beginner-friendly middle ground, a full-fledged dragon that looks distinctive without being difficult to draw.
Your next masterpiece awaits—try these stunning pages!
How This Dragon Drawing Works
Only a few new lines are added at each stage. If you are drawing with a child, encourage them to focus on the shape right in front of them rather than trying to make the finished dragon look absolutely perfect.
Tip: Follow the blue lines in the image for each stage (where available). These lines clearly indicate what needs to be added next.
Step 1: Build the Head with Simple Guide Shapes
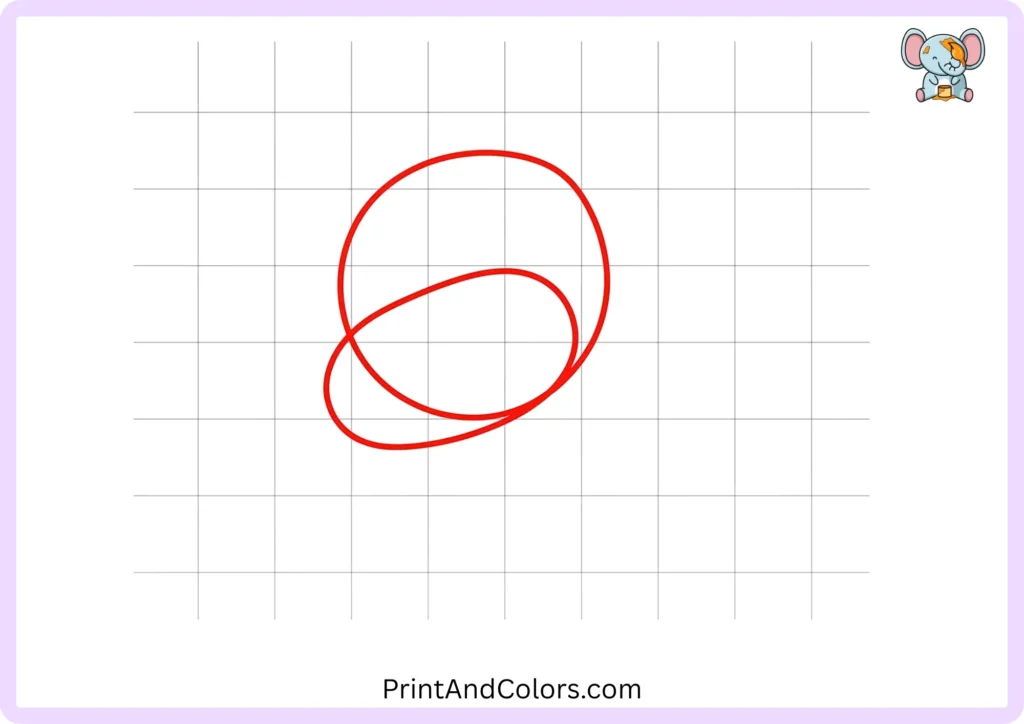
Start by drawing two light, preliminary shapes.
Draw a large circle for the top part of the dragon’s head. Then, draw a smaller, horizontal oval shape to the lower left of that circle. This second shape will form the dragon’s rounded snout.
Do not press too hard with your pencil. These shapes are merely for guidance and are not part of the final drawing.
Step 2: Shape the Dragon’s Body and Curving Tail
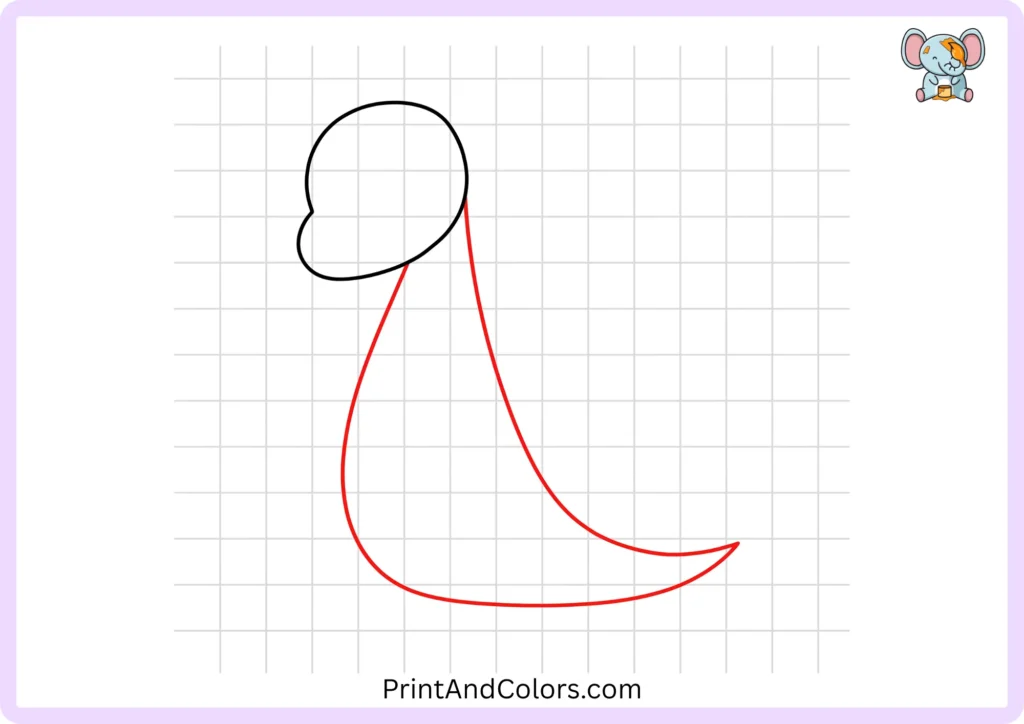
Now, transform these simple shapes into a recognizable dragon form.
Use circles and ovals to create the head and muzzle. Draw a long, curved line extending downwards from the lower part of the head to form the front of the body.
On the other side, start another long, sweeping line from the back of the head and curve it outwards to shape the dragon’s long tail.
Once the basic outline is clear, carefully erase the unnecessary guide lines from within the head.
Step 3: Give Your Dragon a Tiny Arm and Claws
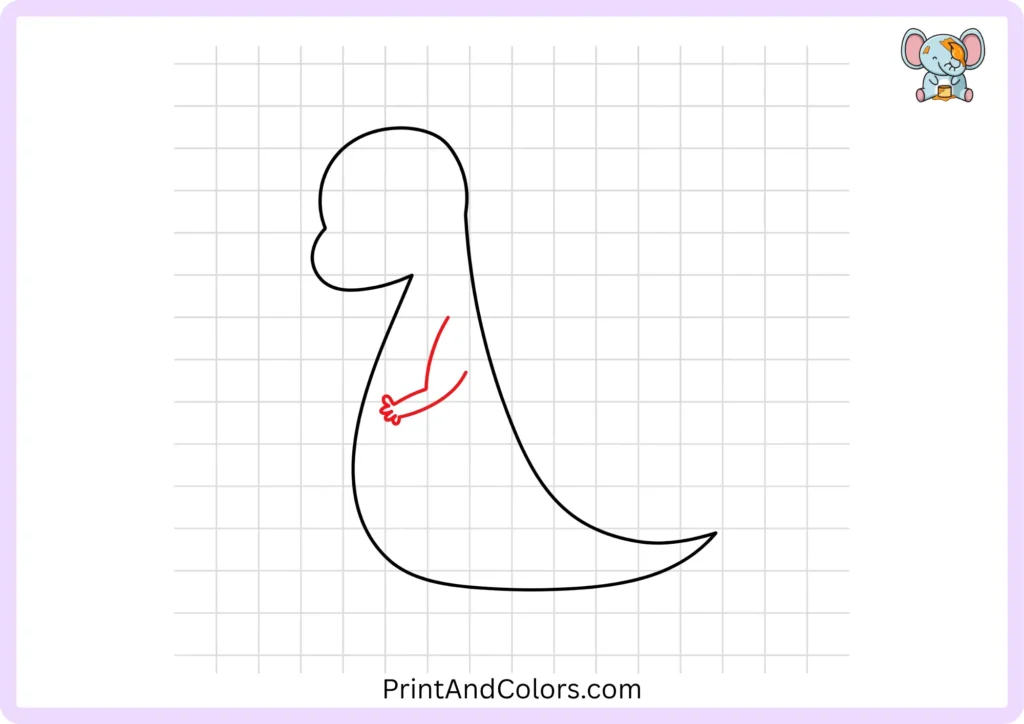
Draw a small, curved arm near the front of the body.
Add three small, curved claws at the tip. Placing the claws close together makes them easier for beginner artists to draw while also creating a compact, distinctive hand for the dragon.
If you want the dragon to look cute, you can make the claws rounded; if you want to portray it as an adventurous character, you can make the claws sharper.
Step 4: Create the Big Wing
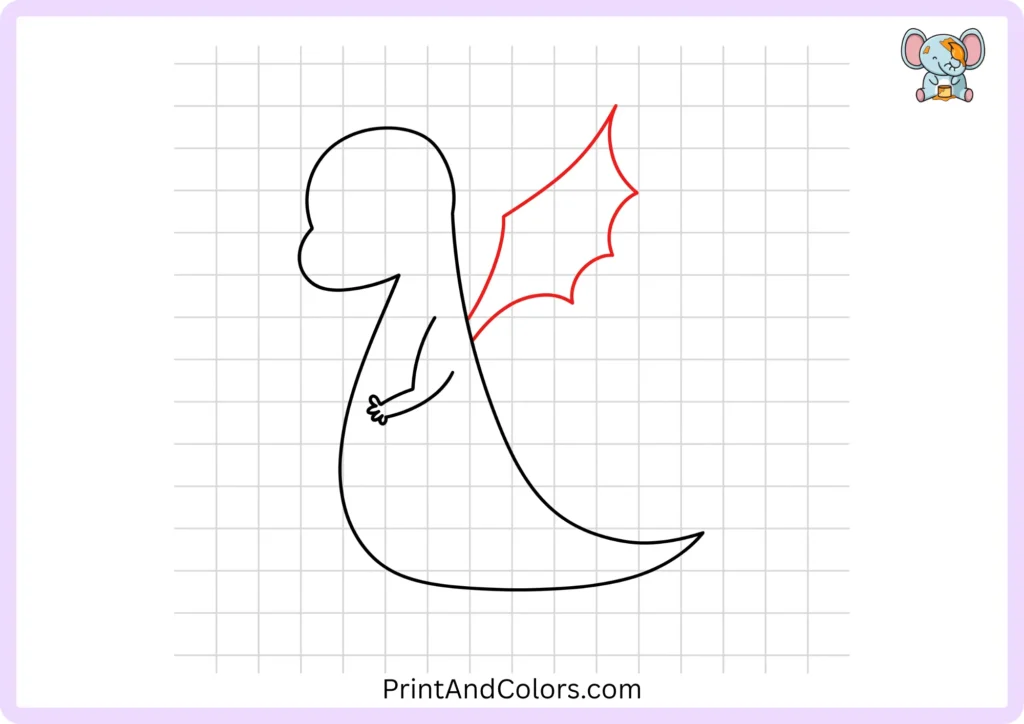
Now for one of the dragon’s most distinctive features: its wing.
Starting near the upper back, draw a large wing that rises upwards from the body. Make the top of the outer edge pointed, and incorporate a few slight inward curves as you bring the line back towards the dragon.
Don’t worry about perfect symmetry or uniformity; a slightly irregular wing can actually give the dragon a more ‘hand-drawn’ and playful look.
Step 5: Form the First Back Leg and Foot
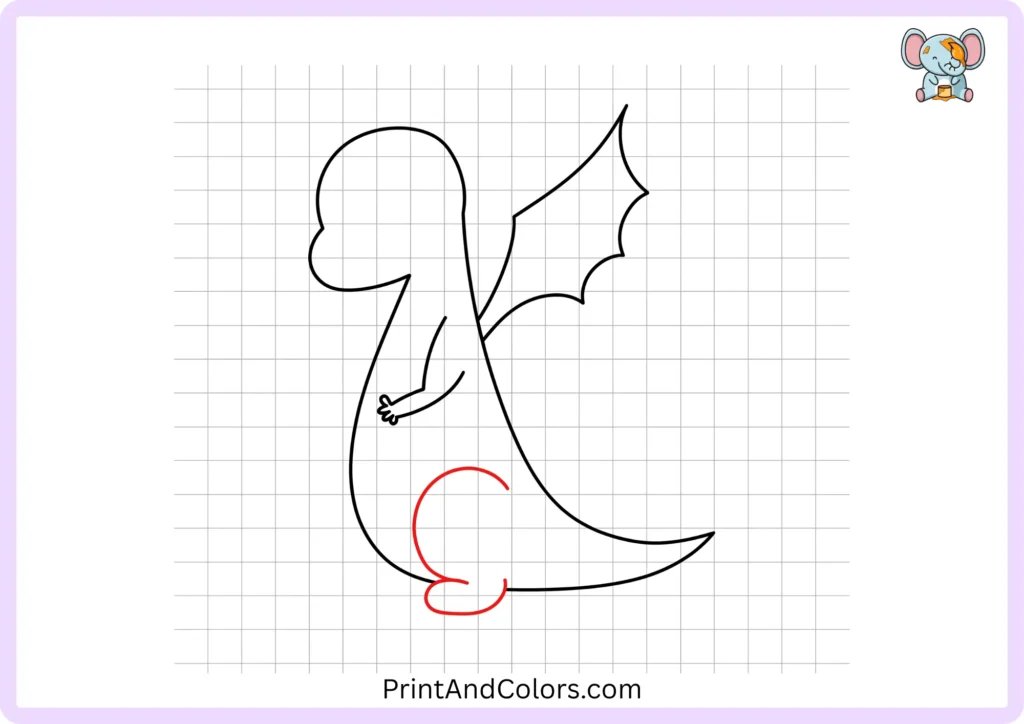
Move down to the lower part of the body.
Draw a long, curved line within the body to form the hind leg. Extend this line downwards and round it off to create a large paw.
There is no need to draw intricate details of the toes at this stage; focus on creating a neat, rounded shape that looks right beneath the dragon’s lower body.
Step 6: Tuck the Other Foot Behind It
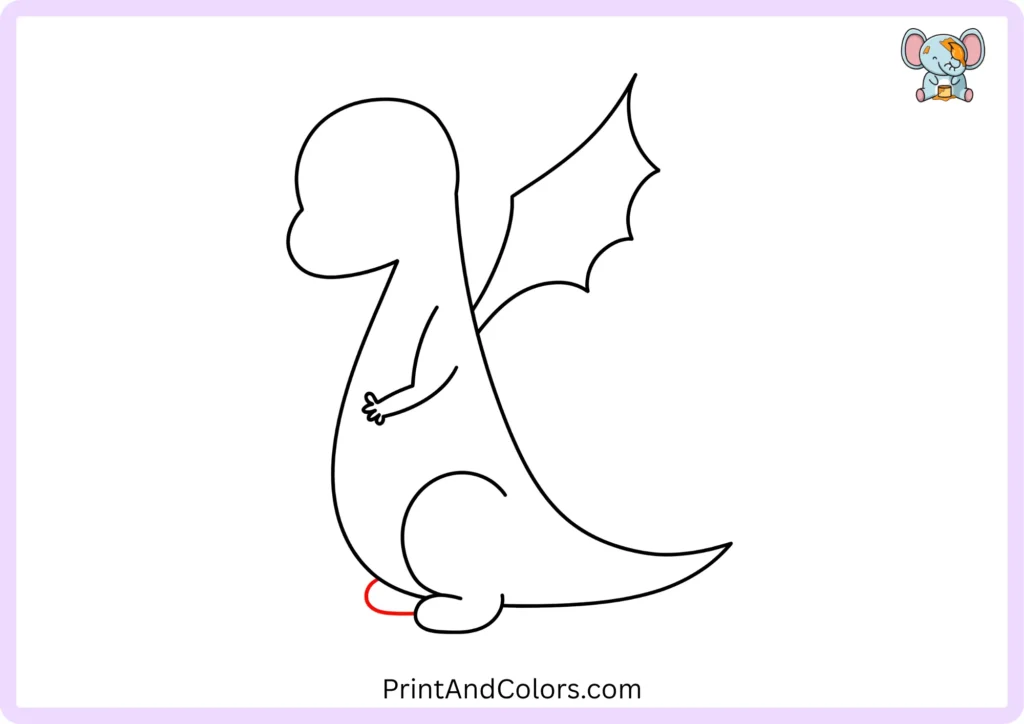
Draw the second claw behind the first one.
Since the dragon is in a sitting position, only a portion of this claw should be visible. Let the front claw slightly overlap it. This simple overlap helps create the impression that the dragon has two legs, rather than appearing as a single, flat shape.
Step 7: Add Structure Inside the Wing
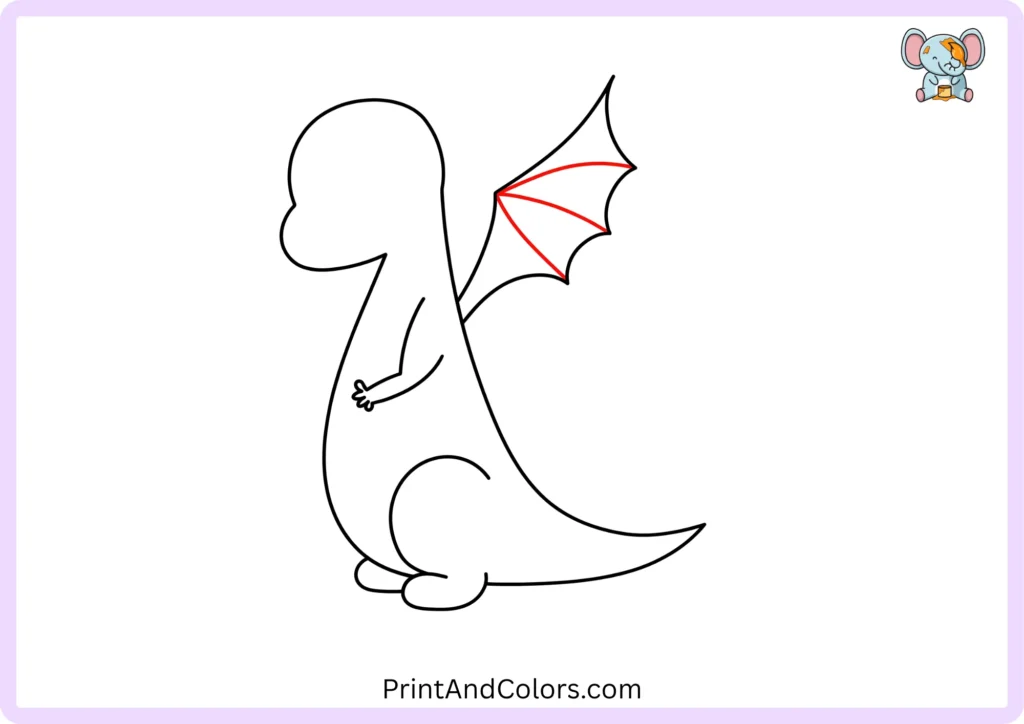
Now it is time to add some more details to the wing.
Draw a few curved lines extending from where the wing connects to the dragon’s back toward the outer edges of the wing. These lines divide the wing into sections, giving it the appearance of a flexible dragon wing.
Keep these lines smooth and spaced well apart to make coloring the drawing easier.
Step 8: Bring the Dragon’s Face to Life
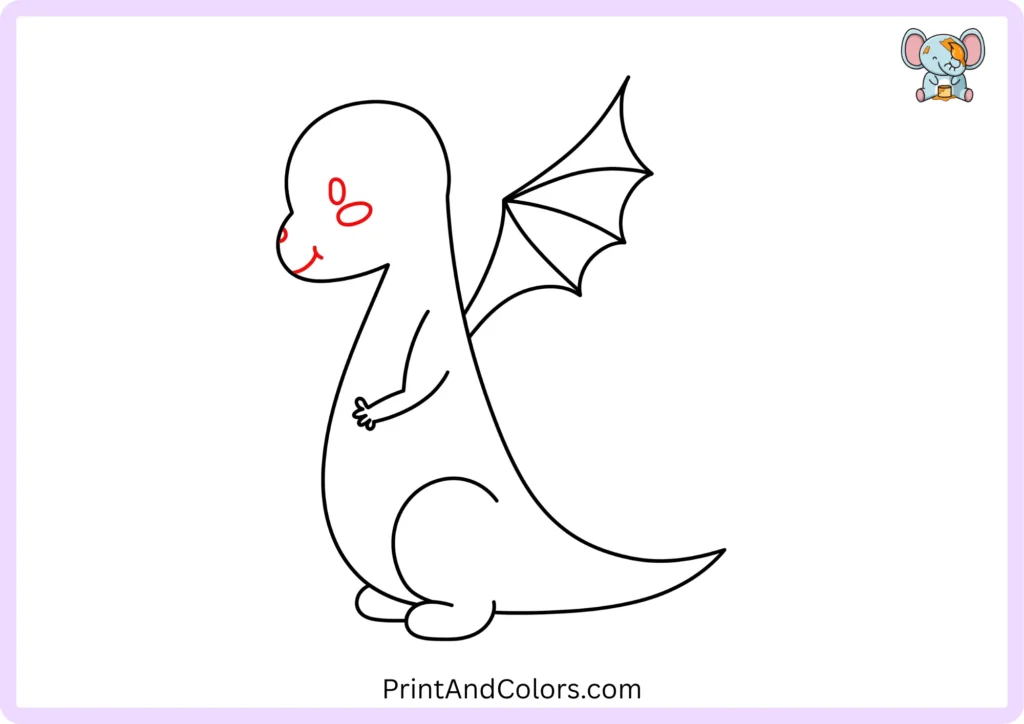
This is where your dragon gets its unique personality.
Draw a long, oval (egg-shaped) eye, and then add a small oval or curved shape on the cheek. Draw a small mark for the nostril near the front of the snout.
Finally, draw a simple curved line for a smile.
The rounded facial features give this dragon a friendly look. If you want to make it look more fearsome later, you can experiment by adding pointed eyebrows, large teeth, horns, or a wide mouth.
Step 9: Decorate the Body with Spots
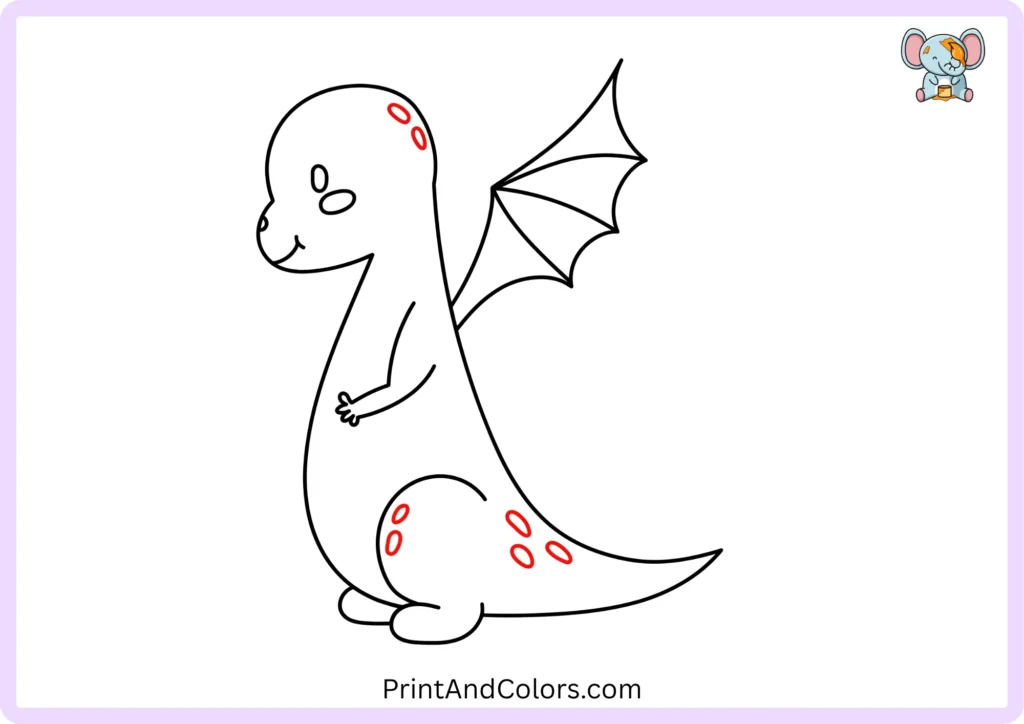
Draw a few simple oval (egg-shaped) spots on the dragon.
Try placing them on the head, hind leg, and tail. Vary the sizes of the spots rather than making them all identical.
These small markings are particularly engaging for children because there is no single specific or “correct” pattern for them. If you like, you can change the shapes to stars, circles, hearts, or anything else.
Step 10: Line the Back with Dragon Spikes
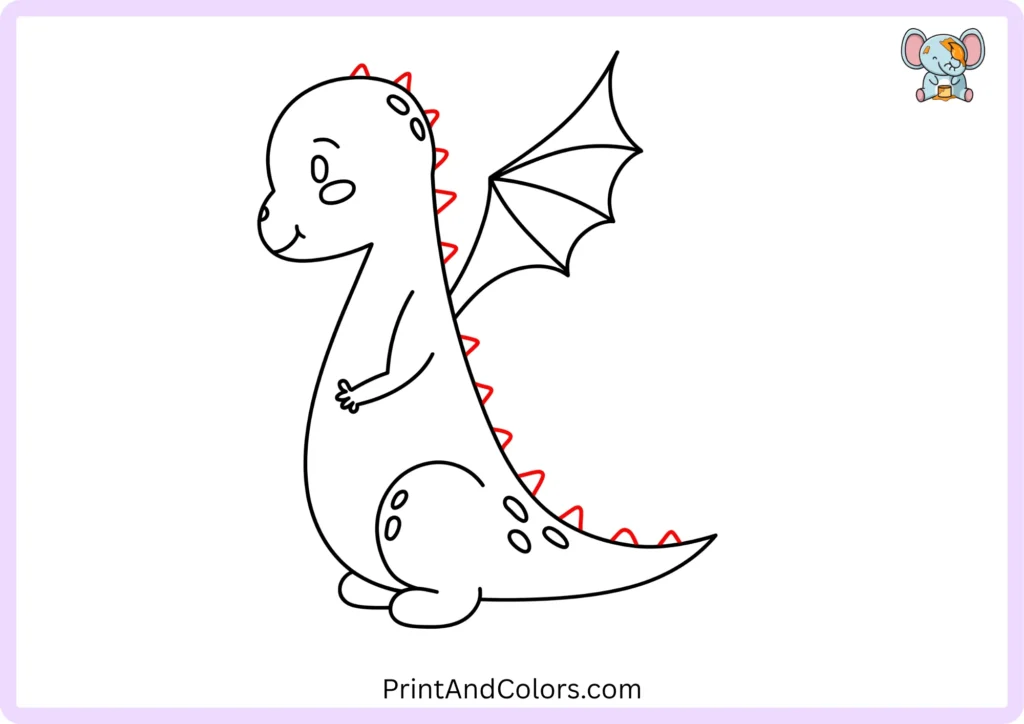
The dragon needs some spikes!
Starting from the top of the head, draw small, triangular spikes along the dragon’s back. Continue them towards the tail.
Gradually reduce the size of the spikes as you approach the tail. This creates a sense of direction for the body and prevents the tail from looking unnecessarily heavy.
Step 11: Finish the Tail with a Special Tip
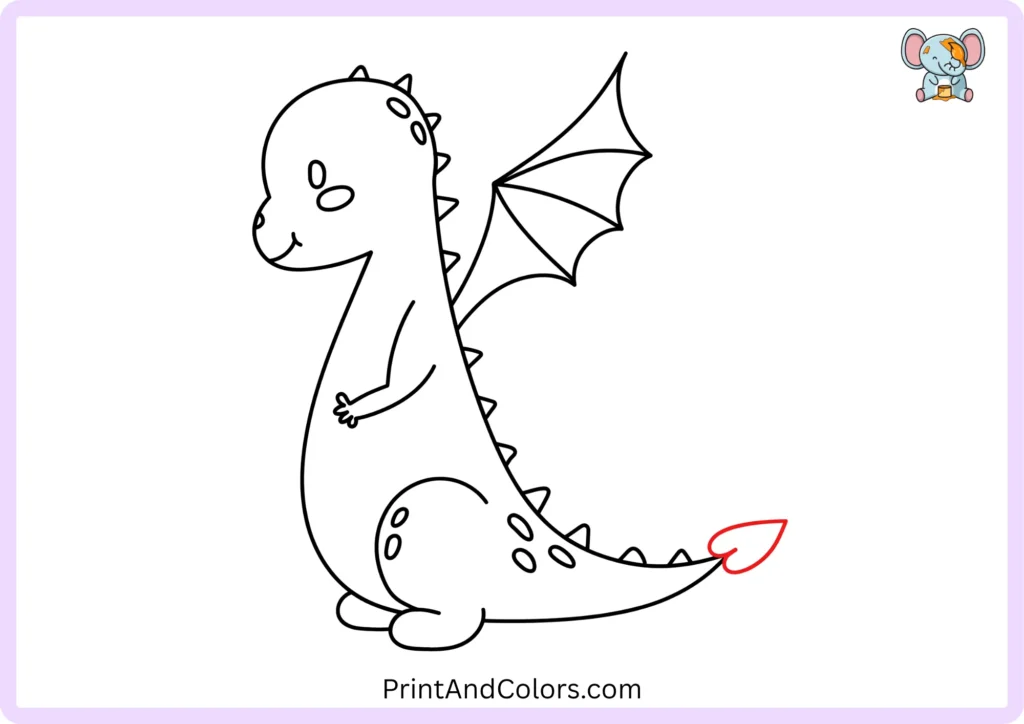
Finish the end of the long tail with a decorative tip.
For this friendly dragon, use two curved lines to create a simple, leaf-like shape. Join these lines at the far end and smoothly connect the tip to the existing tail.
Do you want to create a different kind of dragon? Then try using a diamond, arrow, flame, or spade-shaped tail tip instead.
Step 12: Define the Rounded Belly
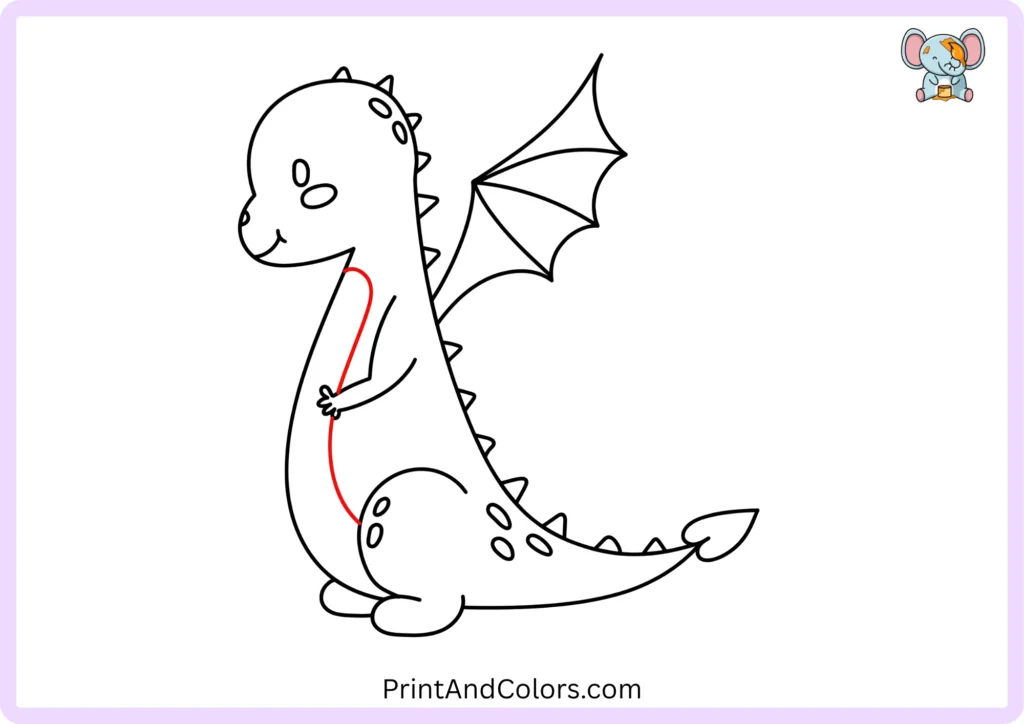
Now, draw the dragon’s belly.
Create a long, gentle curve starting below the head and extending downwards toward the front of the body. Carry this line behind the small arm and end it near the hind leg.
This line separates the belly from the rest of the body, giving the seated dragon its soft, rounded shape.
Step 13: Color Your Finished Dragon
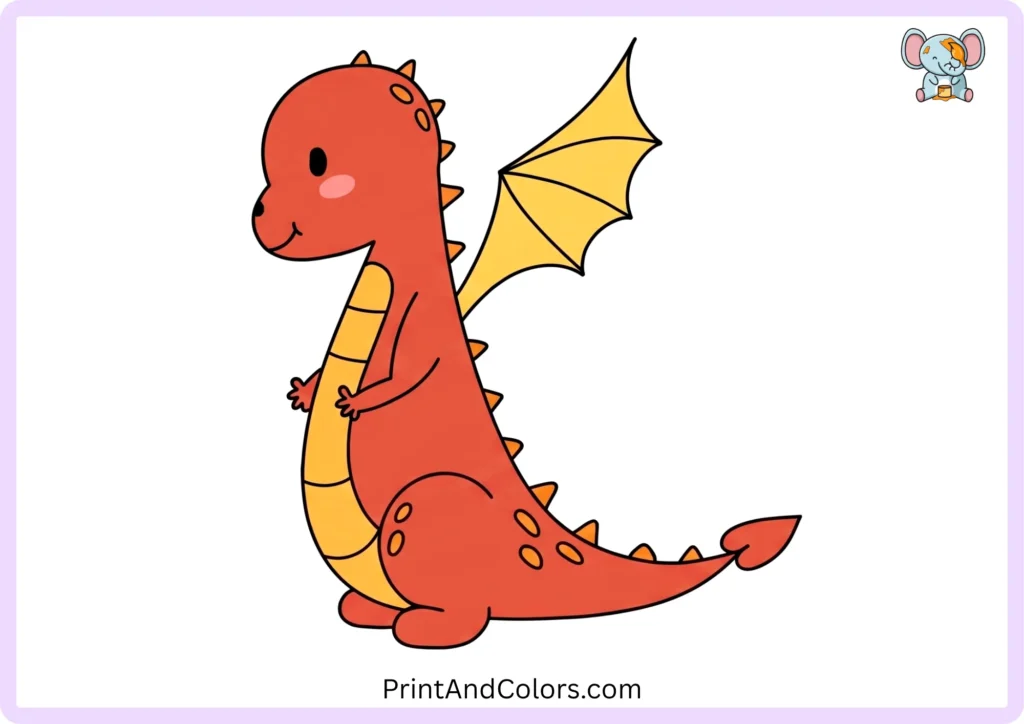
Your dragon is complete!
Now it is time to choose its colors.
You can use:
- Green for a classic friendly dragon
- Blue for a sky or water dragon
- Purple for a magical fantasy dragon
- Red or orange for a fiery dragon
- Pink for a cute storybook dragon
- Several colors for your own imaginary creature
For our example, the body can be green, with a lighter belly and wing sections, darker spots and spikes, a pink cheek, and black details for the eye and nostril.
The best part is that there is no wrong dragon color.
Printable Dragon Drawing PDF & Drawing Book
Do you want to practice drawing a dragon without keeping this webpage open?
Use the ‘Printable Dragon Drawing PDF’ to save or print this drawing activity. This printable version is designed to make it easy to follow the step-by-step instructions on paper.
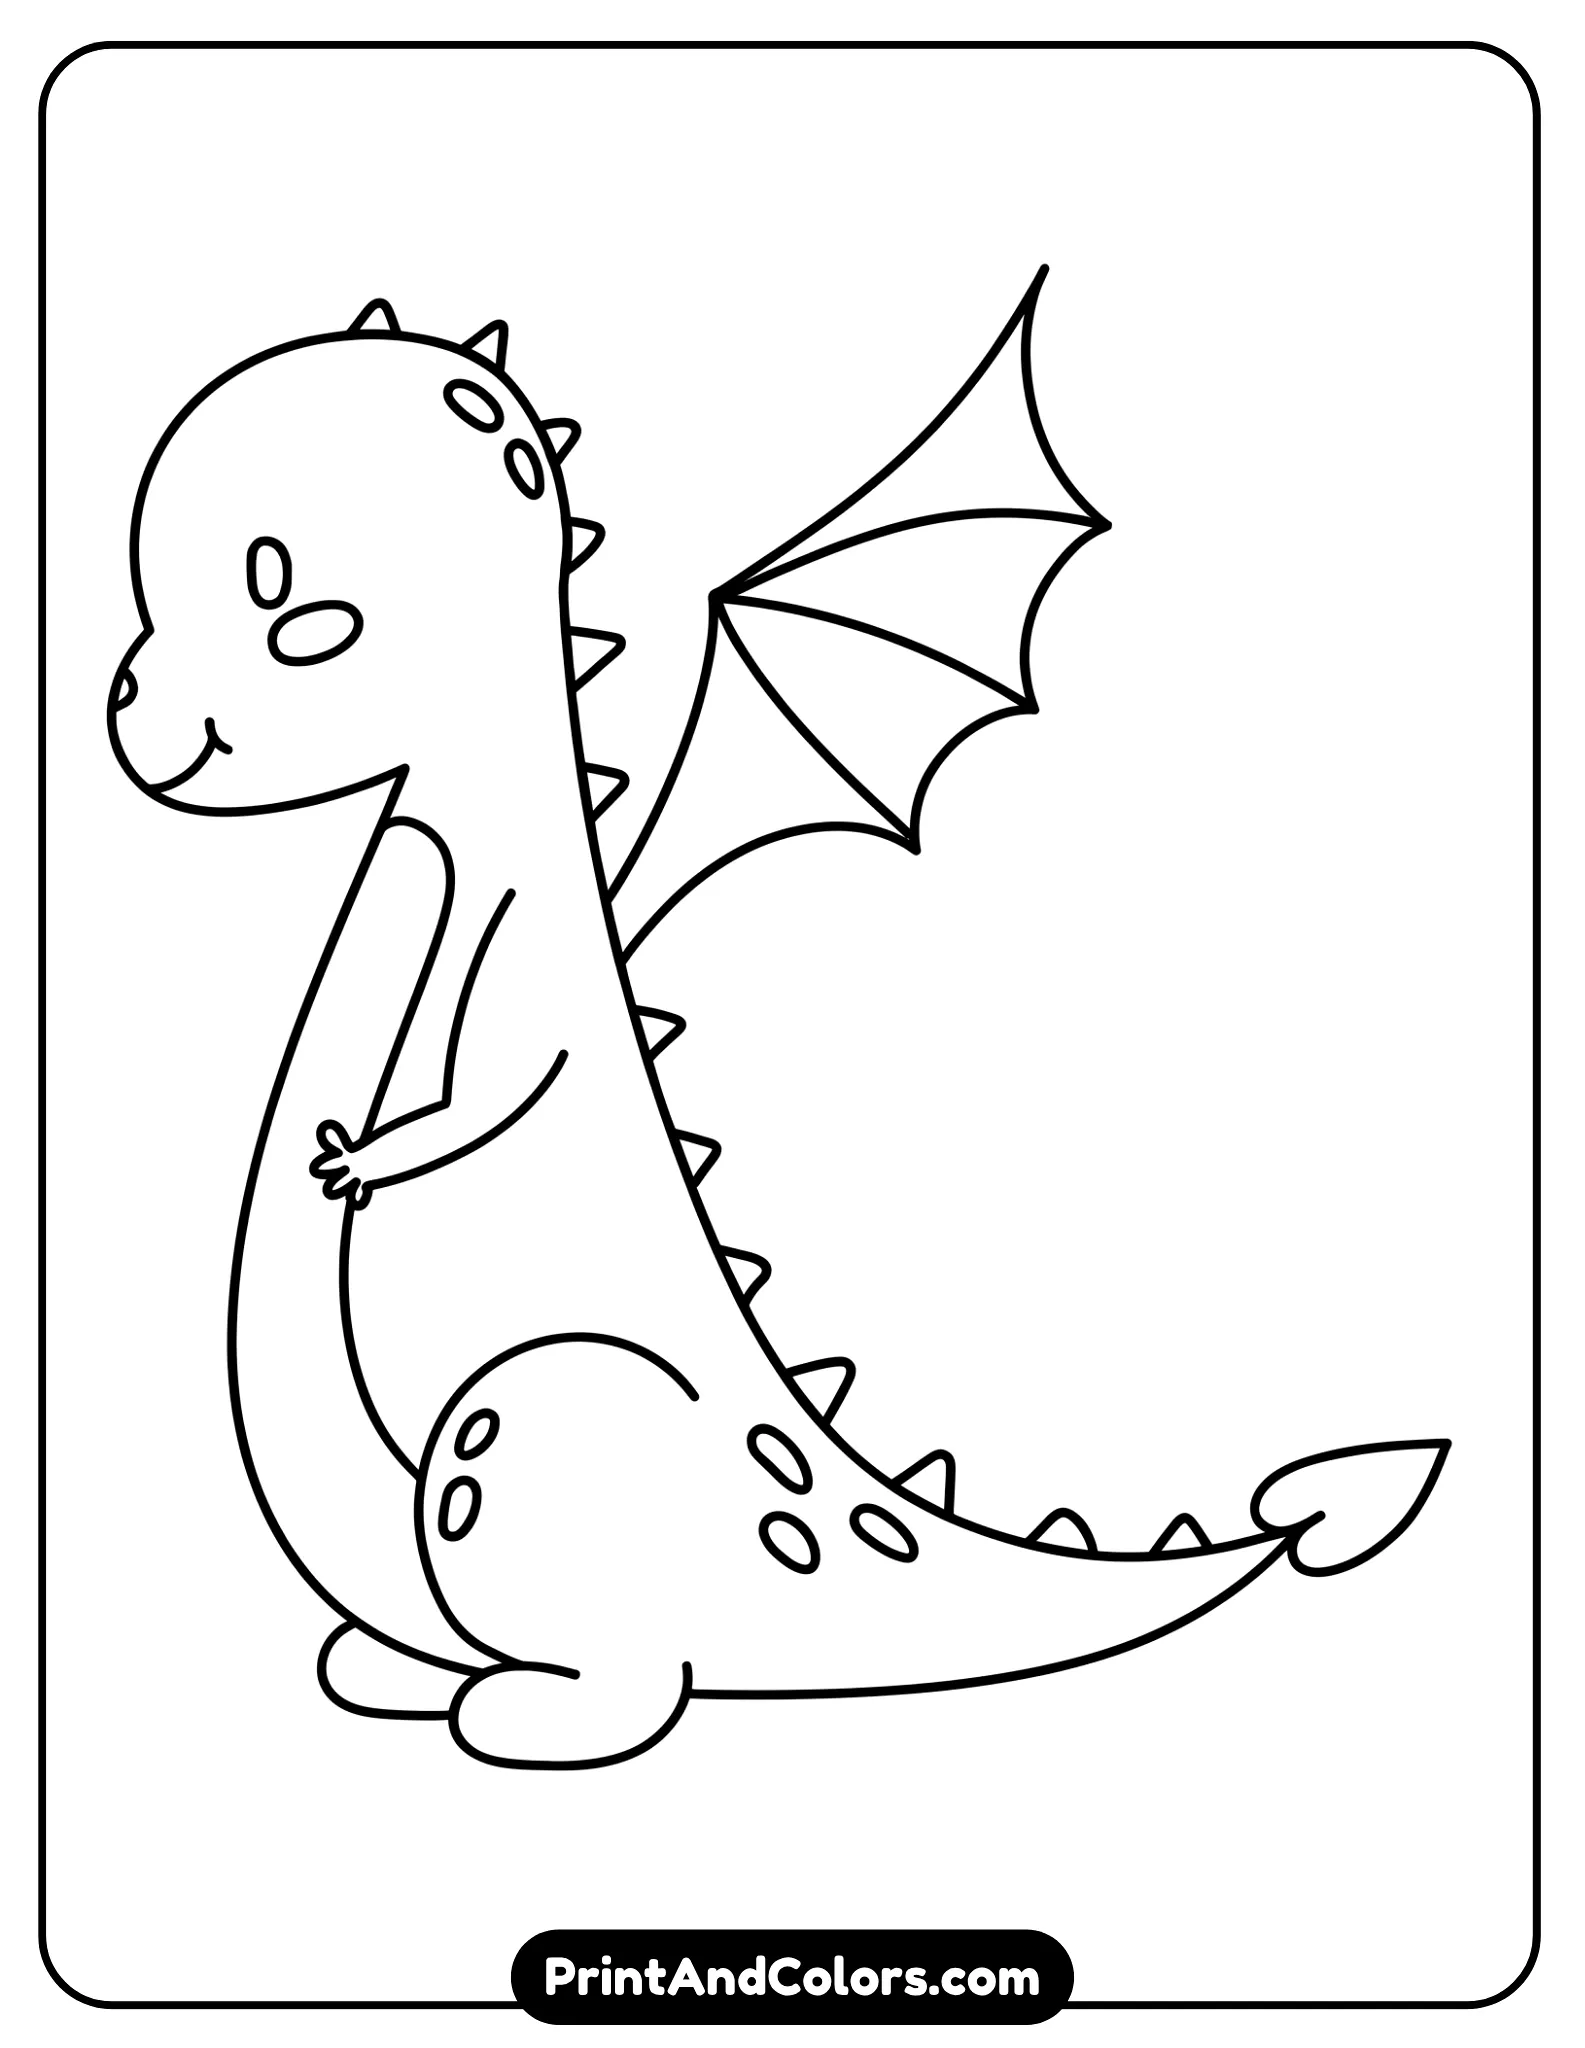
Printable Dragon Drawing PDF & Book
Printable dragon drawing outline showing the complete friendly dragon with rounded head, large wing, curved tail, claws, hind paws, back spikes, spots, and belly ready for coloring
The Printable Dragon Drawing PDF Book brings the complete drawing sequence together in one print-ready format, so children can work through the steps one page at a time.
It is useful for:
- Home drawing practice
- Classroom art activities
- Homeschool lessons
- Kids’ coloring activities
- Parent-child drawing time
- Rainy-day creative activities
After finishing this tutorial, you can also explore more Dragon Coloring Pages for another creative activity.
How to Make Your Dragon Look Different
Once you finish the basic drawing, try creating your own dragon variation.
- For a cute dragon: use large eyes, rounded cheeks, short horns, and soft claws.
- For a fierce dragon: make the eyebrows sharper, add teeth, larger horns, darker scales, and a stronger tail.
- For a flying dragon: change the sitting pose, extend the wings, and curve the body upward.
- For a baby dragon: make the head larger compared with the body and use shorter spikes and tiny wings.
You can also experiment with scales, horns, ears, teeth, flames, clouds, stars, or a fantasy landscape.
Frequently Asked Questions About Drawing a Dragon
What should I use to draw a dragon?
A pencil, paper, and eraser are sufficient to create a basic drawing. Once the sketch is complete, use crayons, colored pencils, markers, or digital coloring tools to add color.
How can I make my dragon look cute?
Use rounded shapes, large or friendly-looking eyes, a gentle smile, soft paws, and smooth curves. Avoid making any features sharp or pointed. Rounded shapes generally convey a soft and friendly character.
How do you draw realistic dragon features?
Start with the basic body structure before adding realistic details. You can then shape the head, jaw, horns, wings, claws, scales, and muscles. Creating a realistic depiction of a dragon generally requires paying close attention to anatomy, proportions, perspective, and shading.
What colors should I use for my dragon?
You can choose any color. Green is a traditional choice, but colors like blue, purple, red, orange, pink, or even a rainbow-like blend can create a unique and imaginative dragon. Try using lighter colors for the dragon’s belly and darker shades for spots or spikes.
Can I print this dragon drawing?
Yes. The printable version is designed so that you can print out the dragon drawing activity and follow the entire process away from the screen. This PDF compiles the individual steps into a format that is convenient and suitable for printing.
Your Dragon Is Ready to Fly!
You started with two simple guide shapes and ultimately created a complete, imaginative creature, featuring a round head, a friendly face, wings, claws, legs, a belly, spots, ridges along its back, and a long, curved tail.
The goal isn’t necessarily to draw a “perfect” dragon; the real objective is to learn how simple shapes can evolve into a character with a unique personality.
Now, pick up your pencil, choose your favorite colors, and create your own version of a dragon. Print out the dragon drawing PDF, follow the steps provided, and see what kind of dragon you can create.
Bring Every Imagination to Life
Premium Coloring Books & Instant Digital Printables
Transform your creative vision into high-quality, personalized coloring products perfect for gifts, education, or special events. Our team of illustrators crafts unique designs tailored to your exact needs.