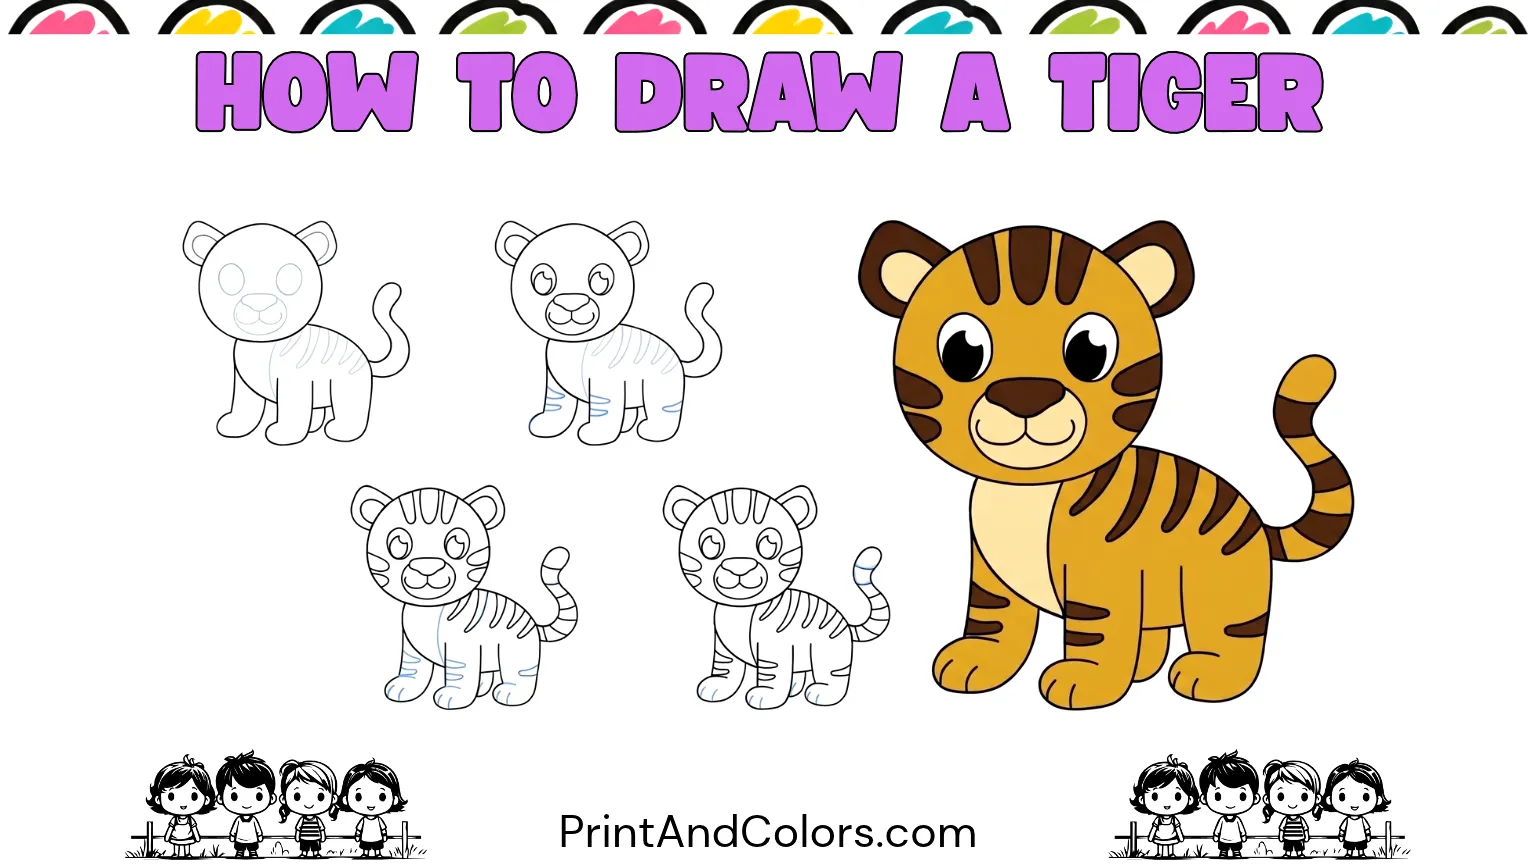
How to Draw a Tiger
Do you want to learn how to draw a tiger but aren’t sure where to start? You’ve come to the right place! With just a few circles, curved lines, and striking stripes, you can transform a blank sheet of paper into a picture of an adorable tiger.
Tigers are a magnificent type of wild cat, known for their orange fur, powerful paws, and beautiful black stripes. Although real tigers might look complex to draw, creating a friendly, cartoon-style version is much easier than you might think!
In this easy-to-follow tutorial on how to draw a lion, we will guide you through simple steps, from sketching the head and body to adding the face, tail, and stripes. It is perfect for children, beginners, classroom art projects, or anyone who enjoys drawing animals.
What’s more, once your lion is complete, you can use our printable lion-drawing PDF, a resource that allows you to practice the entire lesson whenever you like!
Your next masterpiece awaits—try these stunning pages!
What You’ll Need to Draw a Tiger
You don’t need expensive art supplies to get started. Just gather a few everyday materials:
- Drawing paper or a sketchbook
- HB pencil for light outlines
- Eraser for correcting shapes
- Black marker for tracing
- Orange, black, brown, and cream-colored crayons or pencils
Quick tip: Sketch lightly at first. That way, you can erase overlapping lines without leaving marks on your paper.
Step 1: Start With Two Simple Shapes for the Tiger’s Head and Body
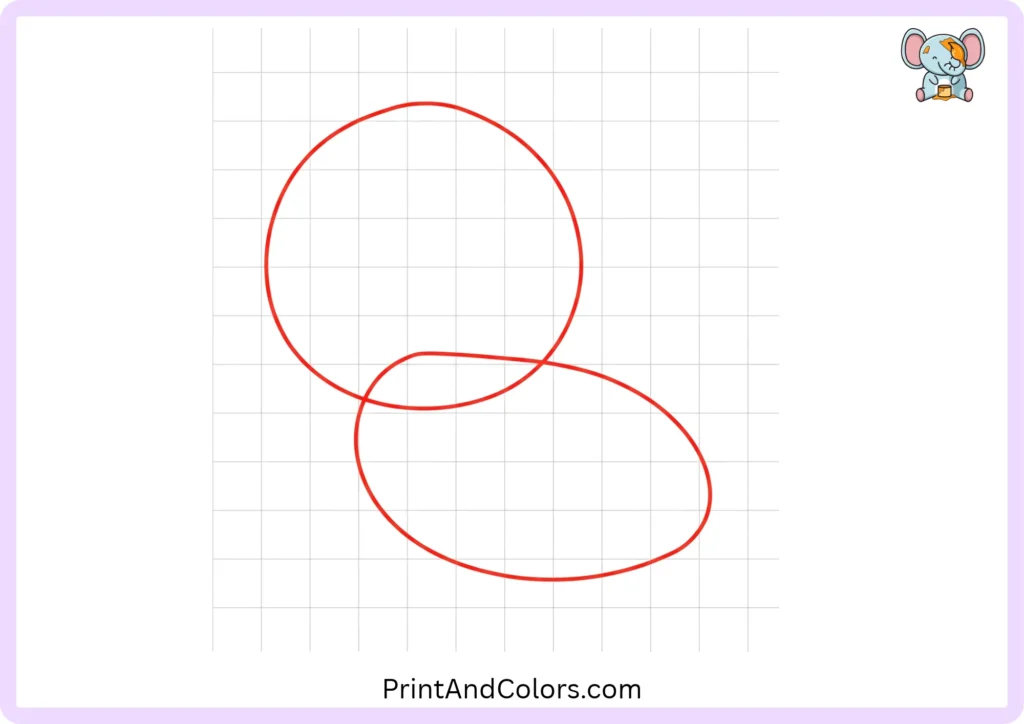
First, draw a large circle on the top-left side of your paper. This will be the lion’s head.
Next, draw a long, slightly tilted oval extending toward the right side. Allow these two shapes to overlap slightly at the point where the neck connects to the body.
Keep your pencil marks light, as these are initial guidelines.
Step 2: Give Your Tiger Four Sturdy Legs and Rounded Feet

Now it’s time to get your lion standing!
Draw four short legs beneath its oval (egg-shaped) body. Position the front and back legs so they are clearly visible, while placing the other two legs slightly further back.
Add a soft, rounded paw to the end of each leg. Think of these paws not as having sharp, pointed corners, but rather as small, soft cushions.
Step 3: Shape the Back Leg for a More Natural Look
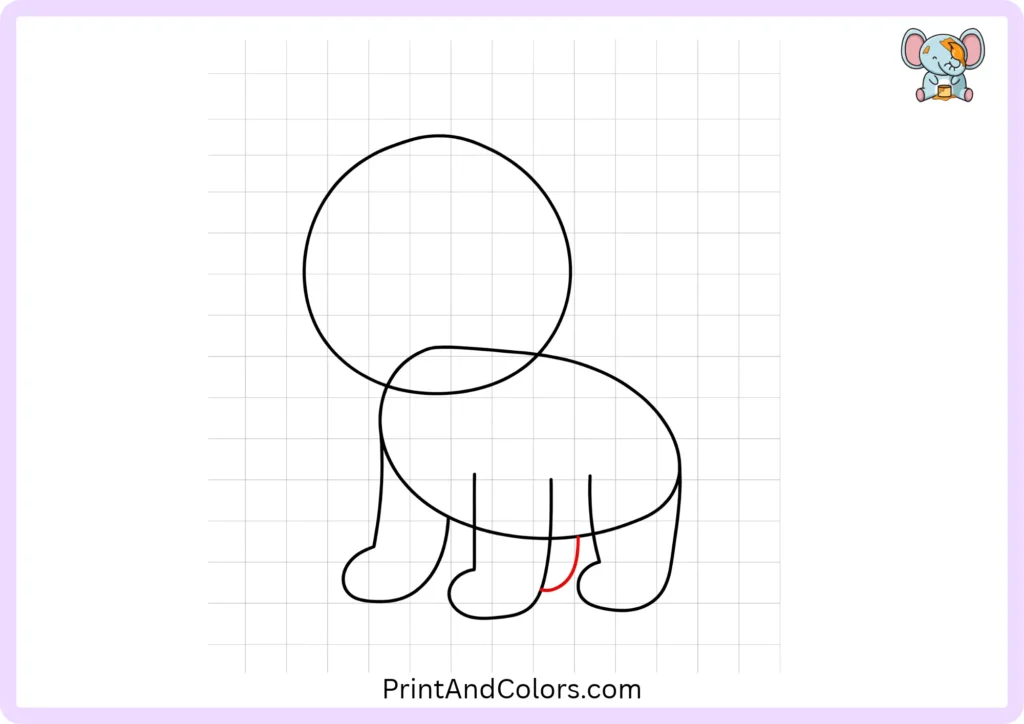
Look at the hind leg tucked beneath the tiger’s belly.
Draw a small, curved line within this area to distinguish the hind legs and add depth to the drawing.
This small detail makes it easy to identify which leg is closer to you.
Step 4: Sketch a Long, Playfully Curved Tiger Tail
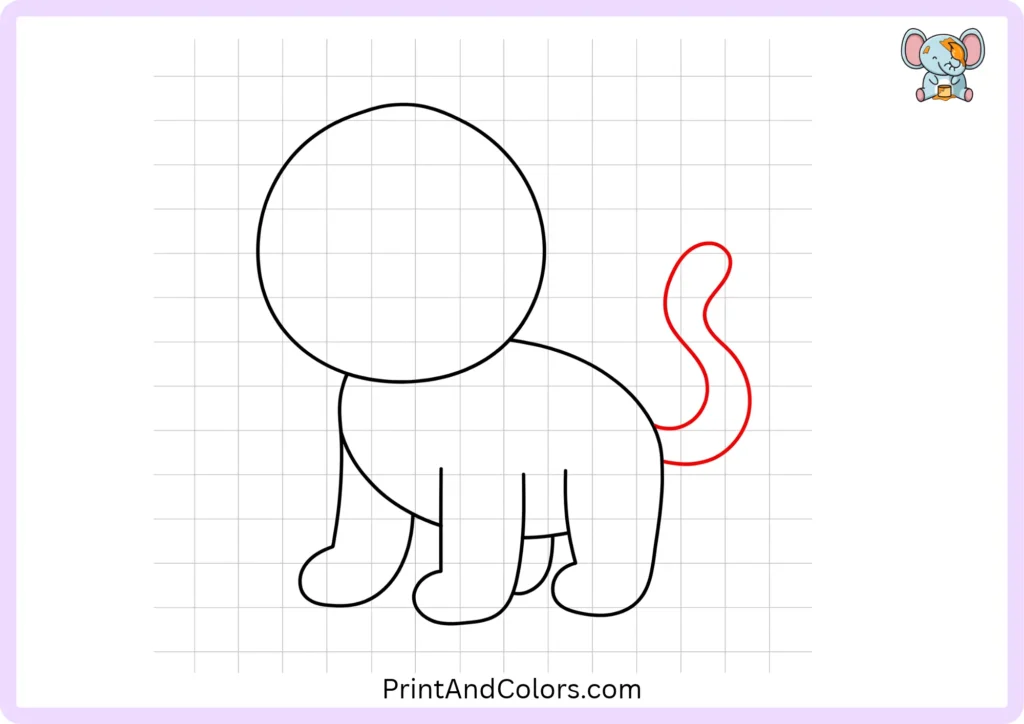
Every lion needs a tail!
Starting from the back of the body, draw a long line that curves upward and then gently slopes downward. Add another line alongside it and connect the two ends with a rounded tip.
Make the tail thick enough so that stripes can be added to it later.
Step 5: Place Two Cute, Rounded Ears on Top
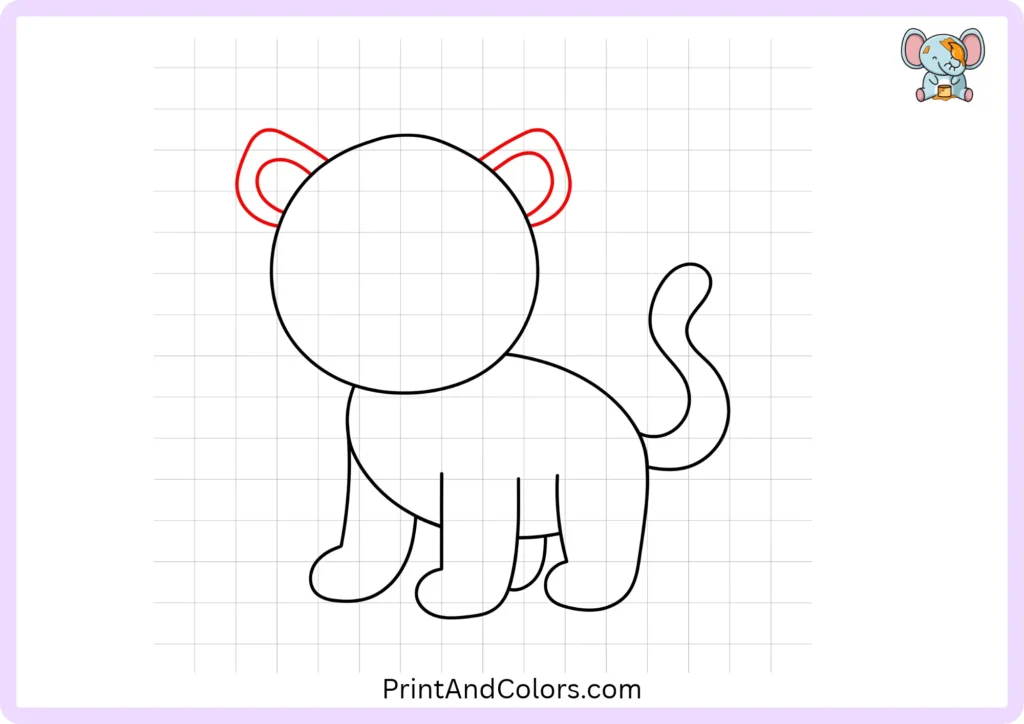
Draw two small, round ears on the top edges of the head.
Inside each ear, draw a small, curved shape to represent the inner part of the ear.
Unlike some cartoon cats that have pointed ears, our lion’s ears are round, giving it a softer and friendlier appearance.
Step 6: Create the Soft Muzzle Area
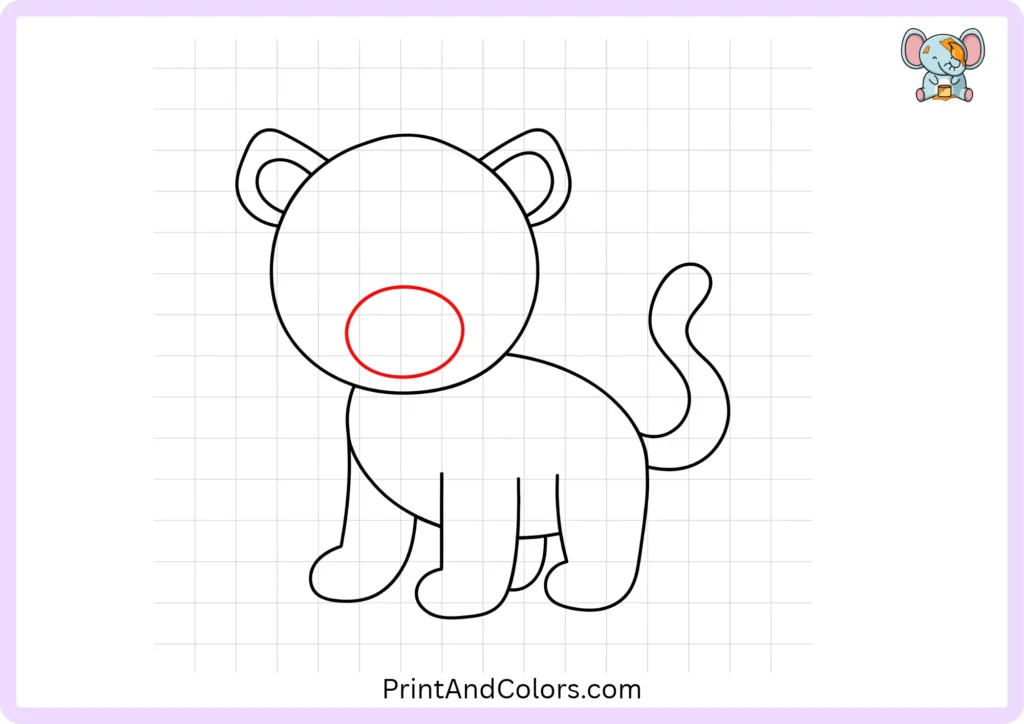
Let’s create a cute little snout for your lion!
Draw a wide, horizontal oval in the middle of the lower part of the face. This will be its snout, where the nose and mouth are located.
Leave plenty of space above it for the eyes.
Step 7: Add a Tiny Nose and a Happy Smile

Near the upper part of the muzzle, draw a small, inverted triangle with slightly rounded corners.
From its bottom point, draw a short, straight line downwards. Then, add two curved lines extending outwards to create a cheerful smile.
Your lion is already starting to look friendly
Step 8: Bring Your Tiger to Life With Expressive Eyes

Draw two oval-shaped eyes above the mouth, keeping them roughly the same size.
Inside each eye, add a small, curved highlight. You can color the rest of the eye black while leaving the highlights white.
Large eyes create a charming, cartoon-like expression, perfect for young artists.
Step 9: Decorate the Forehead and Cheeks With Tiger Stripes
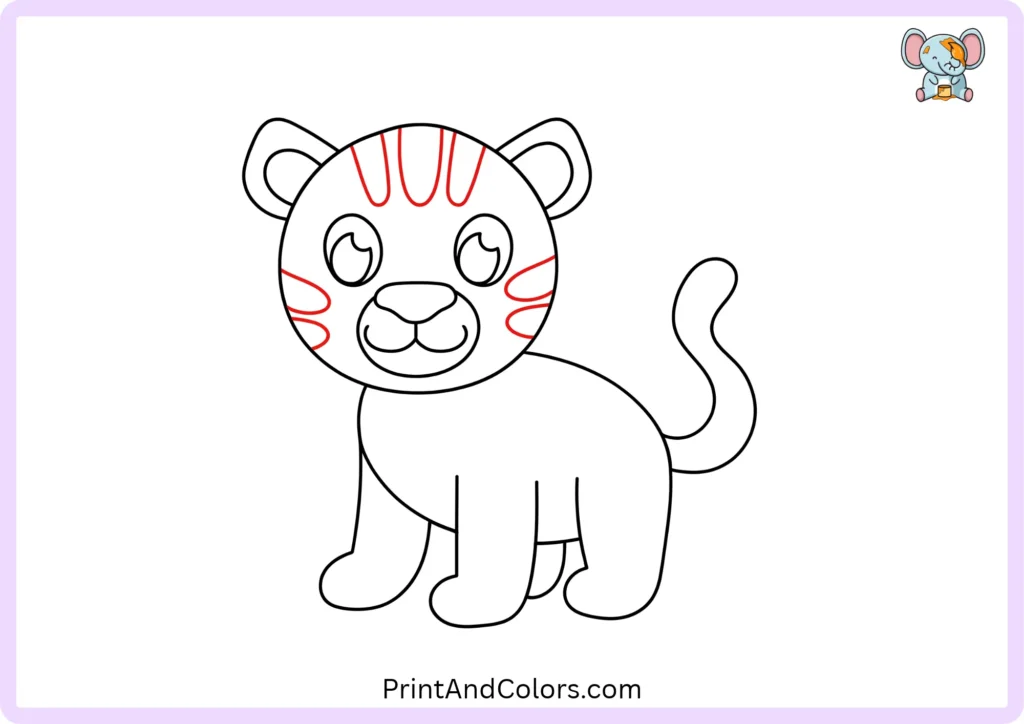
Now, let’s add the details that will clearly make your drawing look like a tiger!
Draw three curved stripes on the forehead that taper toward the front. Then, add two small stripes on each cheek, pointing inward.
Vary the length and thickness of the stripes; real tiger stripes are naturally irregular, so they don’t all need to look exactly the same.
Step 10: Define the Chest and Pattern the Tail
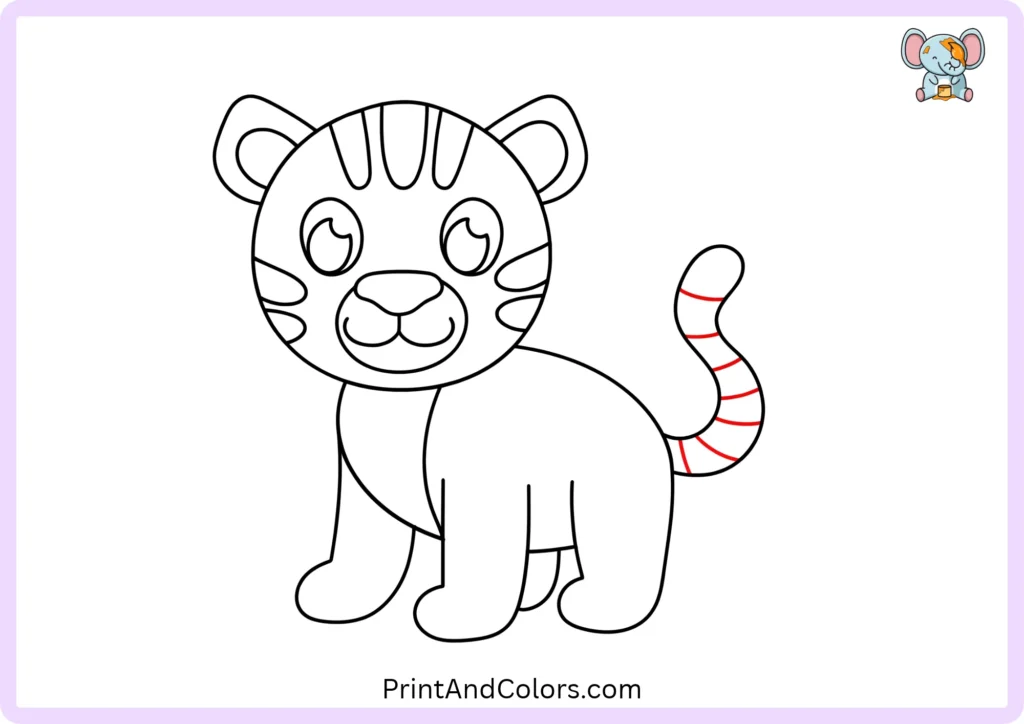
Draw a slightly curved line beneath the head, extending toward the front leg. This line separates the lighter-colored chest area from the orange-colored part of the body.
Next, add a few small, curved stripes on the tail.
Instead of drawing perfectly straight stripes, follow the natural curve of the tail.
Step 11: Fill the Tiger’s Back With Bold, Wild Stripes
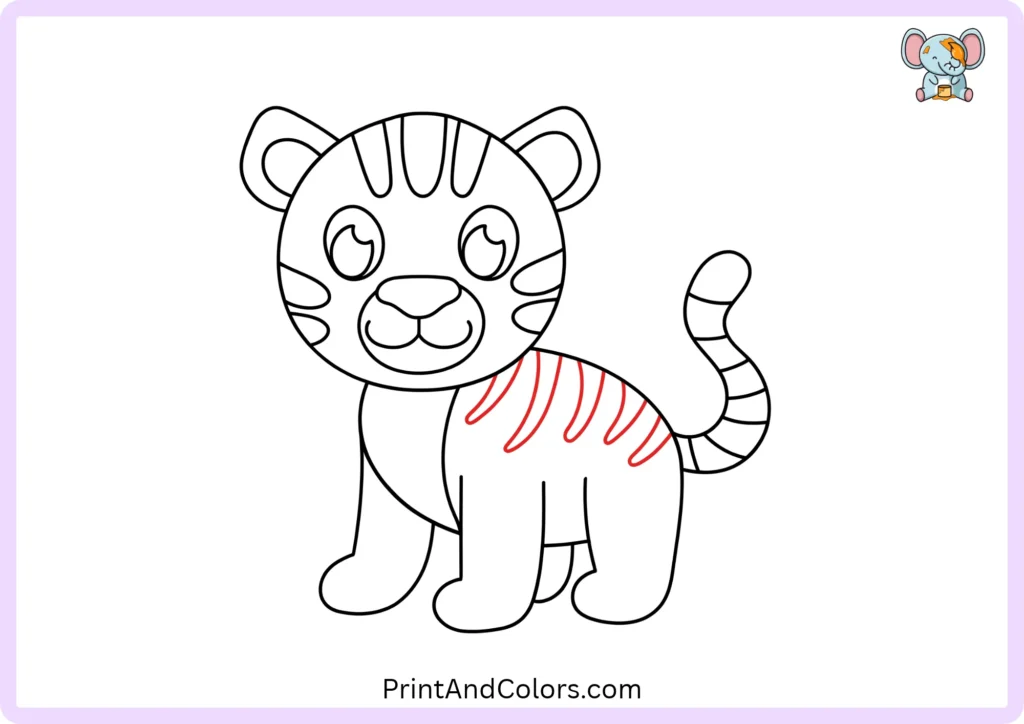
Now, decorate the body with several long, curved stripes.
Start near the tiger’s back and extend these markings downwards toward its flanks. Vary their length, spacing, and thickness to create a more natural-looking pattern.
Interesting fact: Every tiger has a unique stripe pattern, much like human fingerprints!
Step 12: Finish the Legs With Stripes and Little Toes

On the visible legs, draw a few small stripes, following their curvature.
Next, draw a small curved line on each visible paw to separate it from the leg. Finally, add two small lines on each paw to distinguish the toes, creating the appearance of three distinct digits.
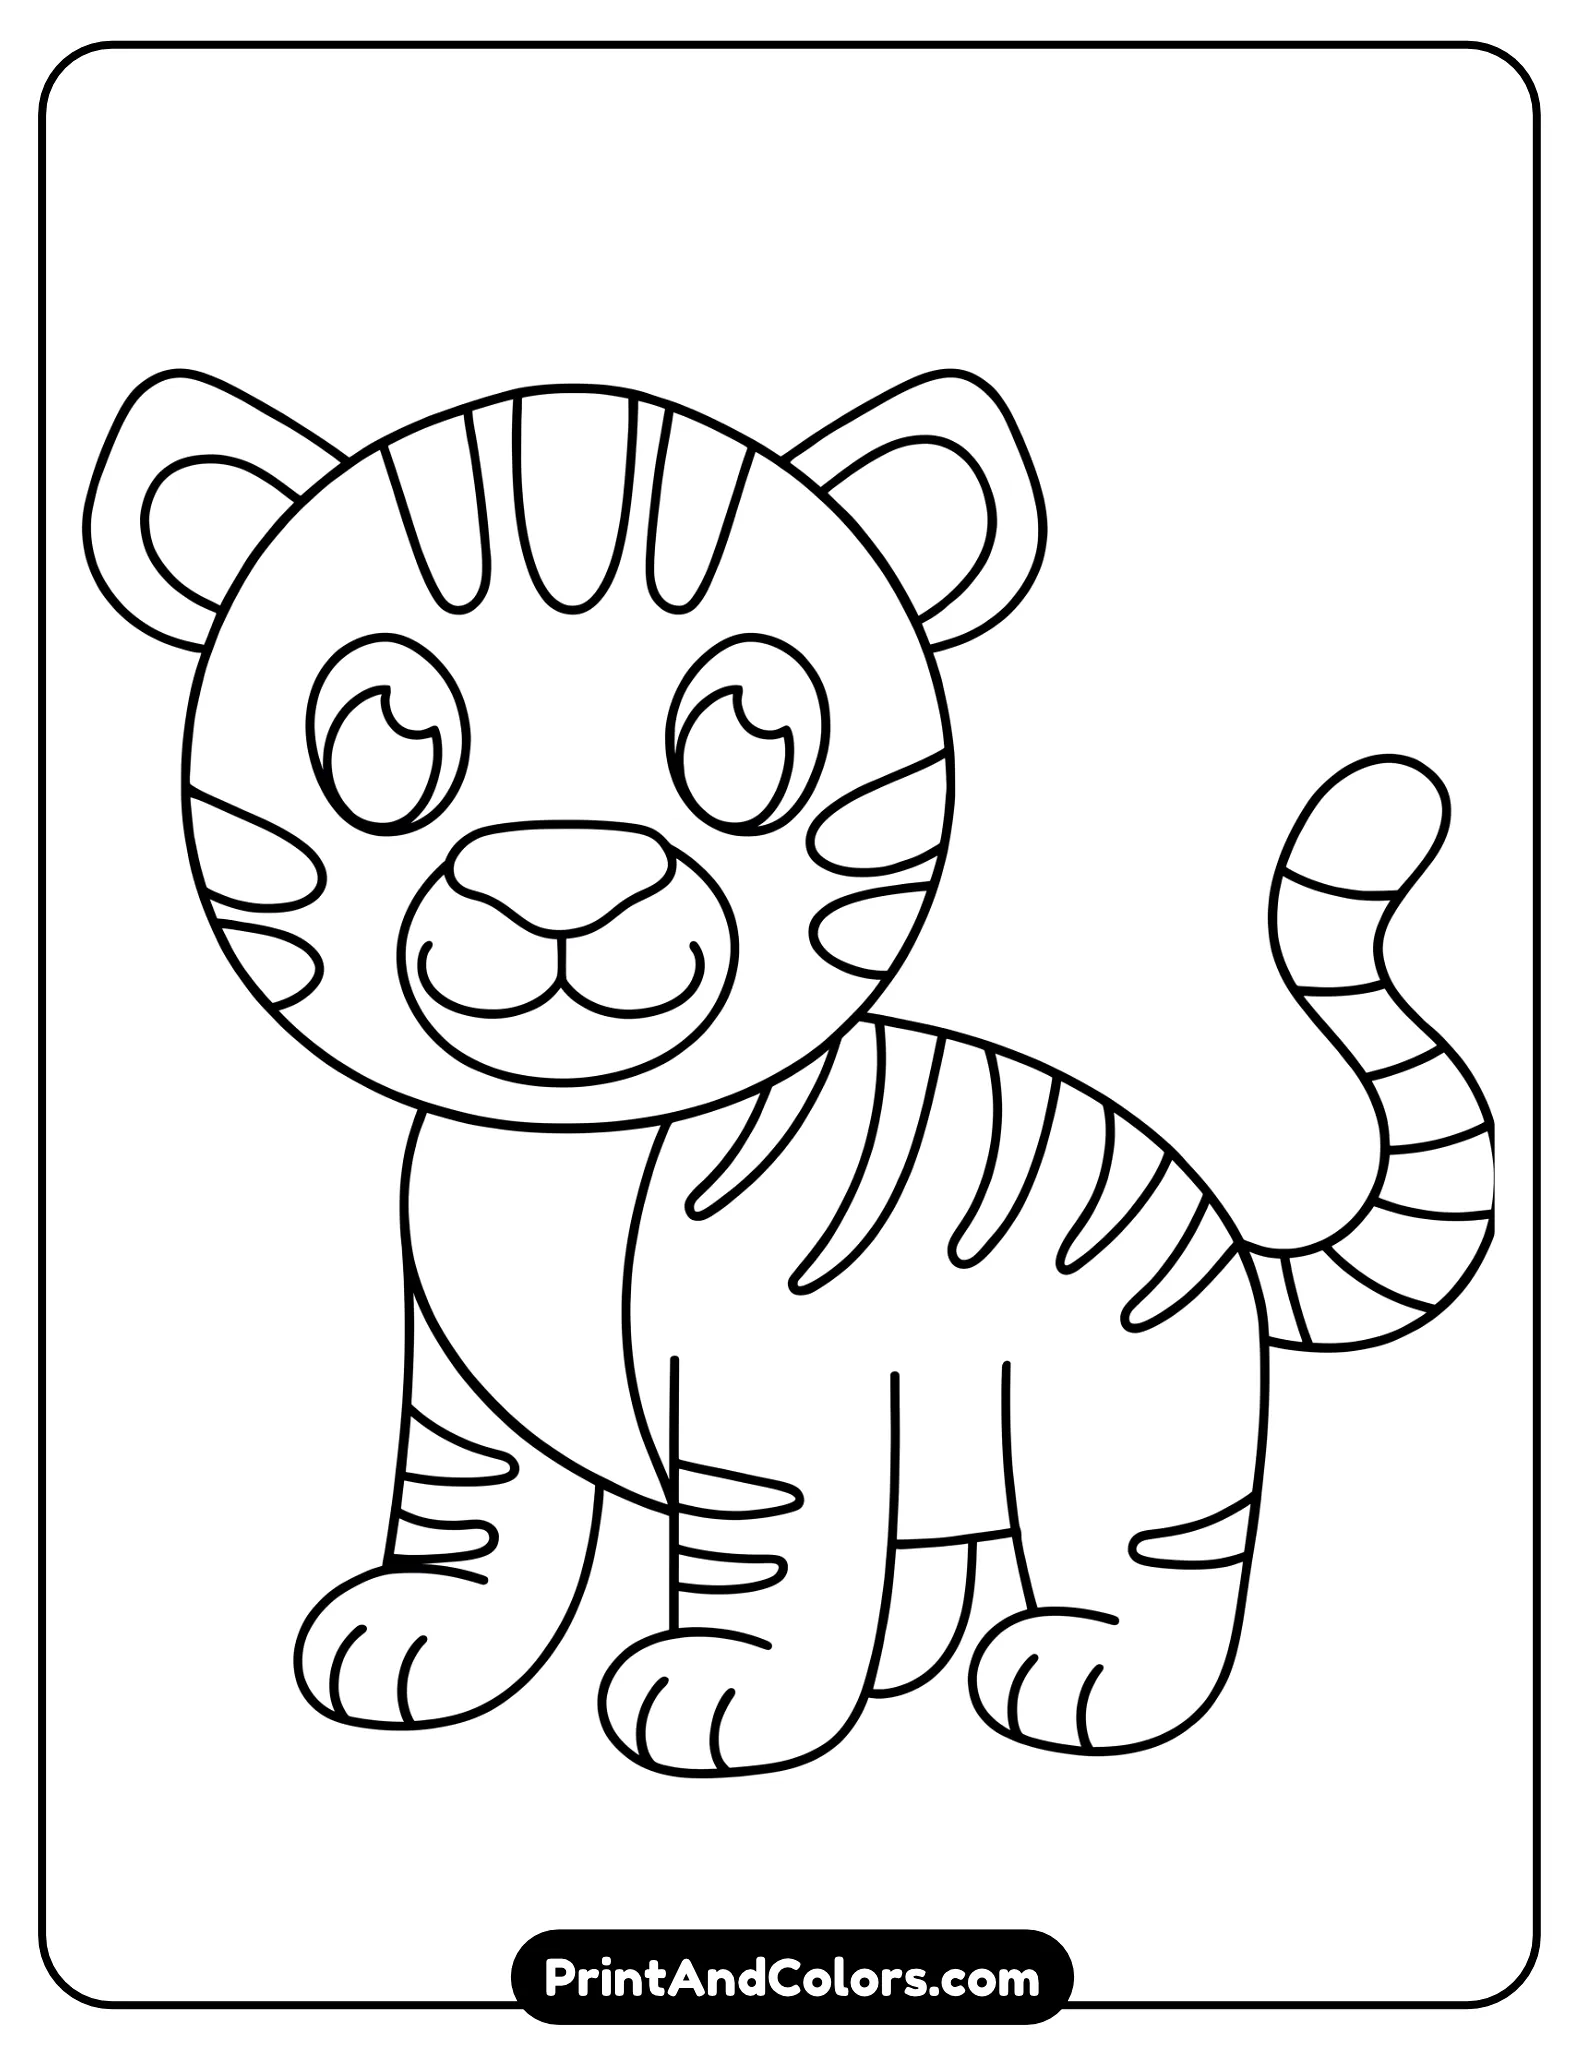
There you have it, your lion sketch is complete!
Step 13: Color Your Tiger Orange, Black, and Cream
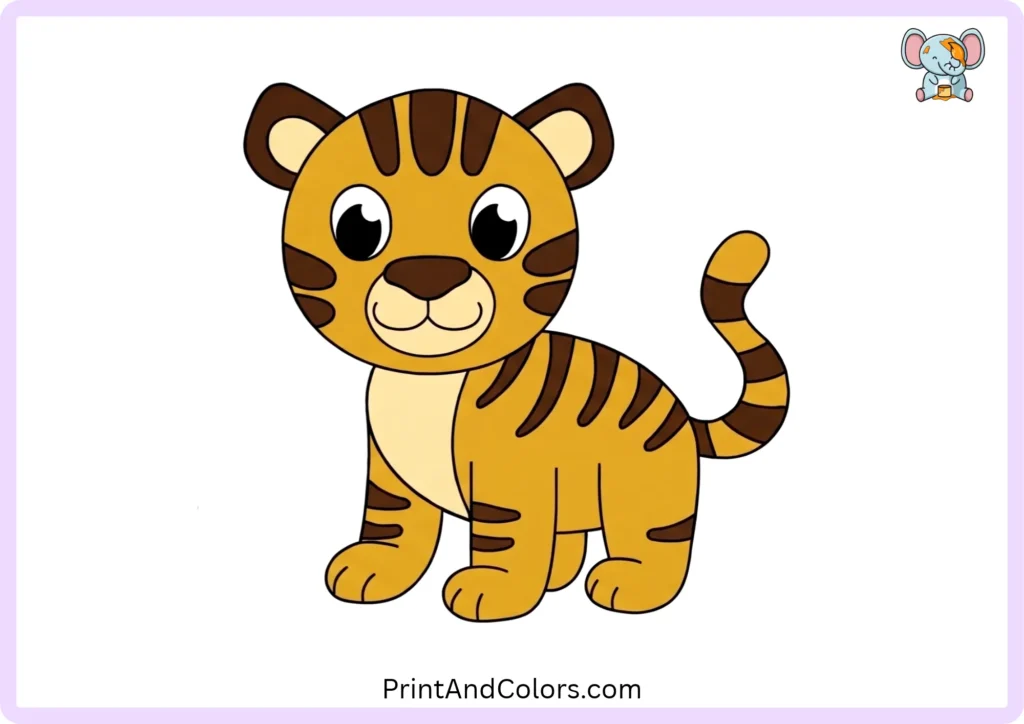
You have reached the most colorful part!
Use a vibrant orange color for the body, head, and tail. Fill the stripes with black or dark brown, and then color the muzzle, chest, and the insides of the ears with a cream or light brown (beige) shade.
Keep the nose dark brown or pink, and leave the bright parts of the eyes white.
To add a more creative touch, draw green grass, leafy trees, or a sunny sky behind your lion.
Printable Tiger Drawing PDF & Drawing Book
Want to practice without looking at a screen?
Our Printable Tiger Drawing PDF Book brings all illustrated steps together in one convenient, print-friendly guide. Follow each picture in order, practice your shapes, and create your own tiger artwork at home or in the classroom.
Printable Tiger Drawing PDF & Book
Printable step-by-step tiger drawing book cover featuring a finished orange cartoon tiger and illustrated previews of the easy drawing steps for kids and beginners.
Print your guide on regular paper and follow each picture at your own pace. It’s a lovely activity for classrooms, rainy afternoons, and animal-themed art projects.
Easy Tips to Make Your Tiger Drawing Look Better
Even simple drawings become more impressive with a few small adjustments.
- Keep the shapes balanced: A large head creates a cute cartoon appearance, while a longer body makes the tiger look more realistic.
- Follow the curves: Stripes should bend around the body and tail, not look like straight lines pasted onto them.
- Use light pencil pressure: You can trace the final outline with a marker once you’re happy with the drawing.
- Try different expressions; Change the eyes or mouth to create a sleepy tiger, playful tiger cub, or roaring tiger.
Frequently Asked Questions About Drawing a Tiger
How do you draw a tiger easily for beginners?
Draw a circle for the head and an oval shape for the body. Add four legs, rounded paws, a curved tail, and small ears. Next, draw the eyes, nose, and mouth. Finally, add the characteristic stripes and color your tiger using orange, black, and cream.
How can kids draw a cute tiger?
To create a cute lion, make its head slightly larger than its body, draw large oval (egg-shaped) eyes, and add a small, smiling mouth. Keep the legs short and the paws rounded. To make the drawing easier for young children, include fewer, thicker stripes.
How do you draw tiger stripes correctly?
Instead of perfectly straight lines, create the stripes as irregular shapes that taper toward the front. On the body, show them curving downward from the back. Add small markings on the face and legs, and draw curved bands around the tail. Vary the spacing between them to achieve a natural look.
What colors should I use for a tiger drawing?
Most tigers have orange fur with dark stripes and white or cream areas around the face, chest, and belly. Use black or dark brown for the stripes and nose. For a creative cartoon tiger, you can experiment with other colors.
Can I draw a tiger using only a pencil?
Absolutely! Start by drawing light outlines with a pencil, then gradually add the face, paws, tail, and stripes. Press harder with the pencil to darken the stripes, while keeping the chest and muzzle areas light. You can also create depth in the drawing through subtle shading, without needing to use colored pencils.
Your Tiger Drawing Is Complete!
Congratulations! You have learned how to draw a tiger using simple circles, ovals, curved lines, and bold stripes.
Whether you stuck to the traditional orange and black colors or created a rainbow-colored jungle cat, your drawing is uniquely yours.
Want more fun with animal drawing? Explore our tiger coloring pages or practice drawing other wild animals, such as lions, elephants, and monkeys.
Bring Every Imagination to Life
Premium Coloring Books & Instant Digital Printables
Transform your creative vision into high-quality, personalized coloring products perfect for gifts, education, or special events. Our team of illustrators crafts unique designs tailored to your exact needs.