How to Draw a Deer
Do you want to draw an adorable deer but aren’t sure where to start?
Don’t worry! You don’t need to be an expert artist to create this cute forest friend, complete with large ears, beautiful antlers, and little spots on its body.
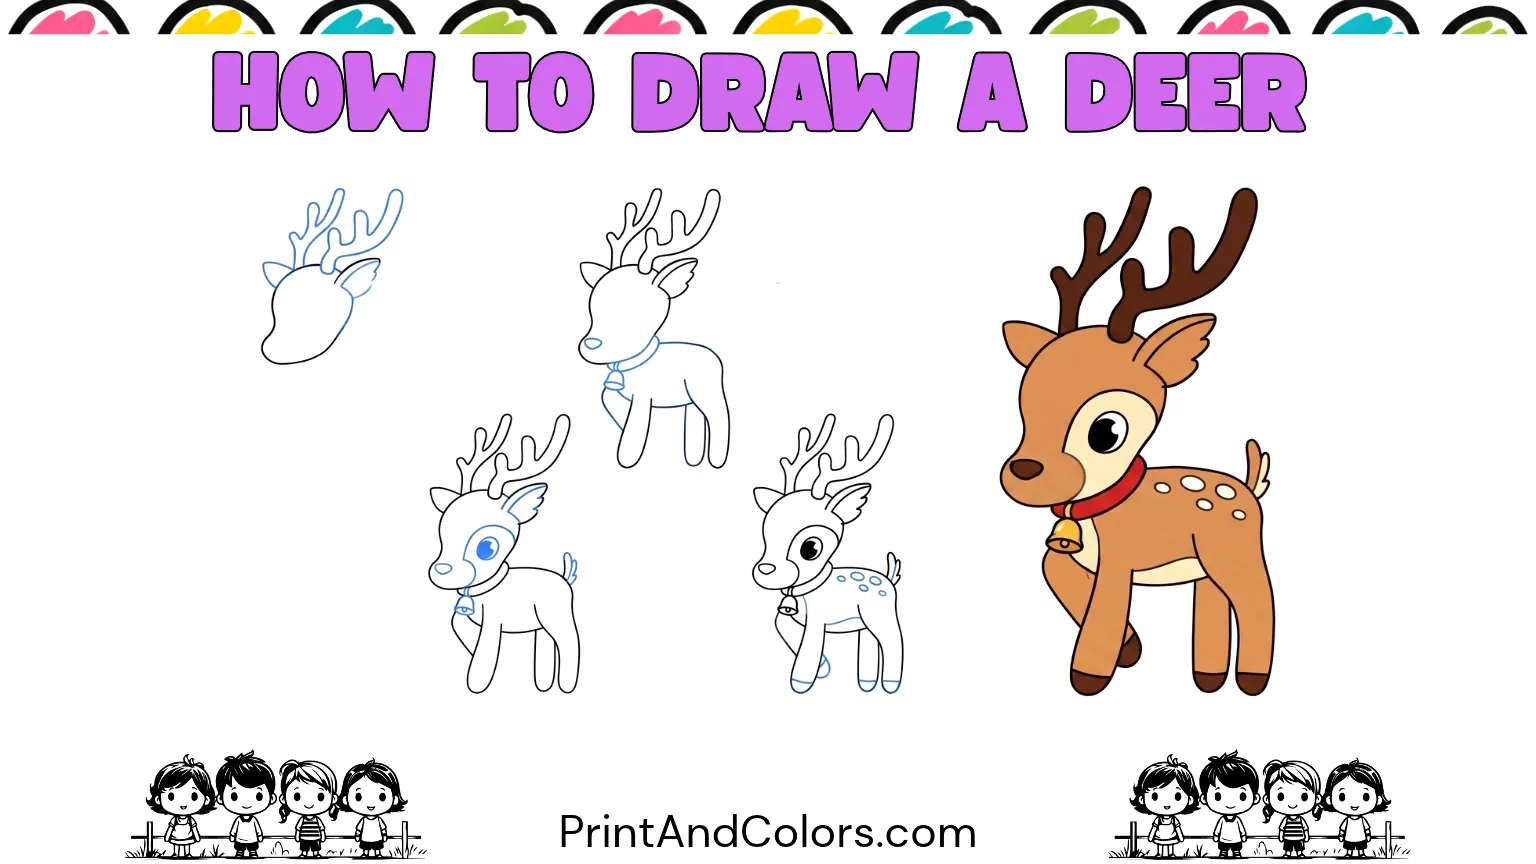
In this easy-to-follow tutorial, we will create a cheerful cartoon deer using simple circles, ovals, and curved lines. You will learn how to draw its head, construct its body, create its four legs, and add all those little details that make your drawing truly special.
It consists of 15 simple steps, with images provided to guide you through each one. Whether you are drawing at home, participating in an art activity in the classroom, or creating a forest-themed illustration, this lesson is a fantastic and fun way to get started.
And once you’ve finished, you can practice again using our printable deer-drawing PDF and step-by-step drawing book!
Your next masterpiece awaits—try these stunning pages!
What You’ll Need to Draw a Deer
You only need a few basic art supplies:
- Drawing paper or a sketchbook
- Pencil and eraser
- Black marker for outlining
- Brown, cream, pink, and yellow crayons or colored pencils
Quick drawing tip: Keep your first pencil lines light. This makes it much easier to erase extra shapes when your deer begins to take form.!
Step 1: Sketch a Round Head and Little Snout
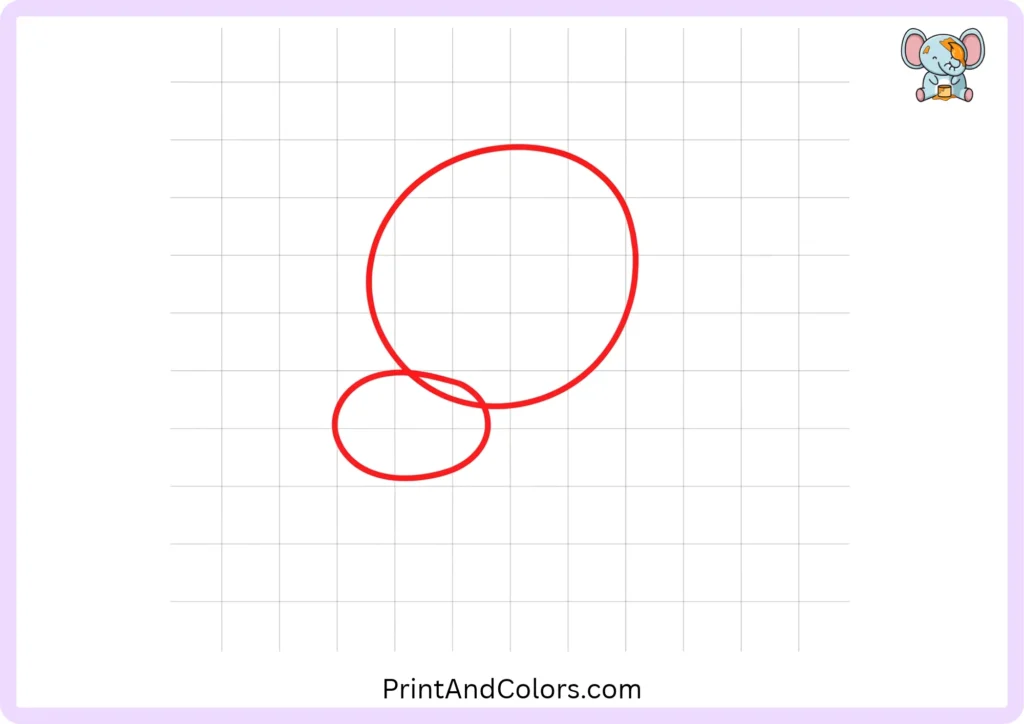
Draw a large circle in the top-left corner of your paper.
This will be the deer’s head. Next, draw a small, horizontal oval on the bottom-left edge of the circle, overlapping a portion of the first circle. This is the deer’s ‘muzzle’ the part of the face surrounding the nose and mouth.
To achieve a cute, cartoon-like style, keep both shapes soft and rounded.
Step 2: Give Your Deer an Oval-Shaped Body
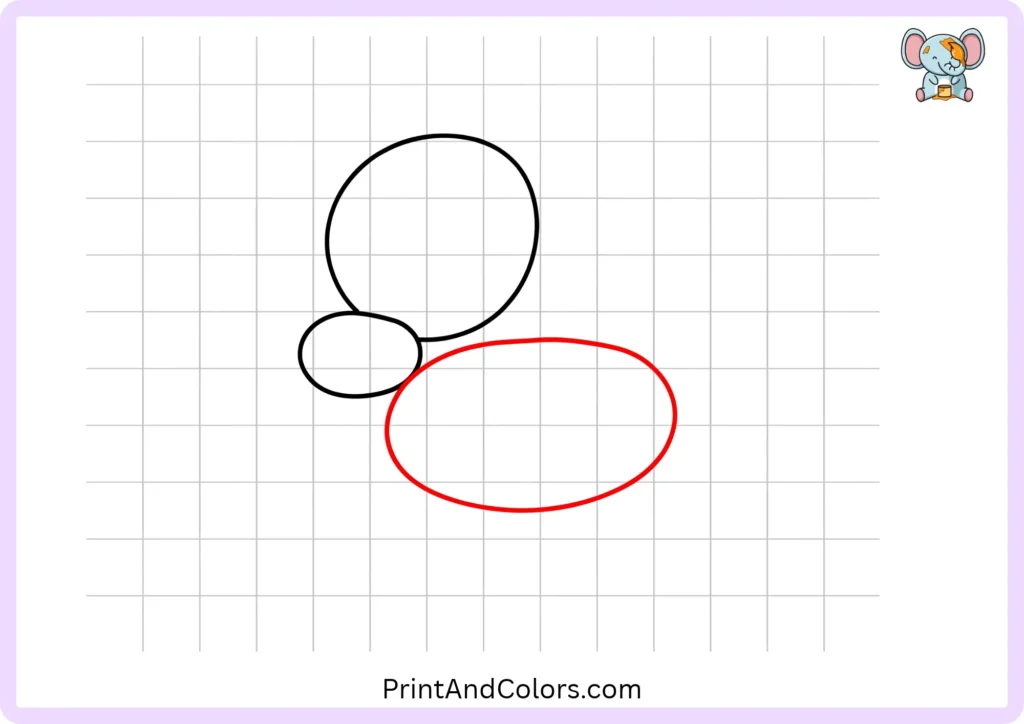
Draw a large, horizontal oval shape below the head and slightly to the right.
Make this oval wider than the head, as it will form the deer’s back, belly, and rounded body. Leave a small gap between the two shapes; in the next step, we will connect them with a graceful neck.
Step 3: Connect the Neck and Smooth the Outline

Now, let’s bring these separate shapes together!
Draw a gently curved line from the back of the head toward the upper body. Add another curved line below to form the neck and chest.
Smooth out the outline of the head and body, then erase any unnecessary overlapping guidelines.
Your deer should now have a recognizable silhouette.
Step 4: Sketch the First Two Standing Legs
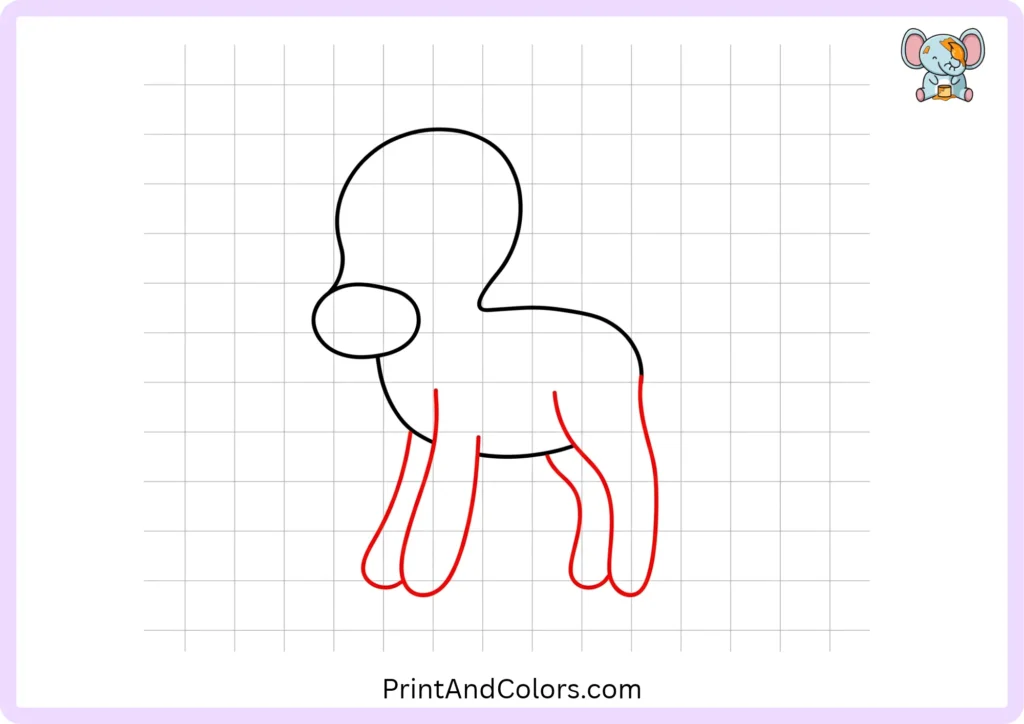
Now it’s time to help your deer stand up!
Draw a slender front leg extending downward from the chest. Then, add a hind leg beneath the rounded rear section of the body.
Keep the front leg fairly straight, and give the hind leg a slight bend. Leave enough space at the bottom for small hooves.
Step 5: Complete All Four Deer Legs
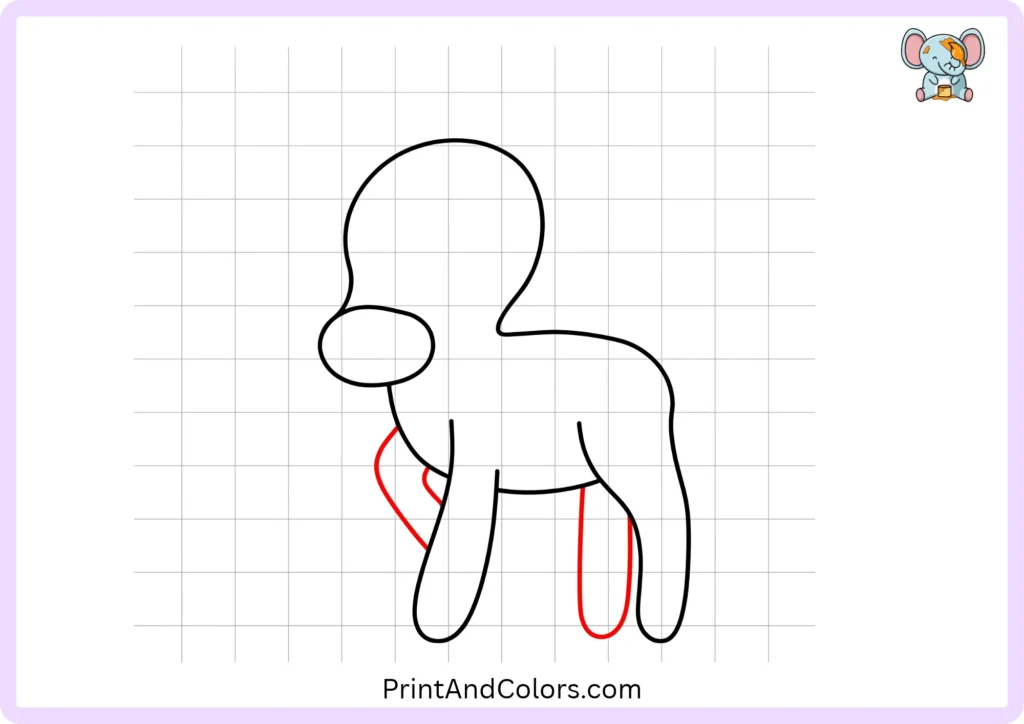
Draw another front leg just behind the first one, followed by a second hind leg.
Position these new legs so that they slightly overlap the legs you have already drawn. This simple technique will give your deer a more three-dimensional appearance.
Ensure that all four feet reach approximately the same level on the ground.
Step 6: Create a Small, Fluffy Tail
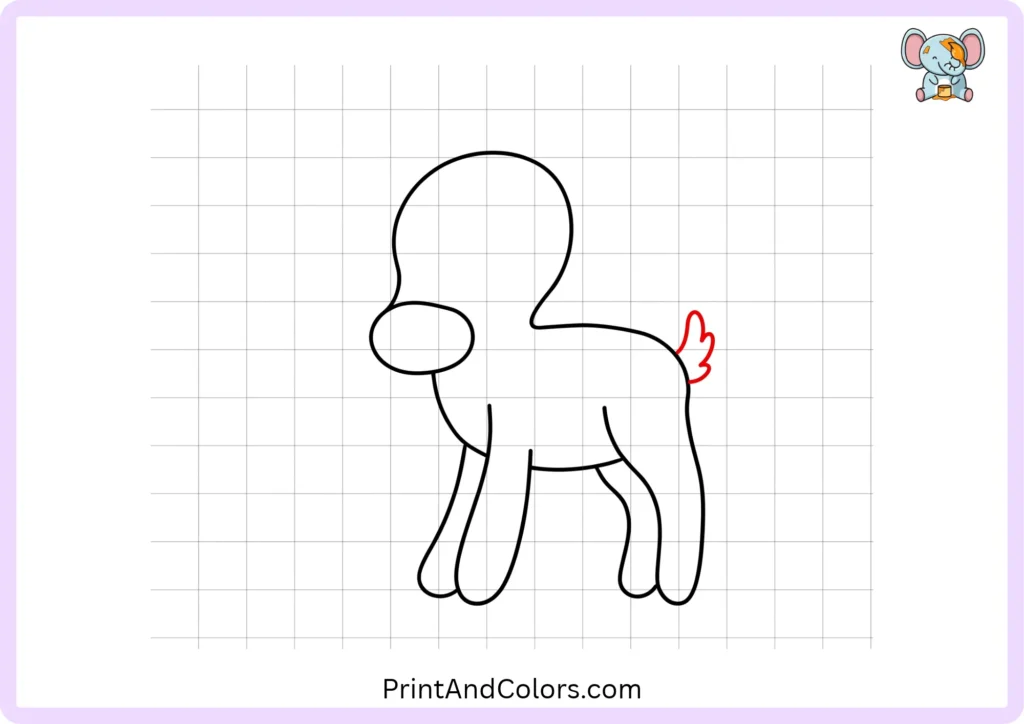
Every adorable deer needs a little tail!
On the back of the body, draw a short, upward-curving shape. Add two or three tiny, pointed tufts to give it a soft, fluffy appearance.
Keep the tail small in proportion to the body. A gentle curve will only add to the charm of your wild friend!
Step 7: Bring the Face to Life With an Eye and Nose

Draw a large, round eye on a prominent part of the face.
Add a small white mark (a highlight) inside the eye to give it a friendly sparkle. Then, draw small, curved marks on the front of the nose (the muzzle) to represent the nostrils.
You can also add a small smile below the nose. There you go, your deer now has a distinct personality
Step 8: Draw Beautiful Branching Antlers
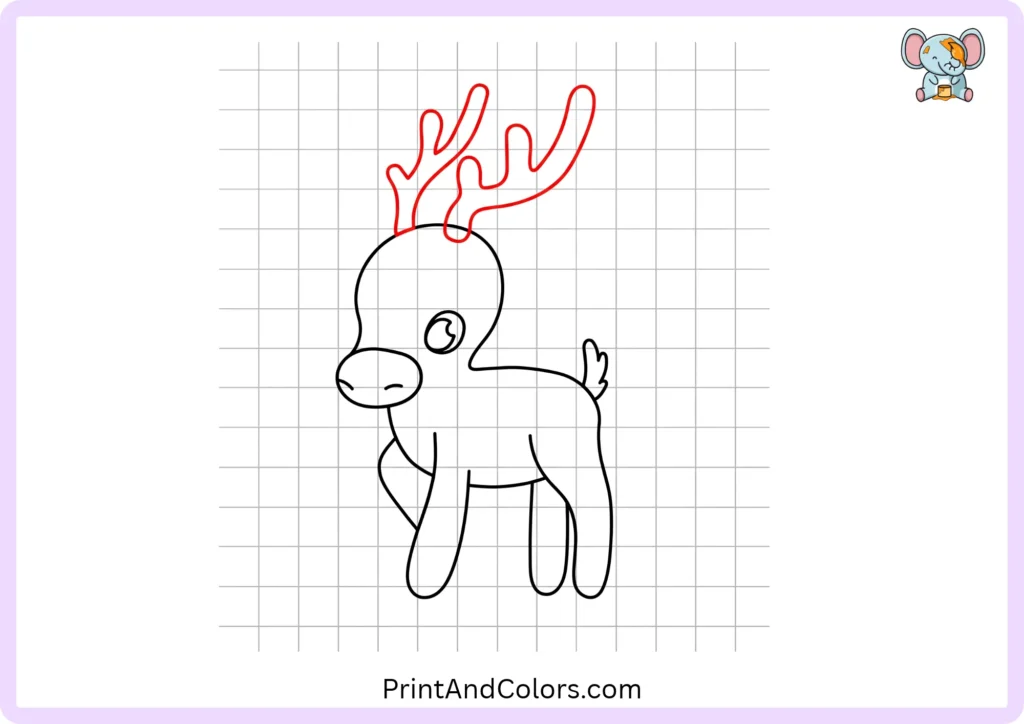
Near the top of the head, begin drawing two shapes that extend upwards, resembling deer antlers.
First, draw the main, larger branches, and then add smaller, curved, pointed sections extending outward. For this cartoon drawing, keep the tips of these points rounded.
An interesting fact about deer: these antlers are made of bone. Many male deer shed them every year, and new ones grow in their place. Unlike typical horns, which do not fall off annually.
Step 9: Add Two Pointy Woodland Ears
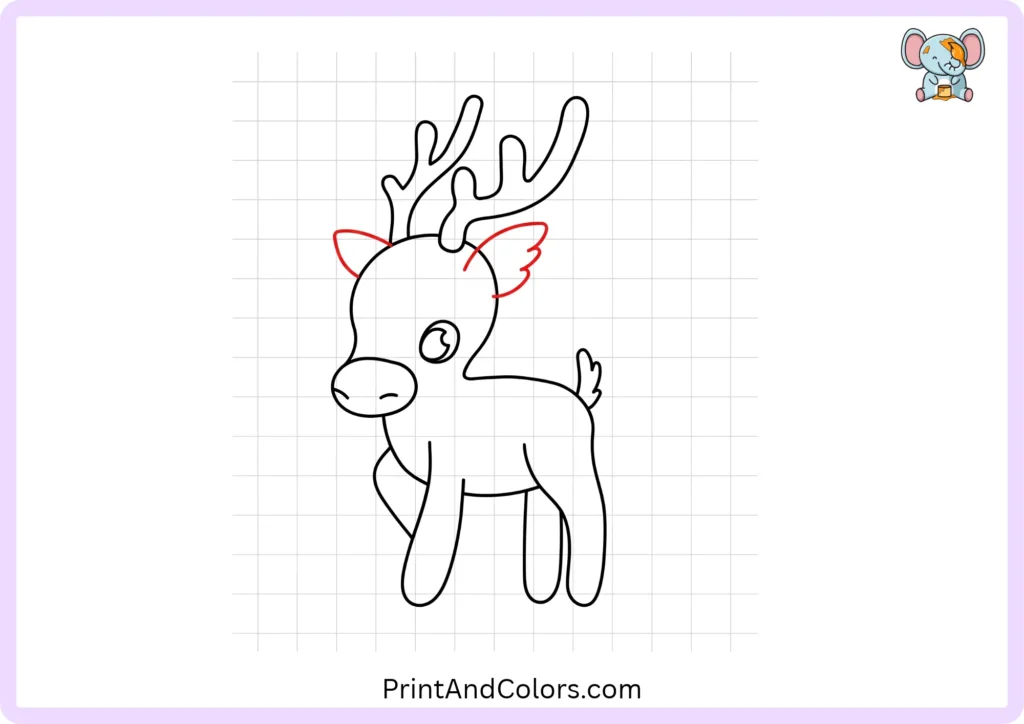
Draw a large, leaf-shaped ear on each side of the head, just below the antlers.
Make the ear closer to the viewer slightly larger, and the one further away a bit smaller.
Try to position the ears so they tilt outward. This will make your deer appear alert, as if it is listening to the sound of birds chirping in the forest.
Step 10: Detail the Inside of Each Ear
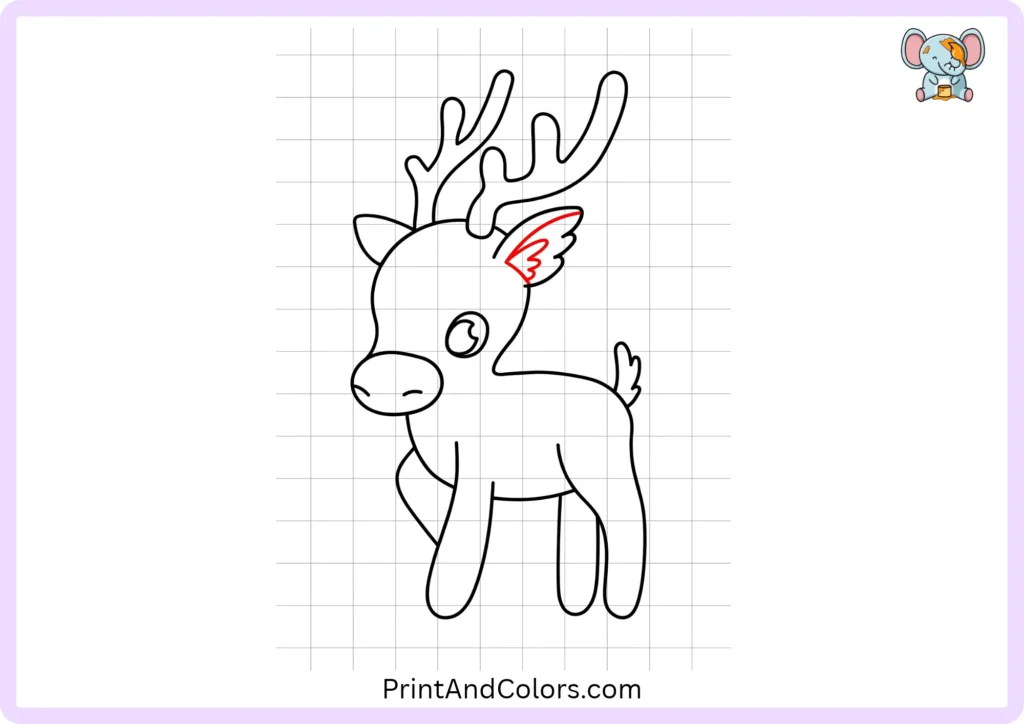
Inside the larger ear, draw a small, curved shape that follows along its outer edge.
If there is enough space, do the same for the other ear.
You can also add some fine, pointed lines to represent soft fur. These simple details will look especially lovely once you fill the ears with a pink or cream color.
Step 11: Add Soft Chest Fur and Facial Markings

Draw a slightly curved line around the eye and along the cheek.
Extend a curved line from beneath the chin toward the chest. Add some small, zigzag marks on the chest to represent thick, soft fur.
When you begin coloring, these marks will separate the lighter-colored areas from the dark brown fur.
Step 12: Finish the Feet With Tiny Hooves
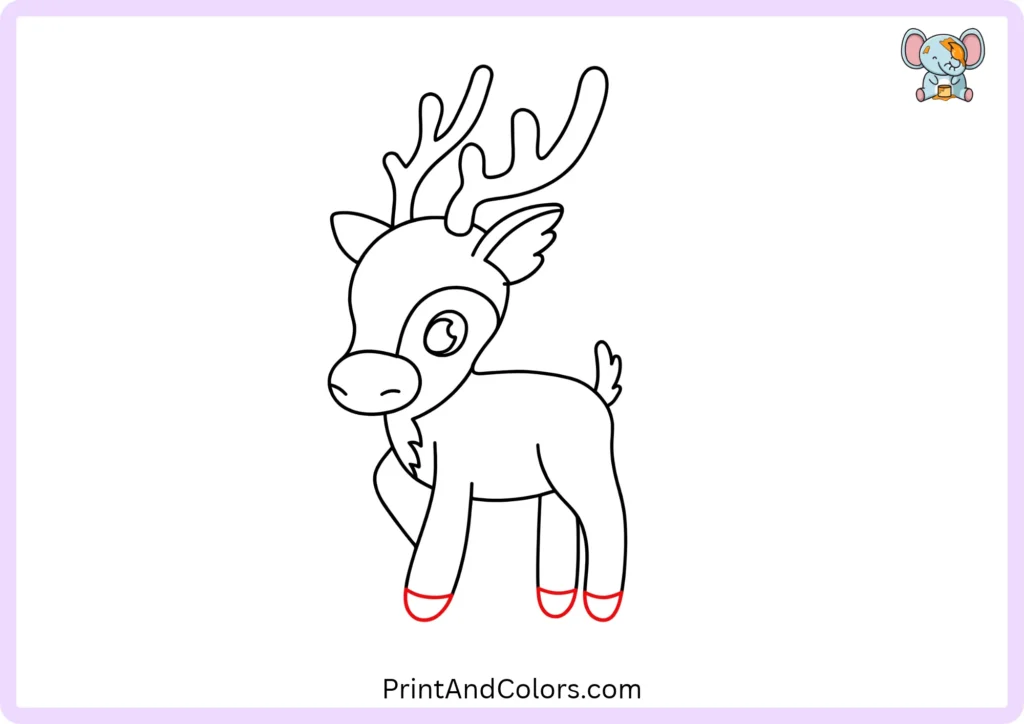
Look at the lower part of each leg and draw a small, curved line to separate the hoof from the leg.
Make the bottom of the feet somewhat flat so that it appears as though the deer is standing comfortably.
Real deer have hooves that are split into two parts. You can represent this feature by drawing a small line on the visible hoof.
Step 13: Decorate the Back With Cute Spots
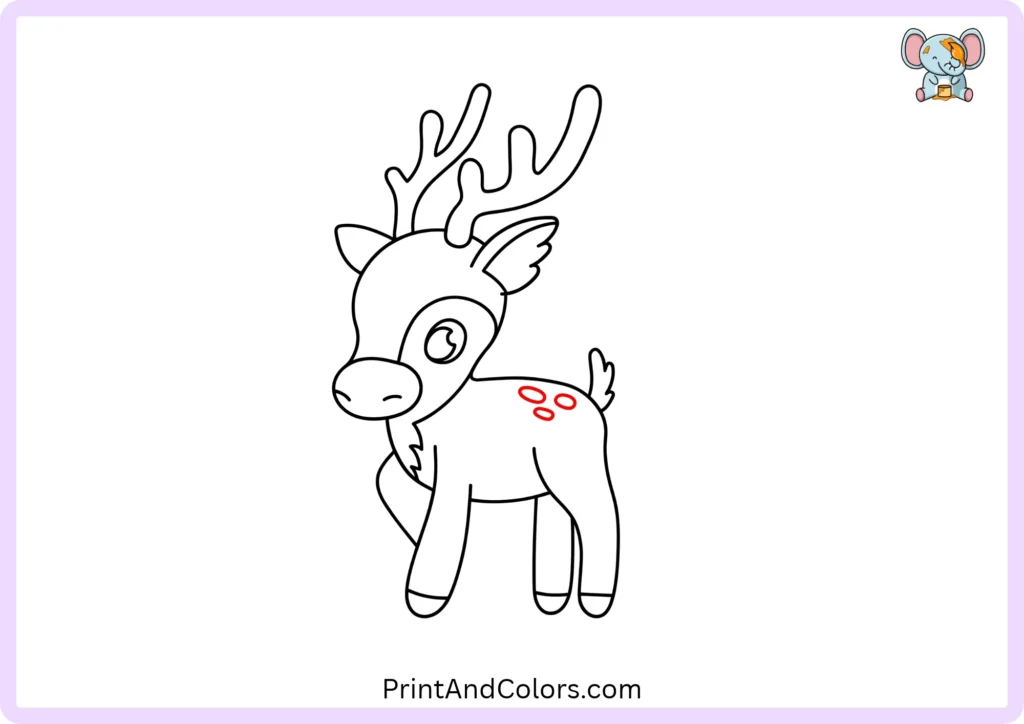
Draw several small, oval (egg-shaped) spots on the upper part of the body.
Try to make three spots of different sizes, and leave a little space between them.
Did you know? Many young deer (called ‘fawns’) have spots on their bodies, which help them blend into (or hide within) their surroundings. Some adult deer species also have spots on their bodies.
Step 14: Give Your Cartoon Deer a Bell Collar

To give it a more storybook-like, charming feel, draw two small, curved lines around the neck to create a collar.
Below this, add a small circle that looks like a bell, and include a tiny, curved slit at its base.
Of course, wild deer don’t actually wear collars! This is just a fun, decorative touch. If you prefer a more natural depiction of wildlife, you can simply leave it out.
Step 15: Color Your Finished Deer Drawing
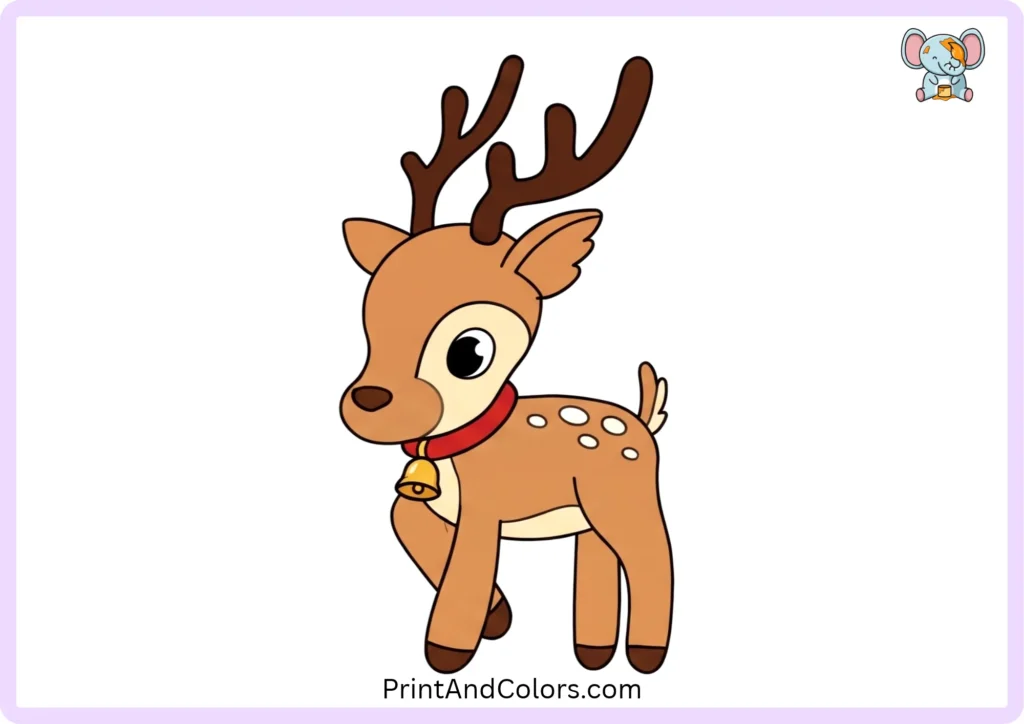
You have completed the sketch of the deer! Now it is time to add color.
Use a warm, reddish-brown color for the body, head, and legs. Color the antlers and hooves dark brown, and use a light cream shade for the fur on the chest.
Use pink for the inside of the ears, a light yellow for the spots on the body, and a golden yellow for the small bell.
If you like, you can outline your drawing with a black marker, and then carefully erase any remaining pencil lines.
Printable Deer Drawing PDF & Drawing Book
Want to practice without looking at your screen?
Use our Printable Deer Drawing PDF to follow the tutorial on paper, or choose the Printable Deer Drawing Book to keep all illustrated steps together.
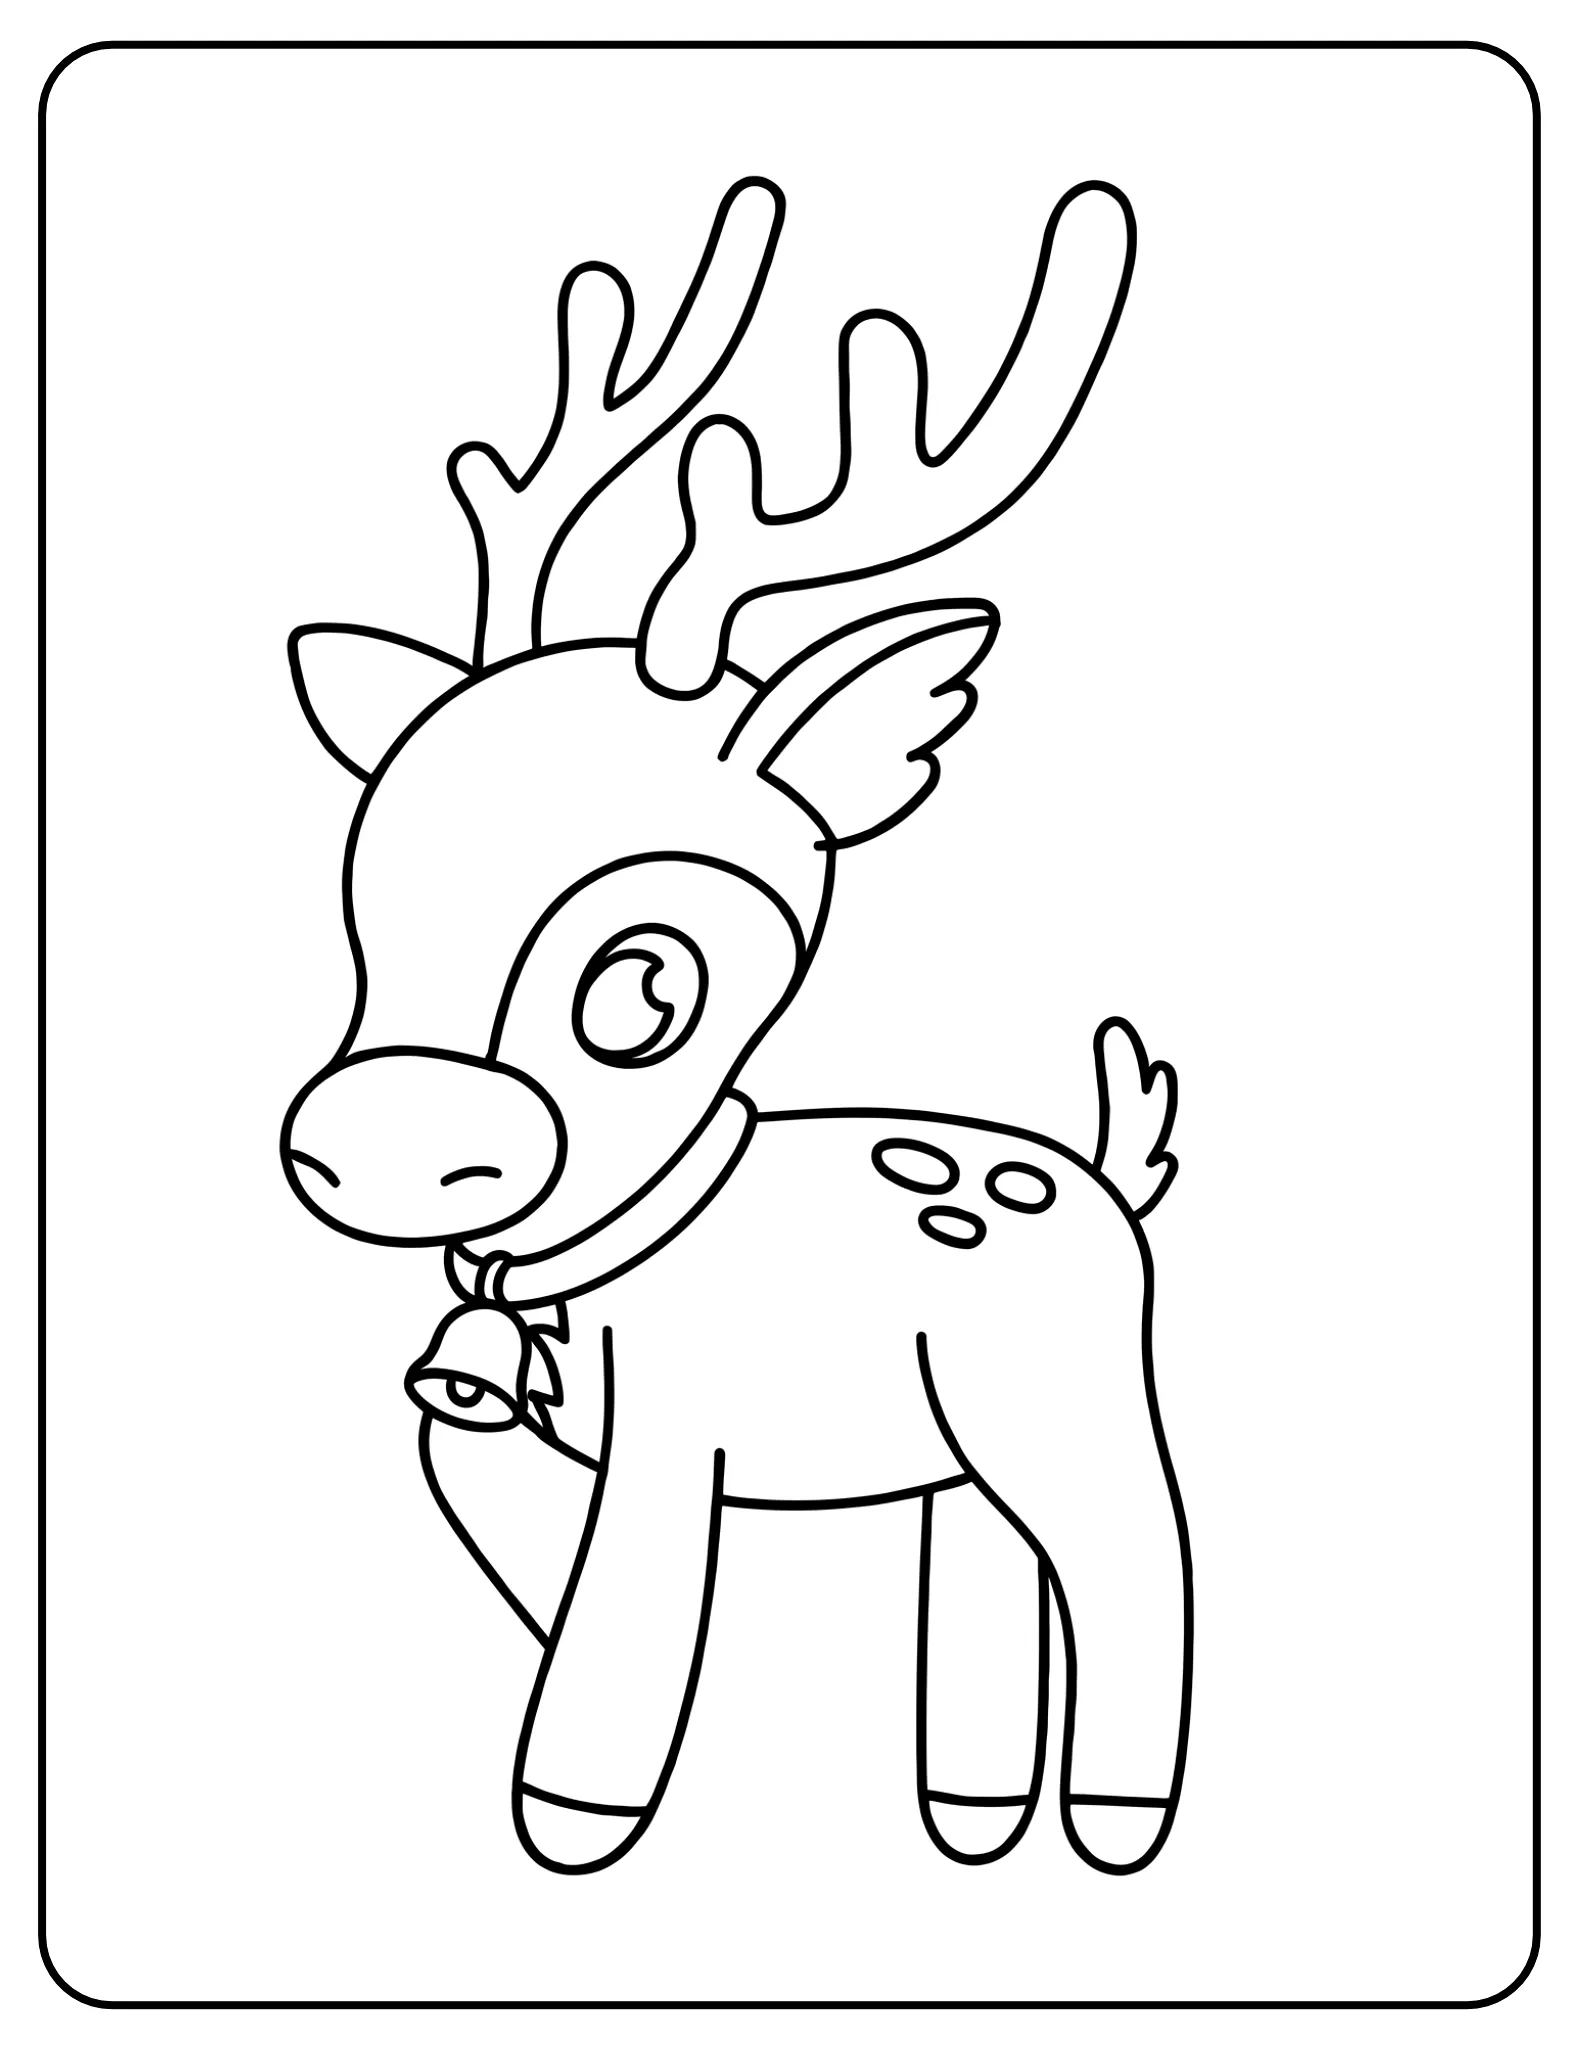
Printable Deer Drawing PDF & Book
Printable deer drawing book cover featuring a cute cartoon deer and a collection of illustrated drawing steps, from basic head and body shapes to antlers, ears, hooves, spots, and the finished colored deer.
Print your guide on regular paper and follow each picture at your own pace. It’s a lovely activity for classrooms, rainy afternoons, and animal-themed art projects.
Easy Deer Drawing Tips for Beginners
If your first drawing looks a little different from the pictures, that’s perfectly fine! A few simple tricks can make your next attempt even better.
- Start with big shapes: Circles and ovals are easier to control than complicated outlines.
- Check the legs: Make sure they connect naturally beneath the chest and hips.
- Keep the antlers simple: Two or three branches on each side are plenty for beginners.
- Draw lightly: Pencil guidelines should be easy to erase.
- Practice different expressions: Change the eyes or smile to make your deer look sleepy, happy, or surprised.
For an extra challenge, draw a forest background with trees, flowers, grass, and butterflies.
Frequently Asked Questions About Drawing a Deer
How do you draw a deer easily for beginners?
Draw a circle for the head and a large oval shape for the body. Connect them with curved lines for the neck, then add four legs, a tail, ears, and antlers. Finally, add the facial details and fill in the colors. Using simple shapes makes it very easy for beginners to draw a deer.
How can kids draw a cute deer?
You can make a baby deer look incredibly adorable by giving it a large, round head, very big eyes, small pointed ears, and a smiling mouth. Keep its legs slender and its antlers simple. To give it a playful, cartoon-like appearance, add colorful spots to its body or place a collar with a small bell around its neck.
What colors should I use for a deer drawing?
To give a deer a natural look, brown, reddish-brown, light brown (tan), and cream are excellent color choices. Use dark brown for the hooves and antlers, and black for the eyes and nose. For a cartoon-style deer, you could add pink ears, golden bells around its neck, or even incorporate other imaginative colors.
How do you draw deer antlers step by step?
Start with two large, curved branches extending upward from the top. Add some smaller branches pointing outward and upward, and then round off their tips. Keep the antlers roughly balanced, but don’t worry about perfect symmetry; in real antlers, the spread of the branches is often naturally uneven.
What’s the difference between drawing a deer and a fawn?
A fawn typically has a small body, a relatively small muzzle, and softer, more delicate features. Many fawns have spots on their bodies, and their antlers have generally not yet fully developed. When drawing a fawn, pay special attention to its large eyes and rounded face.
Can I print the deer drawing steps?
Yes! Use the printable deer-drawing PDF or the step-by-step drawing book provided with this tutorial. A printed guide allows children to practice each shape without needing a screen. It is also useful for teachers who are planning lessons on forest animals or drawing activities.
Your Woodland Deer Drawing Is Complete!
Look at what you’ve created! From simple circles and ovals to beautiful antlers, perky ears, tiny hooves, and colorful spots, you’ve learned how to draw a deer in just easy steps.
Now, you can make your deer part of a grand woodland adventure! Try drawing a little fawn to go along with it, add some tall forest trees, or create an entire family of deer.
For more animal-drawing fun, visit our ‘Print and Color’ website and try your hand at drawing a fox next!
Don’t forget to print your deer-drawing PDF, keep practicing, and share your colorful woodland masterpiece with your family and friends!
Bring Every Imagination to Life
Premium Coloring Books & Instant Digital Printables
Transform your creative vision into high-quality, personalized coloring products perfect for gifts, education, or special events. Our team of illustrators crafts unique designs tailored to your exact needs.