How to Draw the Sun
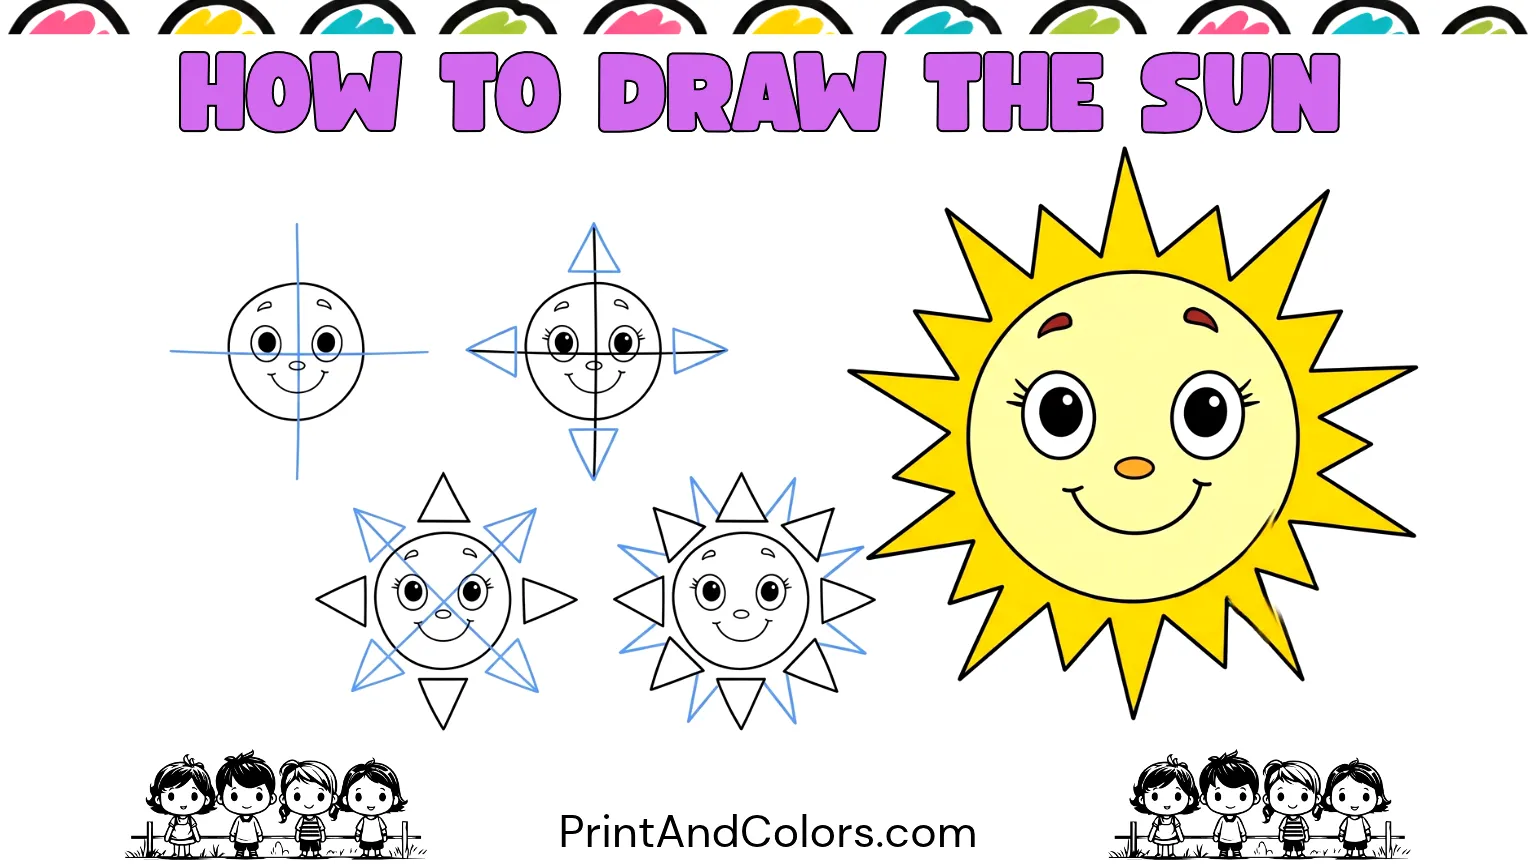
Would you like to learn how to draw a sun without having to struggle with complicated shapes? If so, you’ve come to the right place! With a large circle, a few pointed rays, and a cheerful smile, you can draw your own delightful sun in just a few minutes.
This simple guide to drawing a sun is perfect for children, preschoolers, beginners, and anyone who enjoys creating colorful artwork. You don’t need any special drawing skills or expensive supplies, just grab a pencil, some paper, and your favorite colored pencils.
We’ll show you how to draw a cute sun with a smiling face in easy steps, from its round center to its bright yellow and orange rays. You’ll also find great ideas for coloring, as well as a printable A4 size PDF booklet that you can use to practice whenever you like.
Ready to conjure up a little bit of sunshine? Let’s get started!
Your next masterpiece awaits—try these stunning pages!
How to Draw the Sun Step by Step
The secret to an easy sun drawing is building it one shape at a time. Start with a circle, surround it with rays, and finish with a friendly cartoon face.
Follow the easy illustrated steps below, and don’t worry if your lines aren’t perfect. Every sun can have its own personality!
Step 1: Sketch a Big, Round Sunshine Center
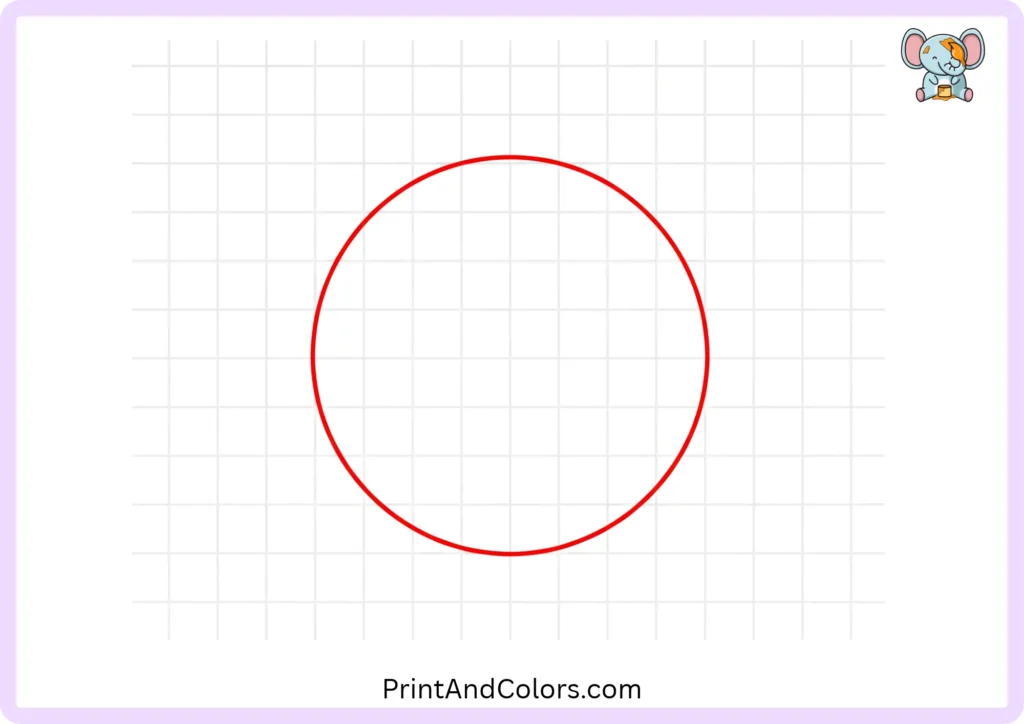
First, draw a large circle near the center of your paper. This will form the round center of your sun.
Leave plenty of empty space around the circle, as we will be adding the sun’s rays later.
If drawing a circle by hand feels difficult, you can create one by tracing around a small cup. By the way, it’s perfectly fine if the circle turns out a bit uneven!
A tip for drawing: Keep your pencil lines light so that they are easy to adjust later.
Step 2: Create the First Pointed Rays Across the Top
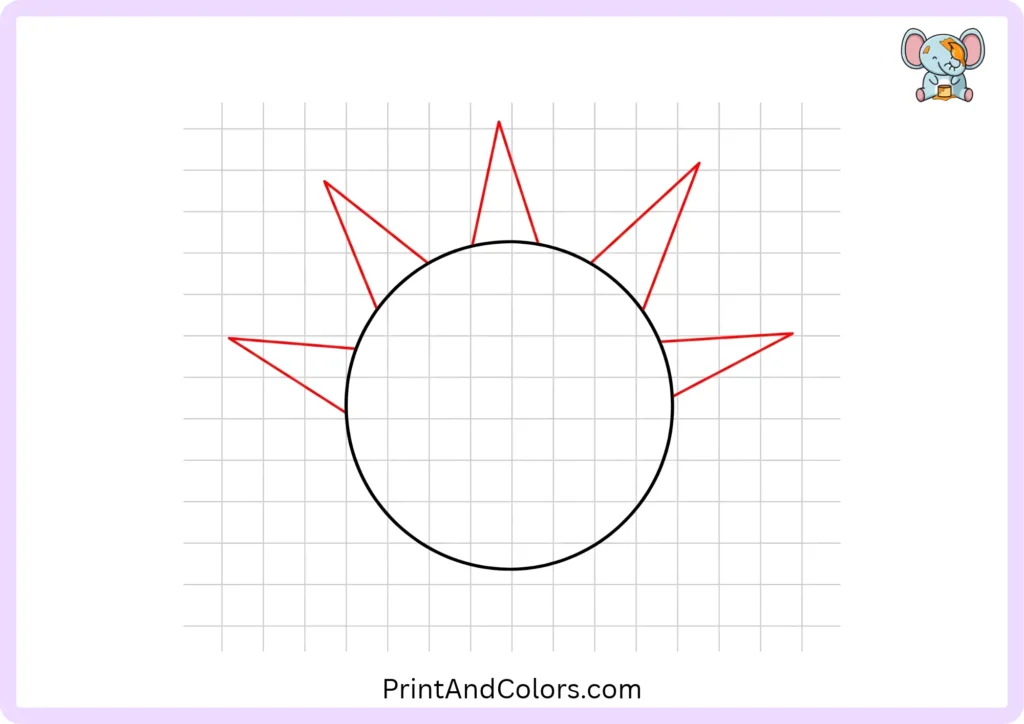
Now, let’s give your sun its first rays!
Along the top edge of the circle, draw several long, thin triangles pointing outward. These shapes represent the sun’s shining rays.
Try making some of the triangles a bit longer than others; this will give your drawing a lively and cheerful look.
Leave some space between the rays so there is room to add more details.
A tip for your drawing: imagine that your sun is wearing a crown made of pointed triangles!
Step 3: Extend the Sunshine Rays Around the Lower Half
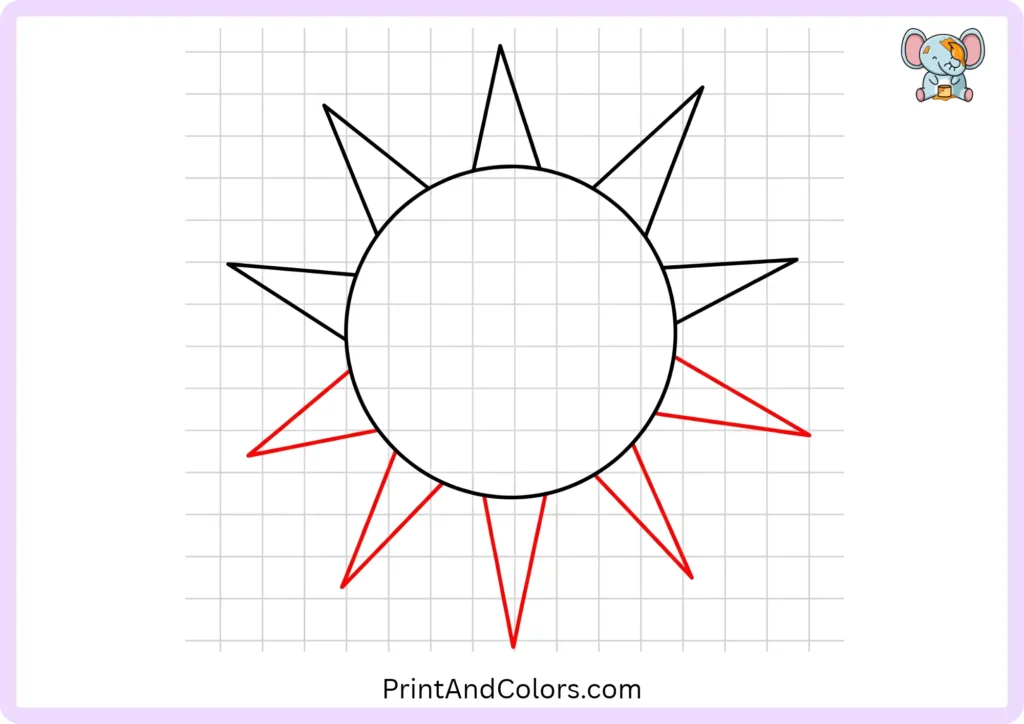
Your sun is starting to shine! Continue adding pointed rays around the bottom half of the circle.
Start from one side and work your way along the bottom of the circle until you reach the other side.
Try to ensure that these rays point outward from the center. They do not all need to be exactly the same length.
By now, a bright, star-like outer shape should have formed around your simple sun sketch.
Drawing tip: If rotating the paper makes it easier to draw the rays at the bottom, feel free to do so!
Step 4: Fill the Spaces with Little Sunshine Spikes
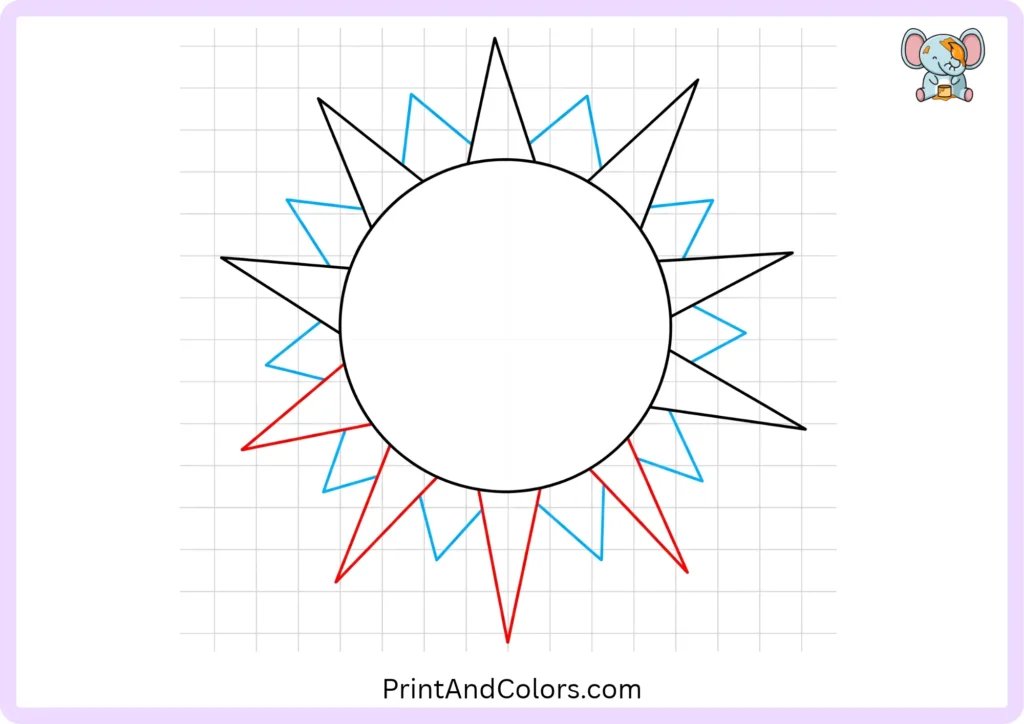
See the empty spaces between the long rays? Let’s fill some of them with smaller triangles.
Working around the outside of the circle, draw smaller, pointed rays between the longer ones.
Alternating between long and short rays creates a more interesting sun design.
Once you are happy with the shape, gently erase any overlapping pencil marks that make the outline look messy.
The outer shape of your sun is now complete!
Drawing Tip: You can also try using slightly curved rays for a softer, more whimsical-looking sun.
Step 5: Give Your Cartoon Sun Two Friendly Eyes
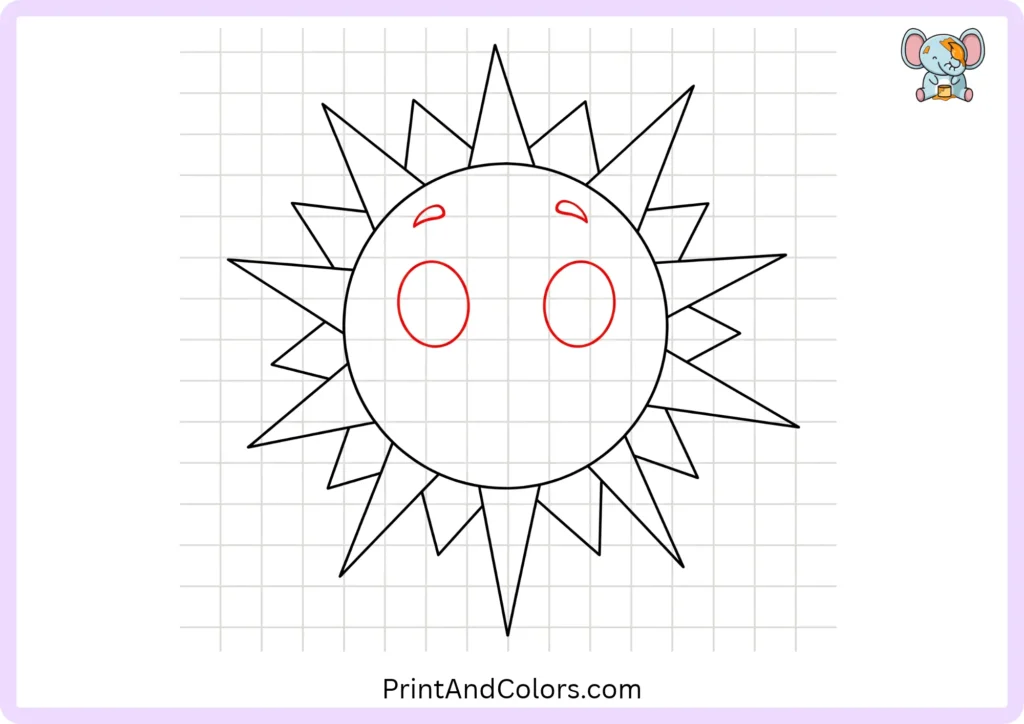
Now it’s time to bring your sun to life!
Inside the circle, draw two vertical ovals for the eyes. Position them slightly above the center so there is enough space left below for a nose and a smile.
Try to make both eyes roughly the same size, but don’t worry if they aren’t exactly identical.
To add extra charm, draw a small, curved eyebrow above each eye.
Drawing Tip: Want to make your sun look even cuter? Try making the eyes a bit larger and rounder!
Step 6: Add a Tiny Nose and a Happy Smile

Every cheerful sun character needs a big smile!
Between the eyes, draw a small oval or a curved mark for the nose.
Next, sketch a wide, U-shaped curve below it to create a happy mouth.
Add two small curved marks at the corners of the smile if you want your sun to look even happier.
You can also draw small circles on the cheeks for a blushing, cartoonish effect.
Drawing Tip: A wide smile makes the face look energetic, while a smaller smile gives it a calm, friendly expression.
Step 7: Make the Eyes Sparkle with Cute Details

Let’s make those eyes sparkle!
Inside each eye, draw a small oval for the pupil. Add a small, uncolored circle near the top of each pupil to create a glint of light.
Carefully shade the pupils darkly, leaving the highlights white.
If you like, add a few small eyelashes or slightly arched eyebrows to give your sun more character.
With the addition of a face, your lovely drawing of the sun is almost complete!
Drawing Tip: The highlights in the eyes are small details, but they add a great deal of expression to cartoon characters.
Step 8: Bring Your Sunshine to Life with Bright Colors
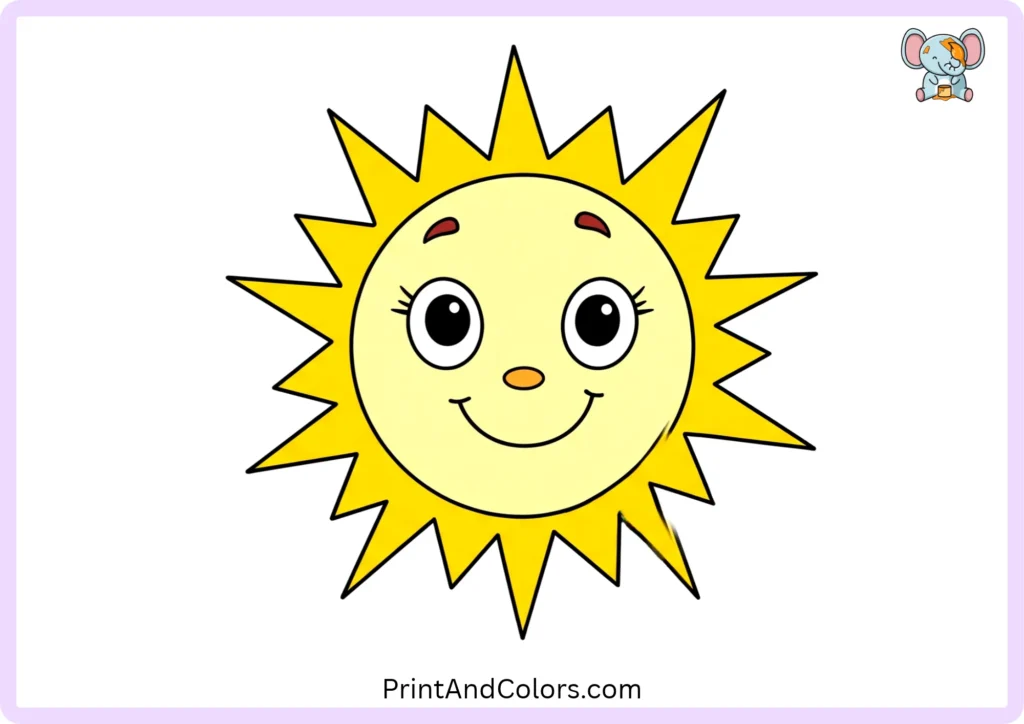
You’ve reached the most colorful part!
Use a bright yellow color to fill in the sun’s round center. Then, color the rays using yellow, golden orange, or a combination of both.
For a warm look, add a bit of orange around the outer edge of the circle.
Color the cheeks a light pink, leave the highlights in the eyes white, and outline your finished drawing with a black marker.
Congratulations! You’ve created your very own smiling sun.
Creative idea: Draw fluffy clouds, a rainbow, or a blue sky around your sun to turn it into a complete summer scene!
Printable Sun Drawing PDF & Drawing Book
Want to practice this drawing again without opening the tutorial every time?
Our Printable Sun Drawing PDF is designed to help children follow the drawing process on paper.
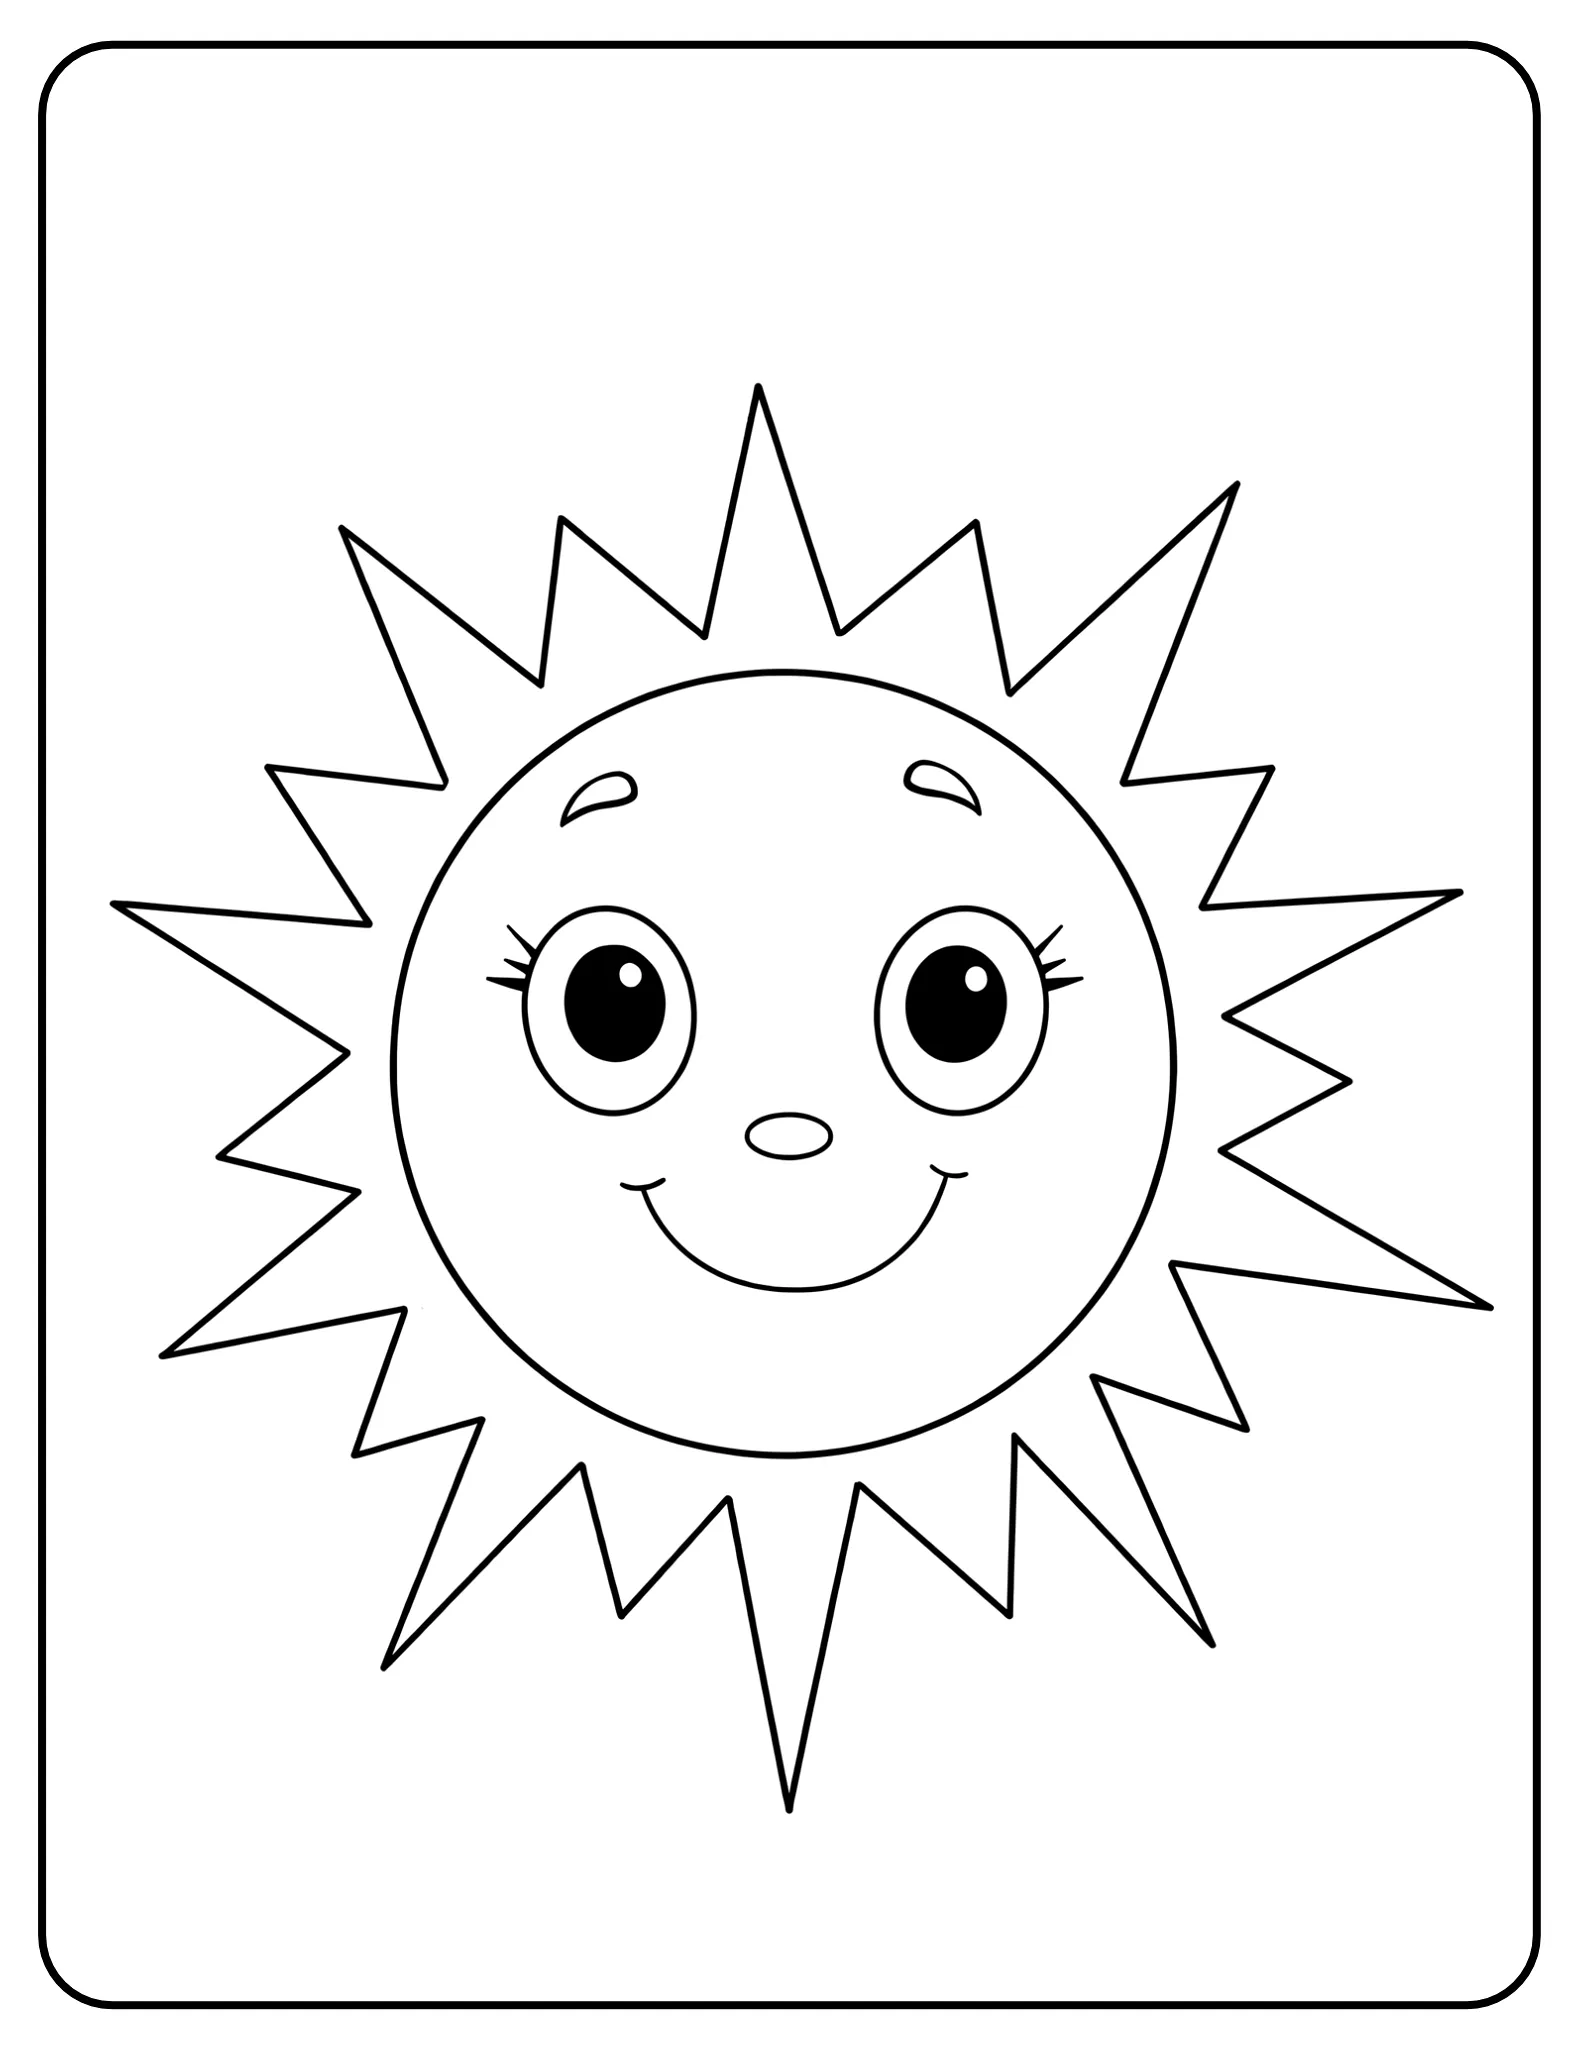
Printable Sun Drawing PDF & Book
Printable sun drawing PDF preview featuring a black-and-white outline of a cute smiling sun with pointed rays, large cartoon eyes, and a happy face, ready for kids to print, color, and practice drawing.
The step-by-step drawing booklet brings all eight stages together, from the first circle to the fully colored sunshine.
Use the printable for:
- Practicing each drawing stage at your own pace.
- Following the complete eight-step visual guide.
- Coloring a black-and-white sun illustration.
- Enjoying creative activities at home or in the classroom.
Fun Facts About the Sun for Curious Kids
Did you know the Sun is actually a star?
It sits at the center of our solar system and provides the light and energy that help make life on Earth possible.
Here are three interesting facts:
- The Sun is enormous: Its diameter is about 109 times Earth’s diameter.
- Sunlight travels incredibly fast: It takes approximately eight minutes and twenty seconds to reach Earth.
- The Sun doesn’t really have a face or pointy rays: Those are artistic features we use to make cartoon sunshine drawings recognizable and fun.
Although we often color the Sun yellow, its light appears essentially white when viewed from space.
Remember, never look directly at the real Sun without proper solar viewing protection.
Frequently Asked Questions About Drawing the Sun
How do you draw a simple sun for kids?
Start by drawing a large circle in the middle of your paper. Draw straight or triangular rays around its outer edge. If you want to create a cartoon-style sun, add two eyes and a smiling mouth. Finally, fill the circle with yellow, and the rays with orange or golden color.
How can I draw a cute sun with a smiling face?
Draw a circle surrounded by alternating long and short rays. Inside the circle, create two large, oval-shaped eyes, each containing a tiny pupil, along with a small nose and a curved, smiling mouth. To give it a cute, cartoon-like appearance, add white highlights to the eyes, a blush to the cheeks, and color it a vibrant yellow.
How do you draw sun rays evenly around a circle?
First, visualize the four cardinal directions: up, down, left, and right. Draw a ray in each of these directions, and then add more rays in between them, with the tips pointing outward. Using a pencil to sketch light guidelines can be helpful, but for a fun and casual drawing of the sun, the spacing between the rays does not need to be perfectly uniform.
Can preschoolers learn to draw the sun?
Yes! Drawing a basic sun is a suitable activity for many preschoolers, as it involves familiar shapes such as circles, lines, and triangles. Younger children can start with a circle and short rays, while older children can add facial features, longer rays, and more detailed coloring.
Where can I find a printable sun drawing tutorial?
Refer to the printable PDF section in this guide, which contains both instructions for creating a sun and materials for coloring. This step-by-step booklet makes it easy to follow the eight stages, without needing to look at a screen—whether you are practicing at home or planning a classroom activity.
Keep Drawing and Let Your Creativity Shine!
Now you know how to draw the sun in simple steps, from its large, round center and pointed rays to its sparkling eyes and cheerful smile.
Try experimenting with different colors, facial expressions, and styles of suns. You could even create an entire sky filled with happy, cartoon-style suns!
For your next art adventure, discover more easy drawing tutorials and printable coloring activities at Print & Colors.
And whenever inspiration strikes, don’t forget to use the printable “Sun Drawing” PDF booklet to follow all eight steps!
Happy drawing, and keep spreading sunshine!
Bring Every Imagination to Life
Premium Coloring Books & Instant Digital Printables
Transform your creative vision into high-quality, personalized coloring products perfect for gifts, education, or special events. Our team of illustrators crafts unique designs tailored to your exact needs.