How to Draw a Cow
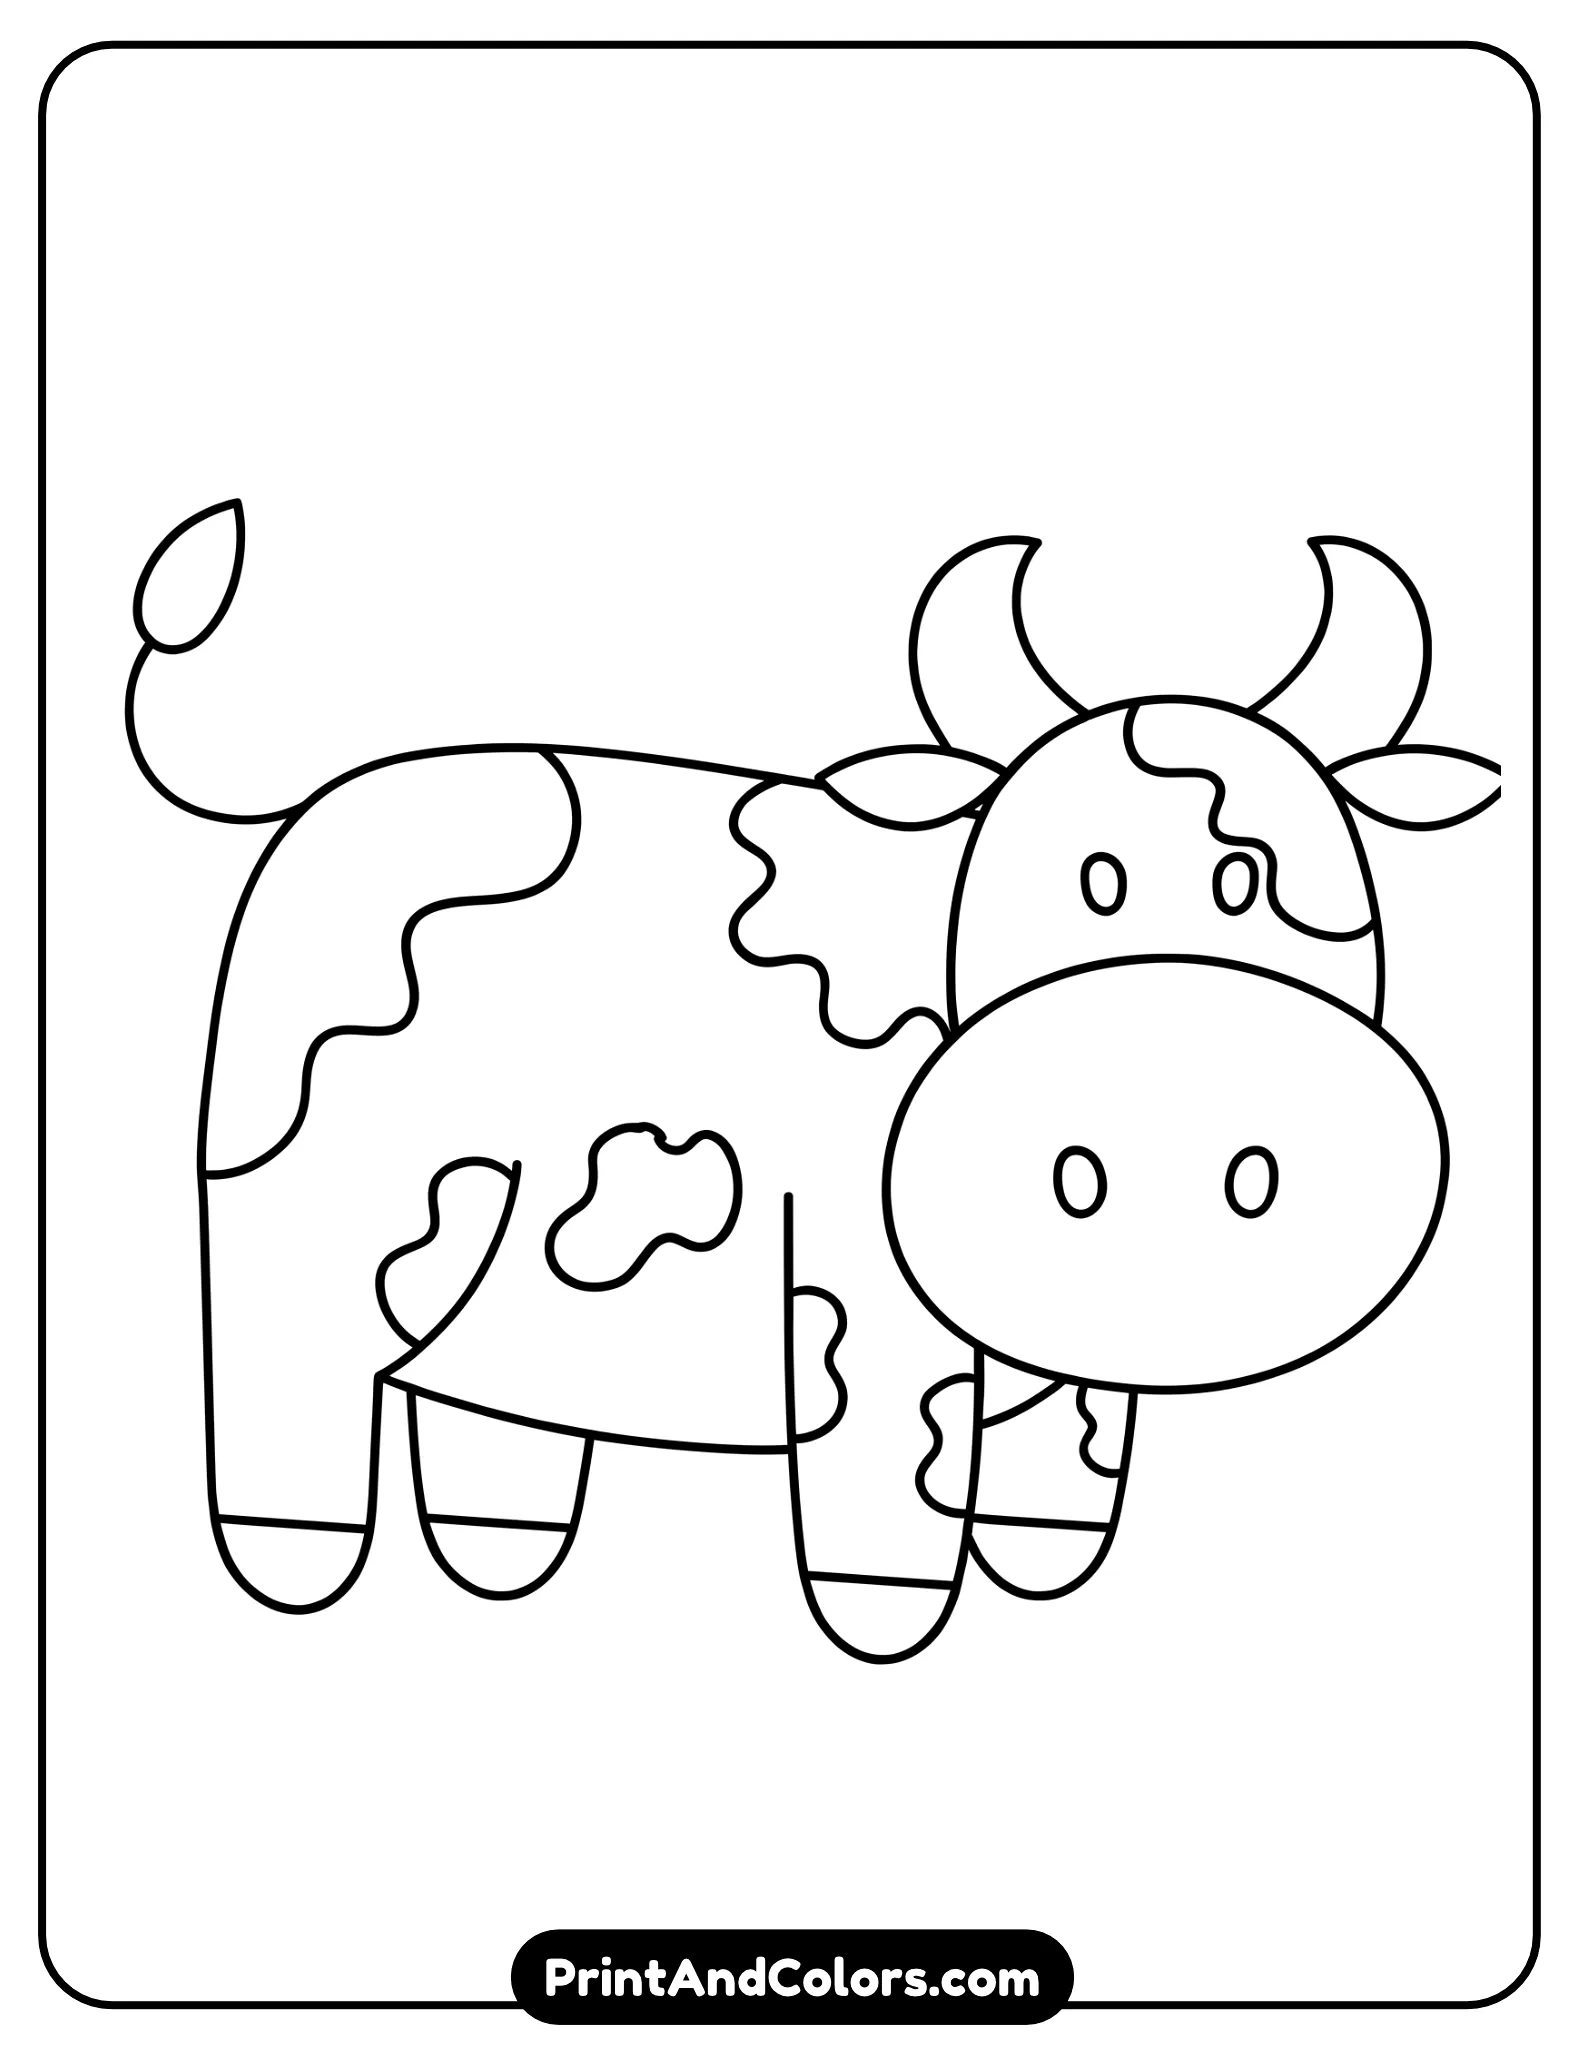
Learning to draw a cow is much easier than you might think! You don’t need to be an expert artist to draw this lovely farm animal. With just a few simple shapes, a pencil, and a bit of imagination, you can transform a blank sheet of paper into a beautiful drawing of a cow.
Cows are among the most easily recognizable farm animals, thanks to their friendly faces, drooping ears, and the lovely patterns on their bodies. Drawing them is also quite fun, as their body structure can be constructed using basic elements like ovals, curved lines, and simple strokes.
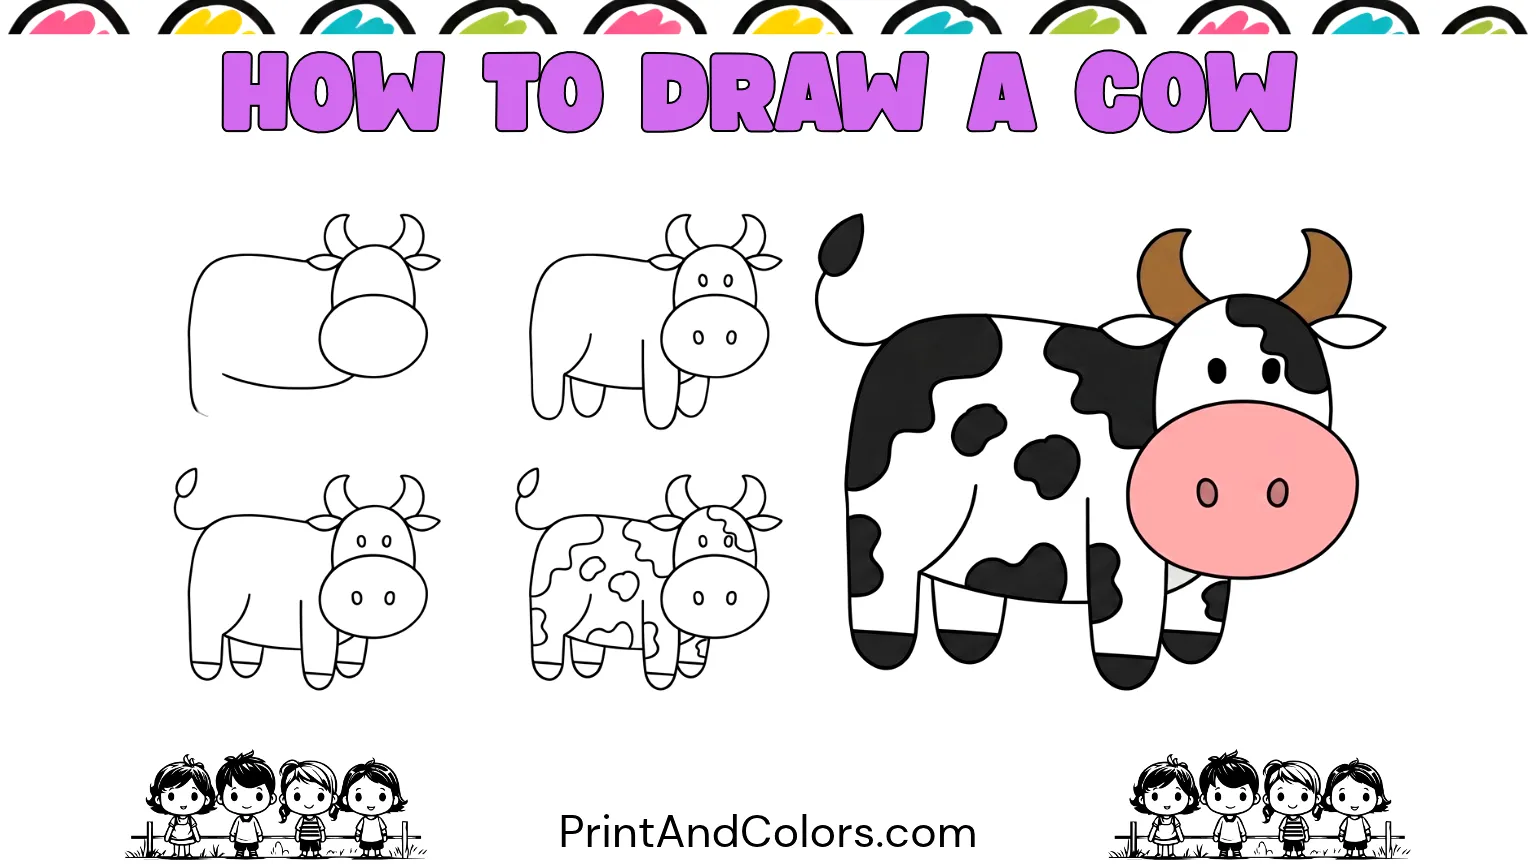
In this beginner-friendly guide, we’ll show you how to draw a cow, step by step, in simple stages, from the head all the way to the colorful spots. Each step is explained in an easy-to-understand way, with accompanying illustrations that highlight the new lines being added, making it simple for you to follow along.
Whether you’re a parent helping a preschooler, a teacher planning a lesson on “farm animals,” or a beginner looking to practice your drawing skills, this guide is perfect for you. You’ll also find creative coloring ideas, helpful drawing tips, and a printable PDF booklet that lets you practice drawing cows whenever you like.
Your next masterpiece awaits—try these stunning pages!
Step 1: Sketch the Cow’s Head with a Rounded Snout
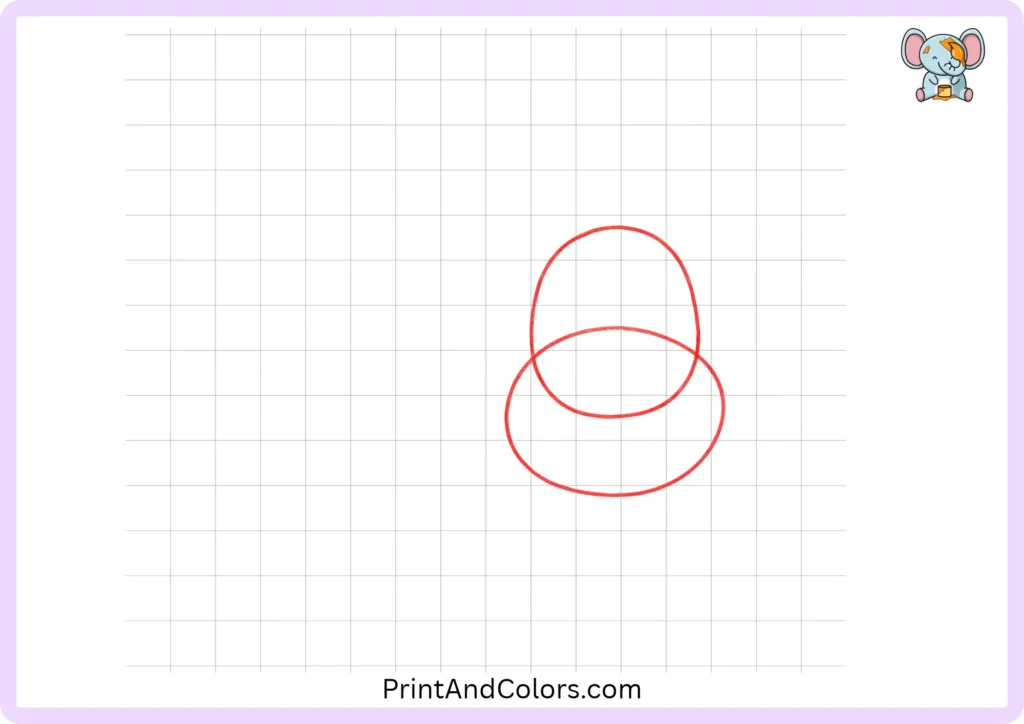
Start near the right side of your paper by drawing a tall, slightly rounded oval. This will form the cow’s head.
Next, sketch a wider, horizontal oval that overlaps the lower part of the head. This second shape will become the cow’s muzzle, the area around the nose and mouth.
Make sure both ovals remain soft and rounded, giving your cow a friendly and cheerful appearance.
Step 2: Create a Big, Curved Body
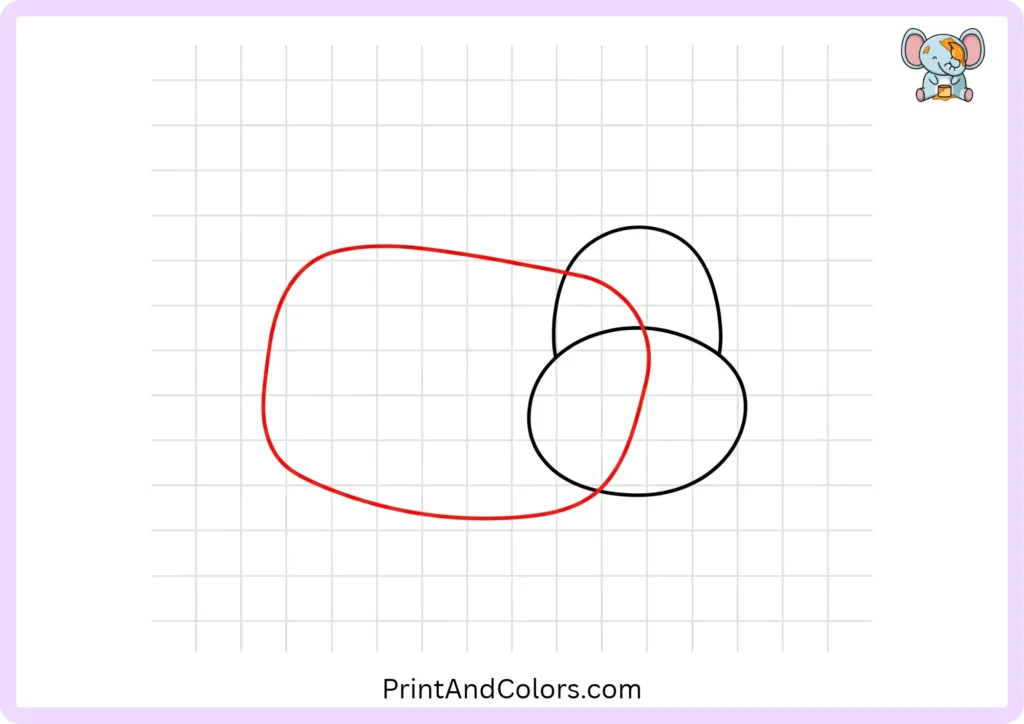
Now, give your cow a body! Starting right behind the head, draw a large, rounded shape that extends toward the left side of the page.
Make the top line curve gently to form the back, and bring the bottom line around to create a full, rounded belly.
Ensure that the body is wider than the head; this gives your drawing a balanced look and provides plenty of space for those characteristic cow spots.
Step 3: Outline the First Two Legs
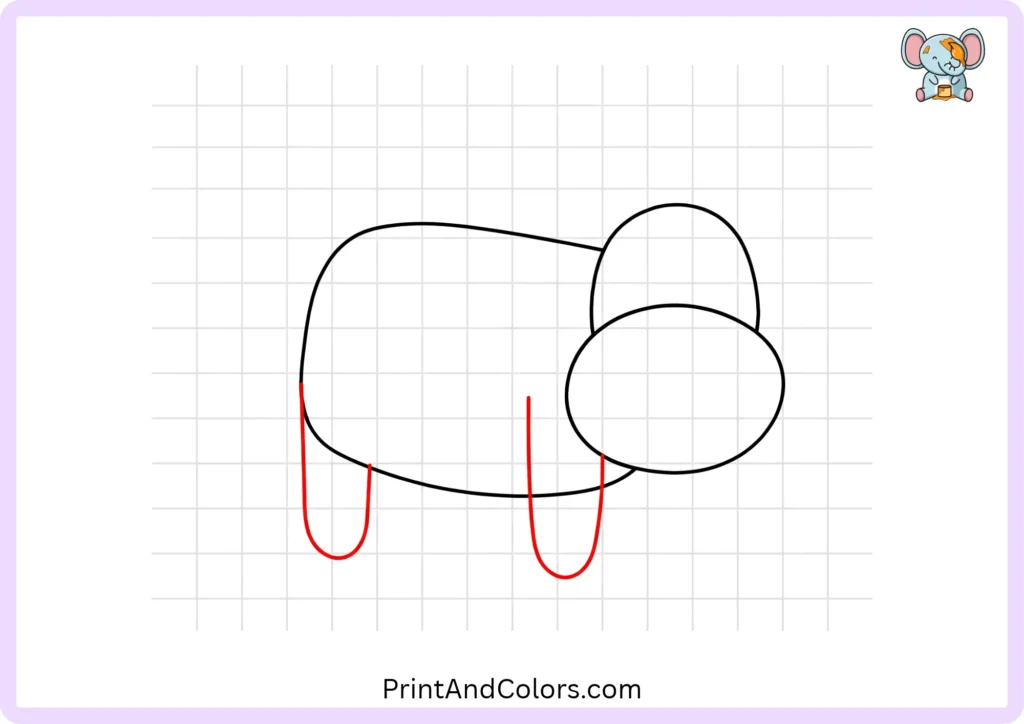
It’s time to help your cow stand up!
Draw a leg extending downward from the front part of the body, just behind the head. Add another leg toward the back.
Use mostly straight lines with slightly rounded corners. Make sure both legs are roughly the same length so that the cow can stand steadily.
Don’t worry about the hooves for now; we’ll add those details later.
Step 4: Complete All Four Legs
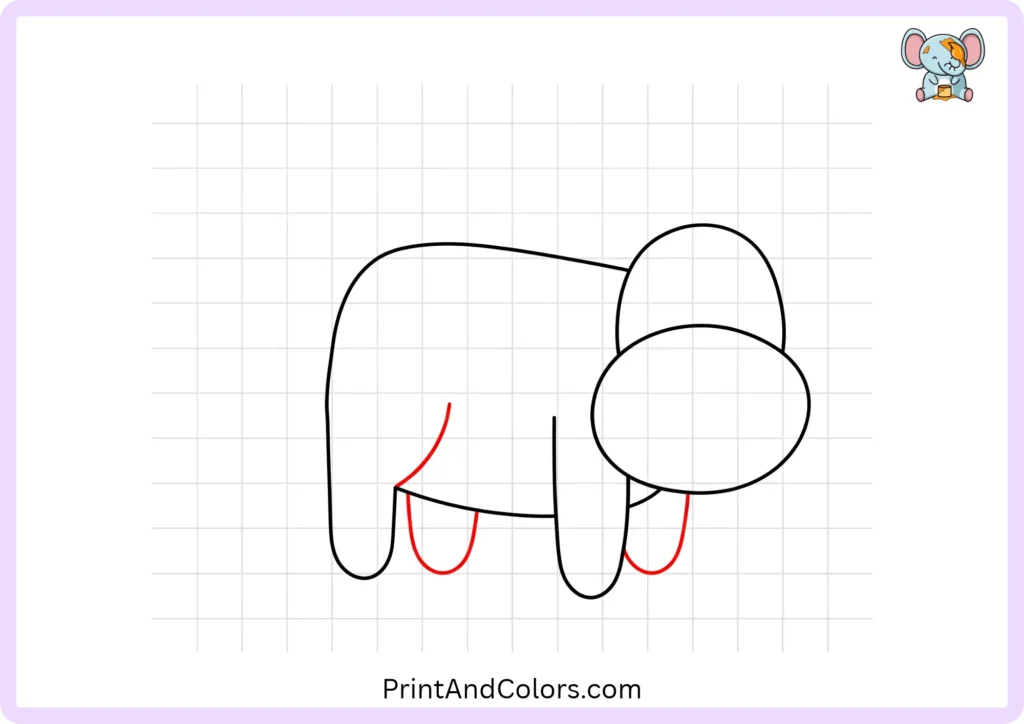
Your cow needs four legs to walk around the farm.
Add the remaining front and hind legs between the two you have already drawn. Position them slightly behind the first pair so that their upper sections are partially obscured.
Connect the visible outlines of the body with a gentle line for the belly.
Tip for beginners: If the legs appear too close together, leave small gaps between them. This makes each leg easier to distinguish.
Step 5: Give Your Cow a Playful Tail
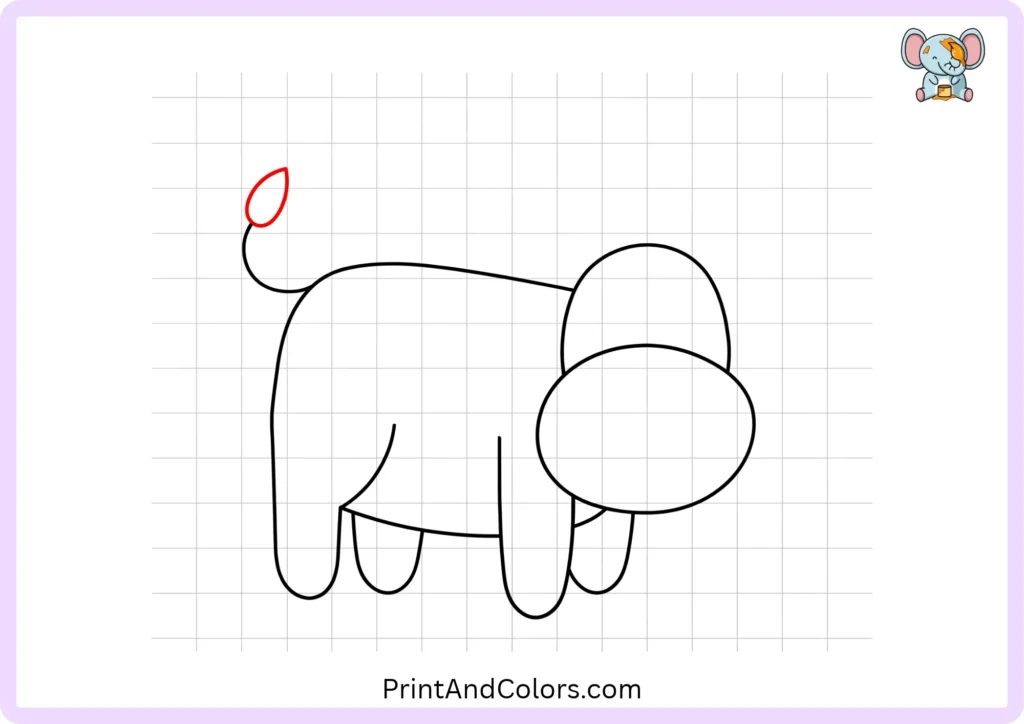
Sketch a long, thin tail at the back of the body that curves upward.
Then, draw a small, pointed, leaf-like tuft at the end of it. You can make the tuft look a bit frayed to suggest short hairs.
A curved tail adds dynamism and personality to your drawing of a cow. It might even look as though the cow is shooing away flies!
Step 6: Add Two Small, Curved Horns
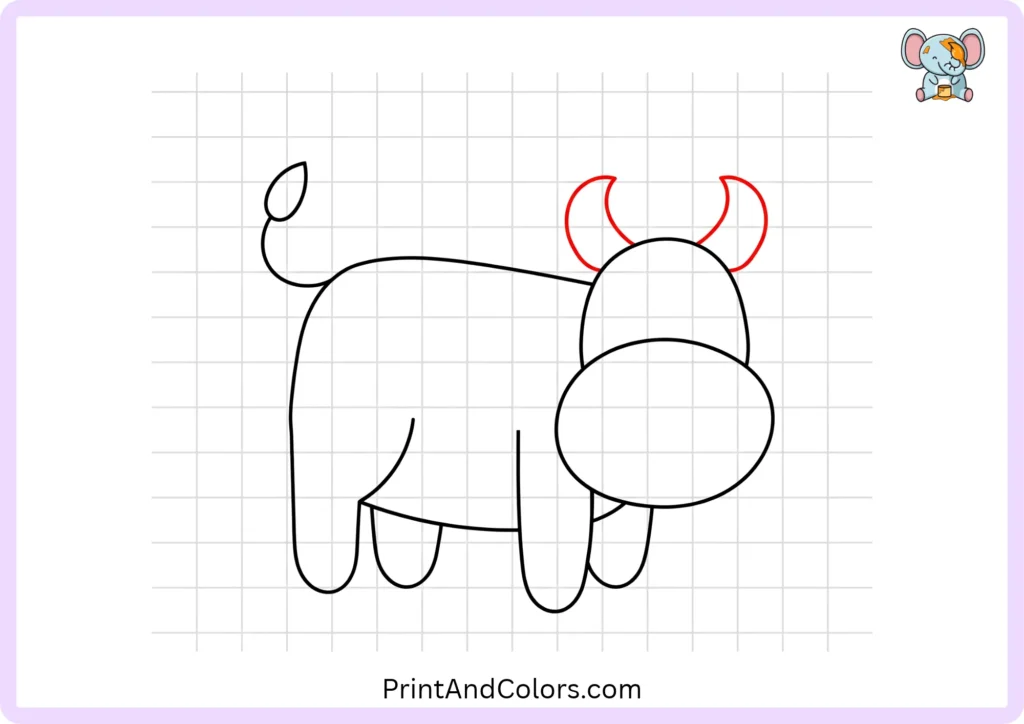
Draw two short horns on the top of the head.
Start each horn with a wider base, then curve the lines inward toward a rounded or pointed tip.
Keep the horns small to achieve a cute, cartoonish look. While some cattle are naturally hornless, adding horns gives this drawing a particularly playful feel.
Step 7: Draw the Cow’s Floppy Ears
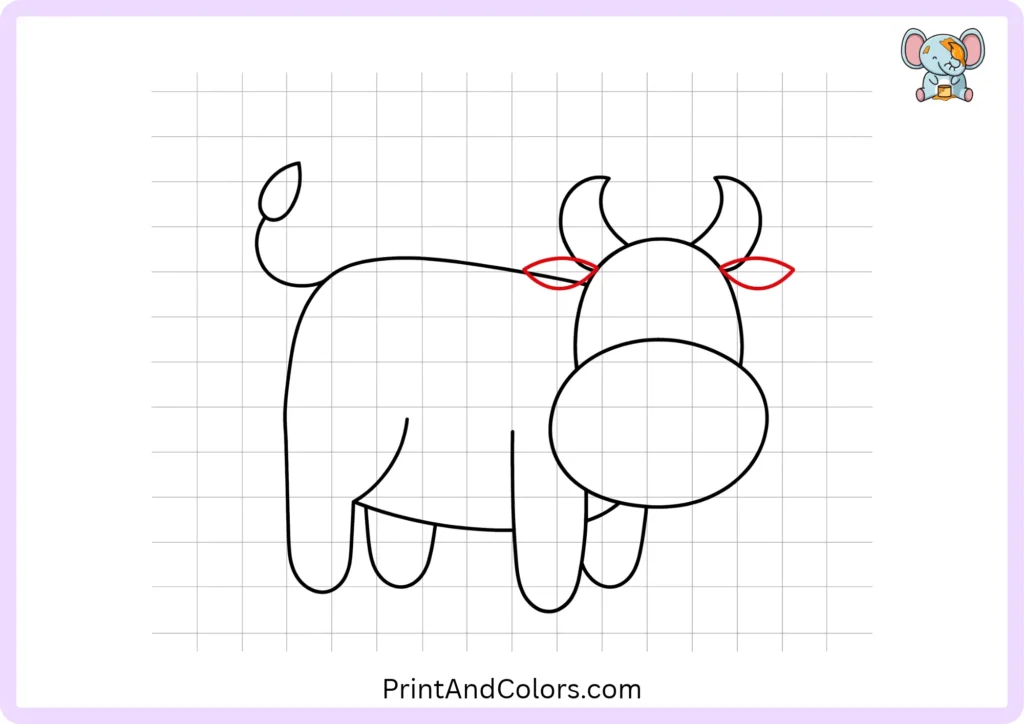
Add an ear on each side of the head, just below the horns.
Use elongated, leaf-like shapes that extend outward. Each ear should have a slightly pointed tip and a smoothly curved outer edge.
You can also draw a smaller, curved line inside each ear to suggest its inner surface.
These floppy ears are one of the easiest ways to make your cow look extra cute.
Step 8: Place Two Tiny Nostrils on the Muzzle
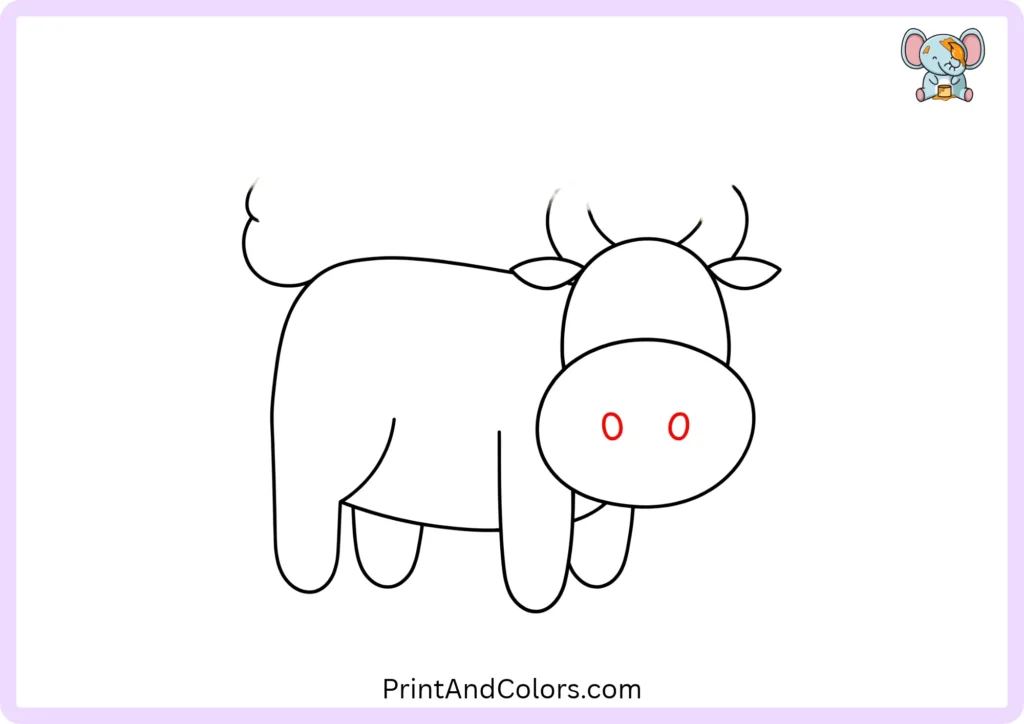
Look at the wide oval you drew for the muzzle in step 1.
Inside it, sketch two small, vertical ovals, spaced evenly apart. These are the cow’s nostrils.
Make sure they aren’t too close to the edge of the muzzle. You can shade them darkly to make the nose stand out more.
Step 9: Bring Your Cow to Life with Friendly Eyes
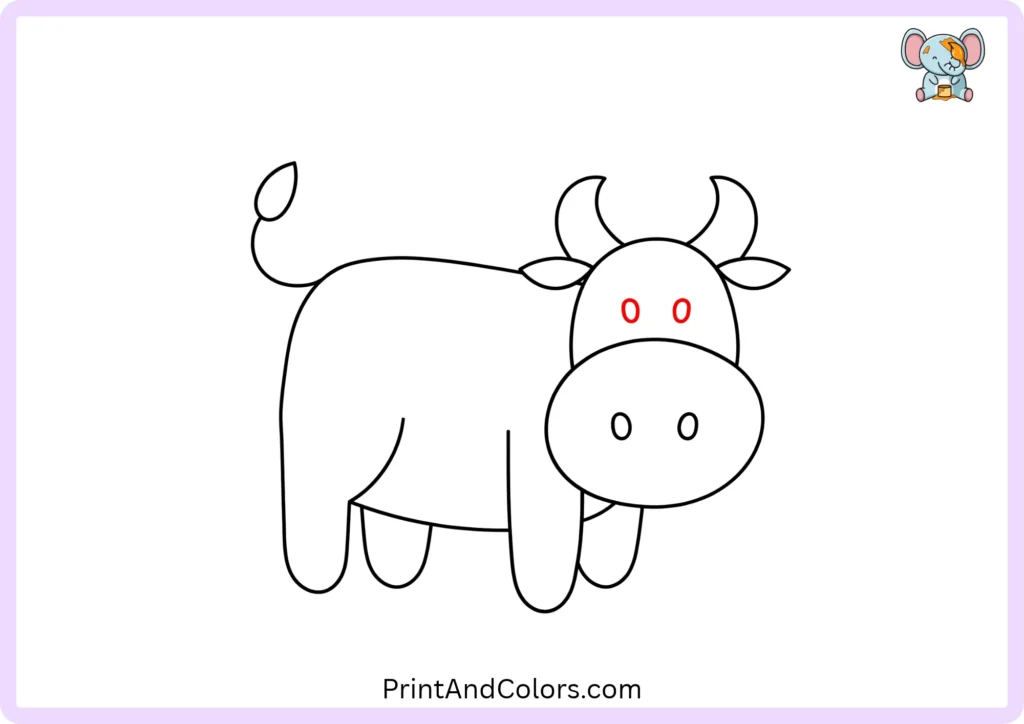
Draw two small, oval eyes in the upper part of the head, above the muzzle.
Add tiny, dark pupils, leaving a small white space in each eye, this creates a bright, lively expression.
If you want the cow to look especially cute, you can draw the eyes a bit larger or add short, curved eyebrows.
You can also sketch a small smile below the nostrils if you want your cow to look particularly cheerful.
Step 10: Finish the Feet with Simple Hooves
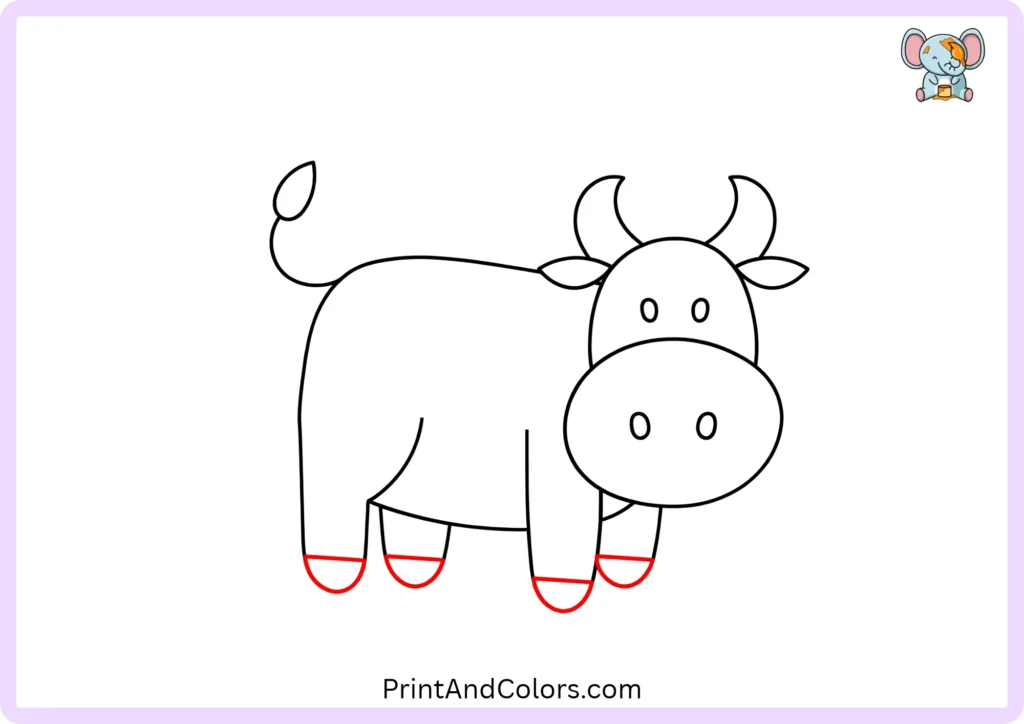
Let’s complete the legs by adding hooves.
To do this, draw a short horizontal line near the bottom of each leg. This separates the hoof from the rest of the leg.
You can also add a small vertical slit to indicate the cow’s cloven hooves, which consist of two main toes.
Make sure the shapes remain simple and look consistent across all four feet.
Step 11: Decorate the Body with Irregular Cow Spots
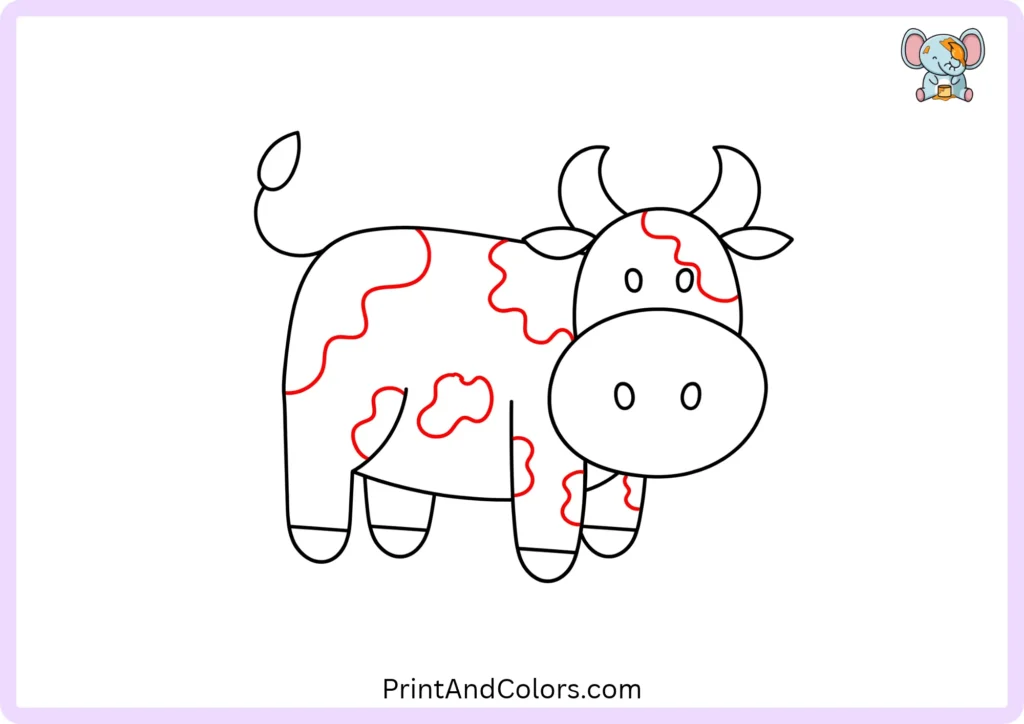
Now comes one of the most entertaining parts: adding the spots!
Draw various irregular spots on the cow’s body. Some can be large and rounded, while others might be smaller and unevenly shaped.
Make sure the spots aren’t perfect circles. Natural-looking, curved outlines create a more interesting pattern.
For example, you could place a spot around one of the eyes, or draw one so that it touches the edge of the body.
Step 12: Color Your Cow and Add the Finishing Touches
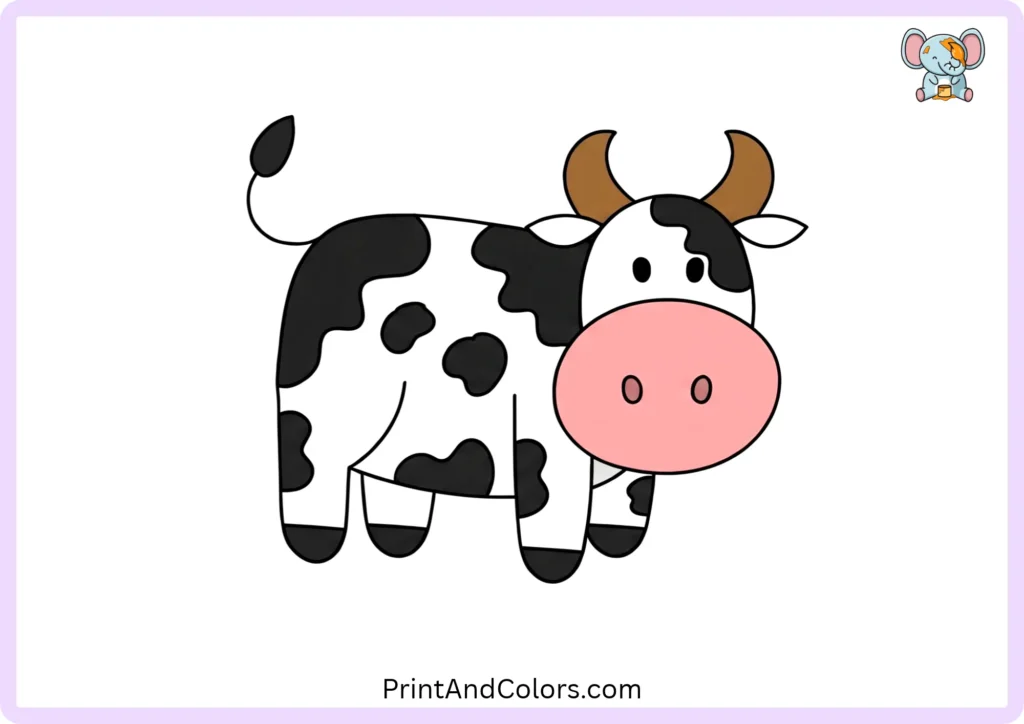
Your cow drawing is ready for some color!
You can go for the classic black-and-white look of a dairy cow, or experiment with other colors.
For our example, you could use a light cream shade for the body, black for the spots, hooves, eyes, and the tuft of the tail, a soft pink for the muzzle, and a warm orange for the horns.
Carefully outline your drawing with a black felt-tip pen, and once the ink has dried, erase any remaining pencil marks.
Printable Cow Drawing PDF & Drawing Book
Want to practice without keeping your screen open?
Our Printable Cow Drawing PDF Book brings the drawing stages together in one convenient, print-friendly guide. Follow each illustration, practice the outlines, and use the finished drawing as a coloring reference.
Printable Cow Drawing PDF & Book
Printable cow drawing PDF book preview showing a collection of illustrated drawing steps, from basic head and body shapes to legs, tail, horns, ears, eyes, hooves, spots, and a finished colored cow.
Easy Drawing Tips for Kids and Beginners
If your first attempt doesn’t look exactly like the example, that’s perfectly fine. Drawing improves through practice.
Try these simple techniques:
- Use basic shapes first: Ovals and curves make complicated animals easier to draw.
- Check proportions: Keep the body larger than the head and the legs reasonably even.
- Draw lightly: Adjusting pencil lines is easier before outlining.
- Experiment with expressions: Larger eyes or a curved smile can change your cow’s personality.
- Practice again: Draw a smaller calf or create a whole family of farm animals.
A Helpful Note About Cow Anatomy
Real cows have four legs, two main toes in each hoof, a broad muzzle, and ears positioned on either side of the head. Their coat colors vary widely by breed.
This tutorial simplifies those features into beginner-friendly shapes. It’s a cartoon drawing, so you don’t need perfect anatomical proportions to create a recognizable cow.
Frequently Asked Questions About Drawing a Cow
How do you draw a cow easily for beginners?
Start with two overlapping ovals for the head and muzzle, then add a large, rounded body. Draw four legs, a tail, ears, and small horns. Finally, add eyes, nostrils, hooves, and spots. Use simple outlines to begin with before coloring the drawing, this keeps the drawing process manageable.
How can kids draw a cute cartoon cow?
To make a cartoon cow look cute, it should have a large, rounded head, a broad muzzle, floppy ears, and expressive eyes. Ensure that the legs are short and the body has soft, rounded contours. Give the cow a cheerful smile and colorful spots to endow it with a charming personality.
What colors should I use for a cow drawing?
Black and white are popular colors for a Holstein-style cow, but cows can also be brown, reddish, cream-colored, or patterned. Shades of pink work well for the muzzle, while darker colors are suitable for the hooves. Children can also use their favorite crayons to create colorful, imaginative cows.
How do you draw realistic cow spots?
Draw uneven patches with soft, irregular borders rather than identical circles. Vary their sizes and positions across the body. Some spots can extend to the cow’s outline. Looking at photographs of real cattle can help you understand natural coat patterns and placement.
How do you draw a baby cow?
A young bovine, known as a calf, can be depicted with a smaller, rounder body, shorter legs, and proportionately larger eyes. Ensure that the muzzle appears soft and the ears are clearly defined. Use fewer details than you would for a full-grown cow to create a cute illustration of a calf that is also suitable for beginners.
Keep Drawing More Farm Animals!
You’ve learned how to draw a cow, using simple ovals, curved lines, four legs, a swishing tail, friendly facial features, and creative coat patterns.
Now it’s your turn to add your own personal touch to the drawing. Include a meadow, sketch a little calf next to your cow, or create an entire farm scene.
For even more creative activities, explore our Animal Coloring Pages collection on Print and Colors, and use the printable cow drawing guide to practice your new skills.
Happy drawing!
Bring Every Imagination to Life
Premium Coloring Books & Instant Digital Printables
Transform your creative vision into high-quality, personalized coloring products perfect for gifts, education, or special events. Our team of illustrators crafts unique designs tailored to your exact needs.